
“Christmas is coming! The goose is getting fat. Please do put a penny in the old man’s hat. If you haven’t got a penny, a ha’penny will do. If you haven’t got a ha’penny, then God bless you!”
I usually find myself singing these song lyrics this time of year. And each year my husband looks at me sideways and says, “There is no way that song is real. You have totally made it up.” And then each year I respond with cool confidence, “It is indeed real. We sang it in high school choir, at our Christmas program, as a round. It was magical.” And each year without skipping a beat, my dear husband asks incredulously, “YOU were in choir!?!?”
All singing and kidding aside, there is something really special about this time of year. The excitement, anticipation, expectancy and joy that comes is worth celebrating…daily! I created this Advent Calendar so our family can do just that: count down the days to Christmas, hear the amazing Christmas Story and enjoy the wonder of this holiday season.

In our dining room this simple art installation currently holds center stage on one wall. It was made with two gorgeous pieces of driftwood my hubby and son brought home from one of their many outdoor adventures, some baker’s twine, and Instagram photos printed on heavy card stock and then glued onto pieces of cardboard. It is a fun and virtually free way to display some family photos in our home.

Now picture me standing in front of this piece and think, think, thinking. The conversation in my sweet little head went a little something like this: “Hey! We could use this driftwood display piece as a base for our advent calendar. We could hang bags with treats for each day in December. And the kids will love it and understand the real meaning of Christmas because I will put a part of the Christmas Story in each bag. They will not at all focus on the daily treats and instead focus on what really matters. Oh! And of course they most certainly won’t fight to the death over the caramel if I accidentally put one Dove Caramel and one Dove Milk Chocolate in December 5th’s bag. This will be just perfect!”
That little conversation between me, myself and I settled it. After all, I had already researched and priced several different options for advent calendars and couldn’t find one I was either passionate about and/or could afford so I decided to take craft matters into my own hands and create my own.

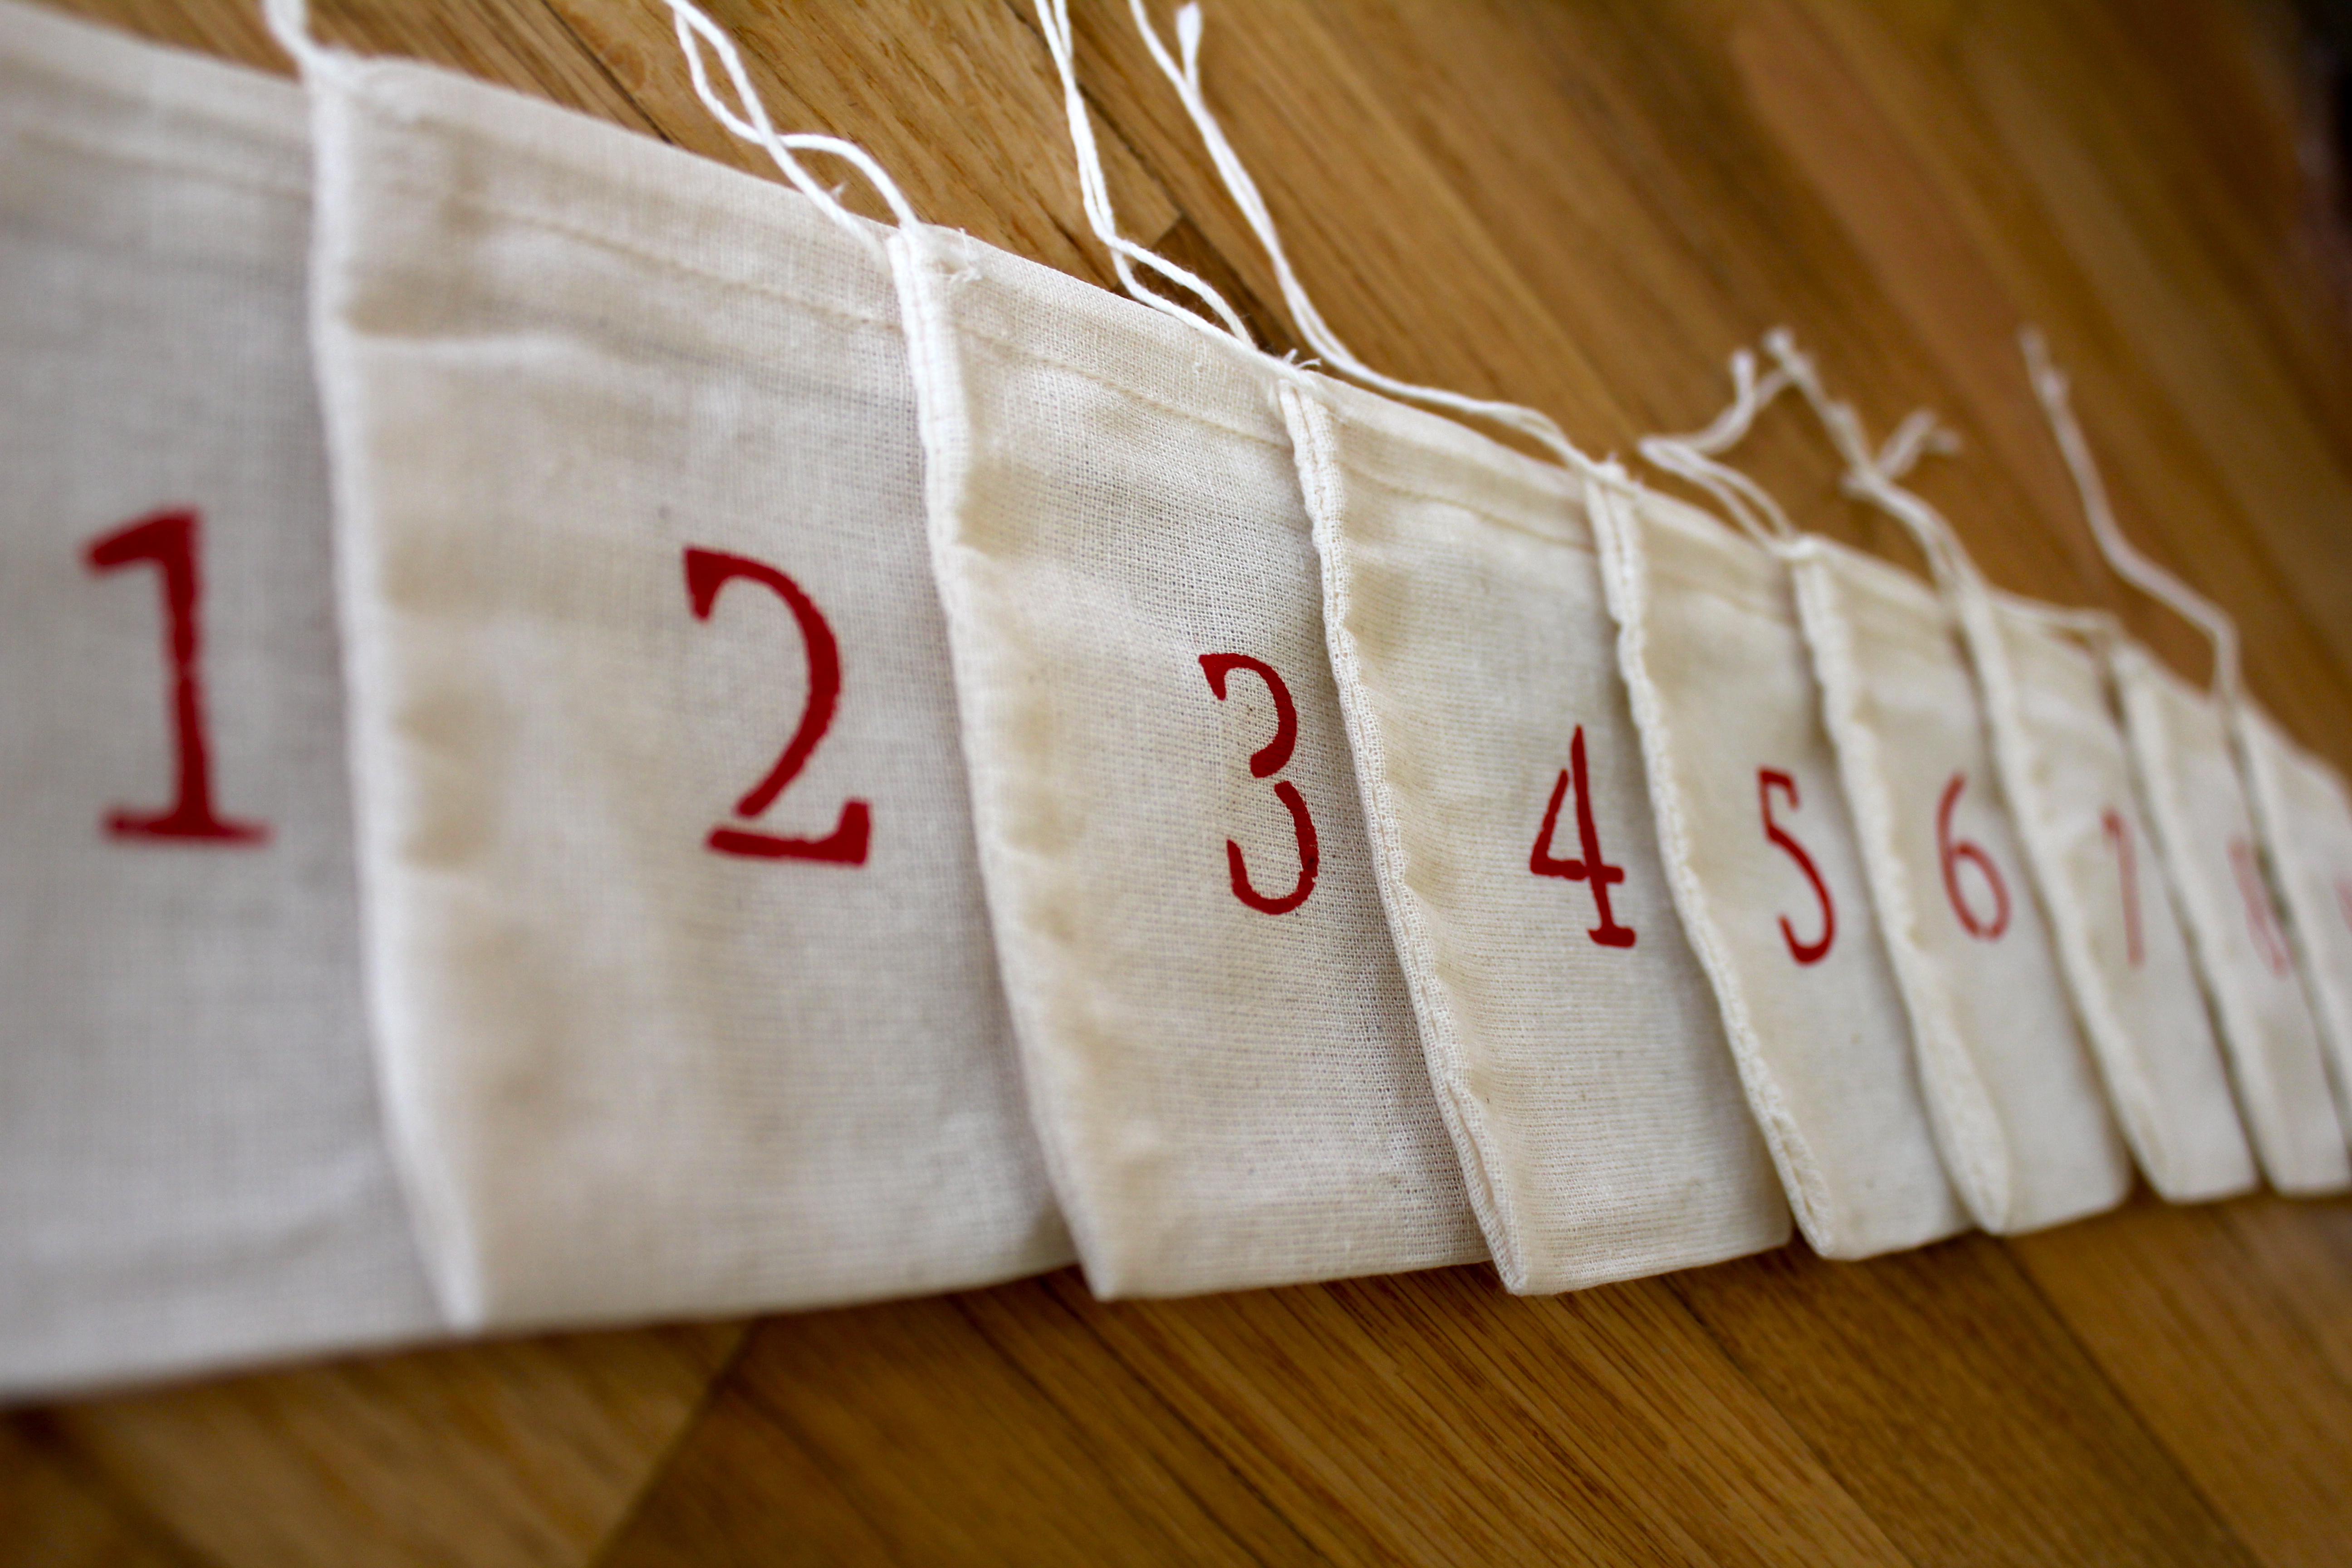
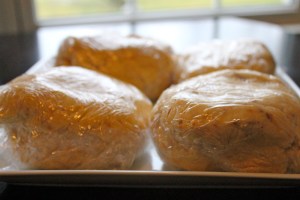
And then after that little stroke of brilliance last year I didn’t do anything but buy these cotton spice/tea bags. I found these at Whole Foods on a random end cap and snatched them up because I thought they would work perfectly. And then I put them somewhere very special and enjoyed sledding, books and naps, days at the pool, a family vacation and a dessert or sixty. And suddenly it was time to think about Christmas and advent calendars again and it was only then that I realized I had no idea where I had put the aforementioned bags. No clue! So I spent a good hour turning my house upside down over a span of two days and finally and miraculously found the bags! Don’t be me. Buy the bags and make the calendar immediately. Or better yet…put things away and actually remember where you put them! You’ll thank me later.
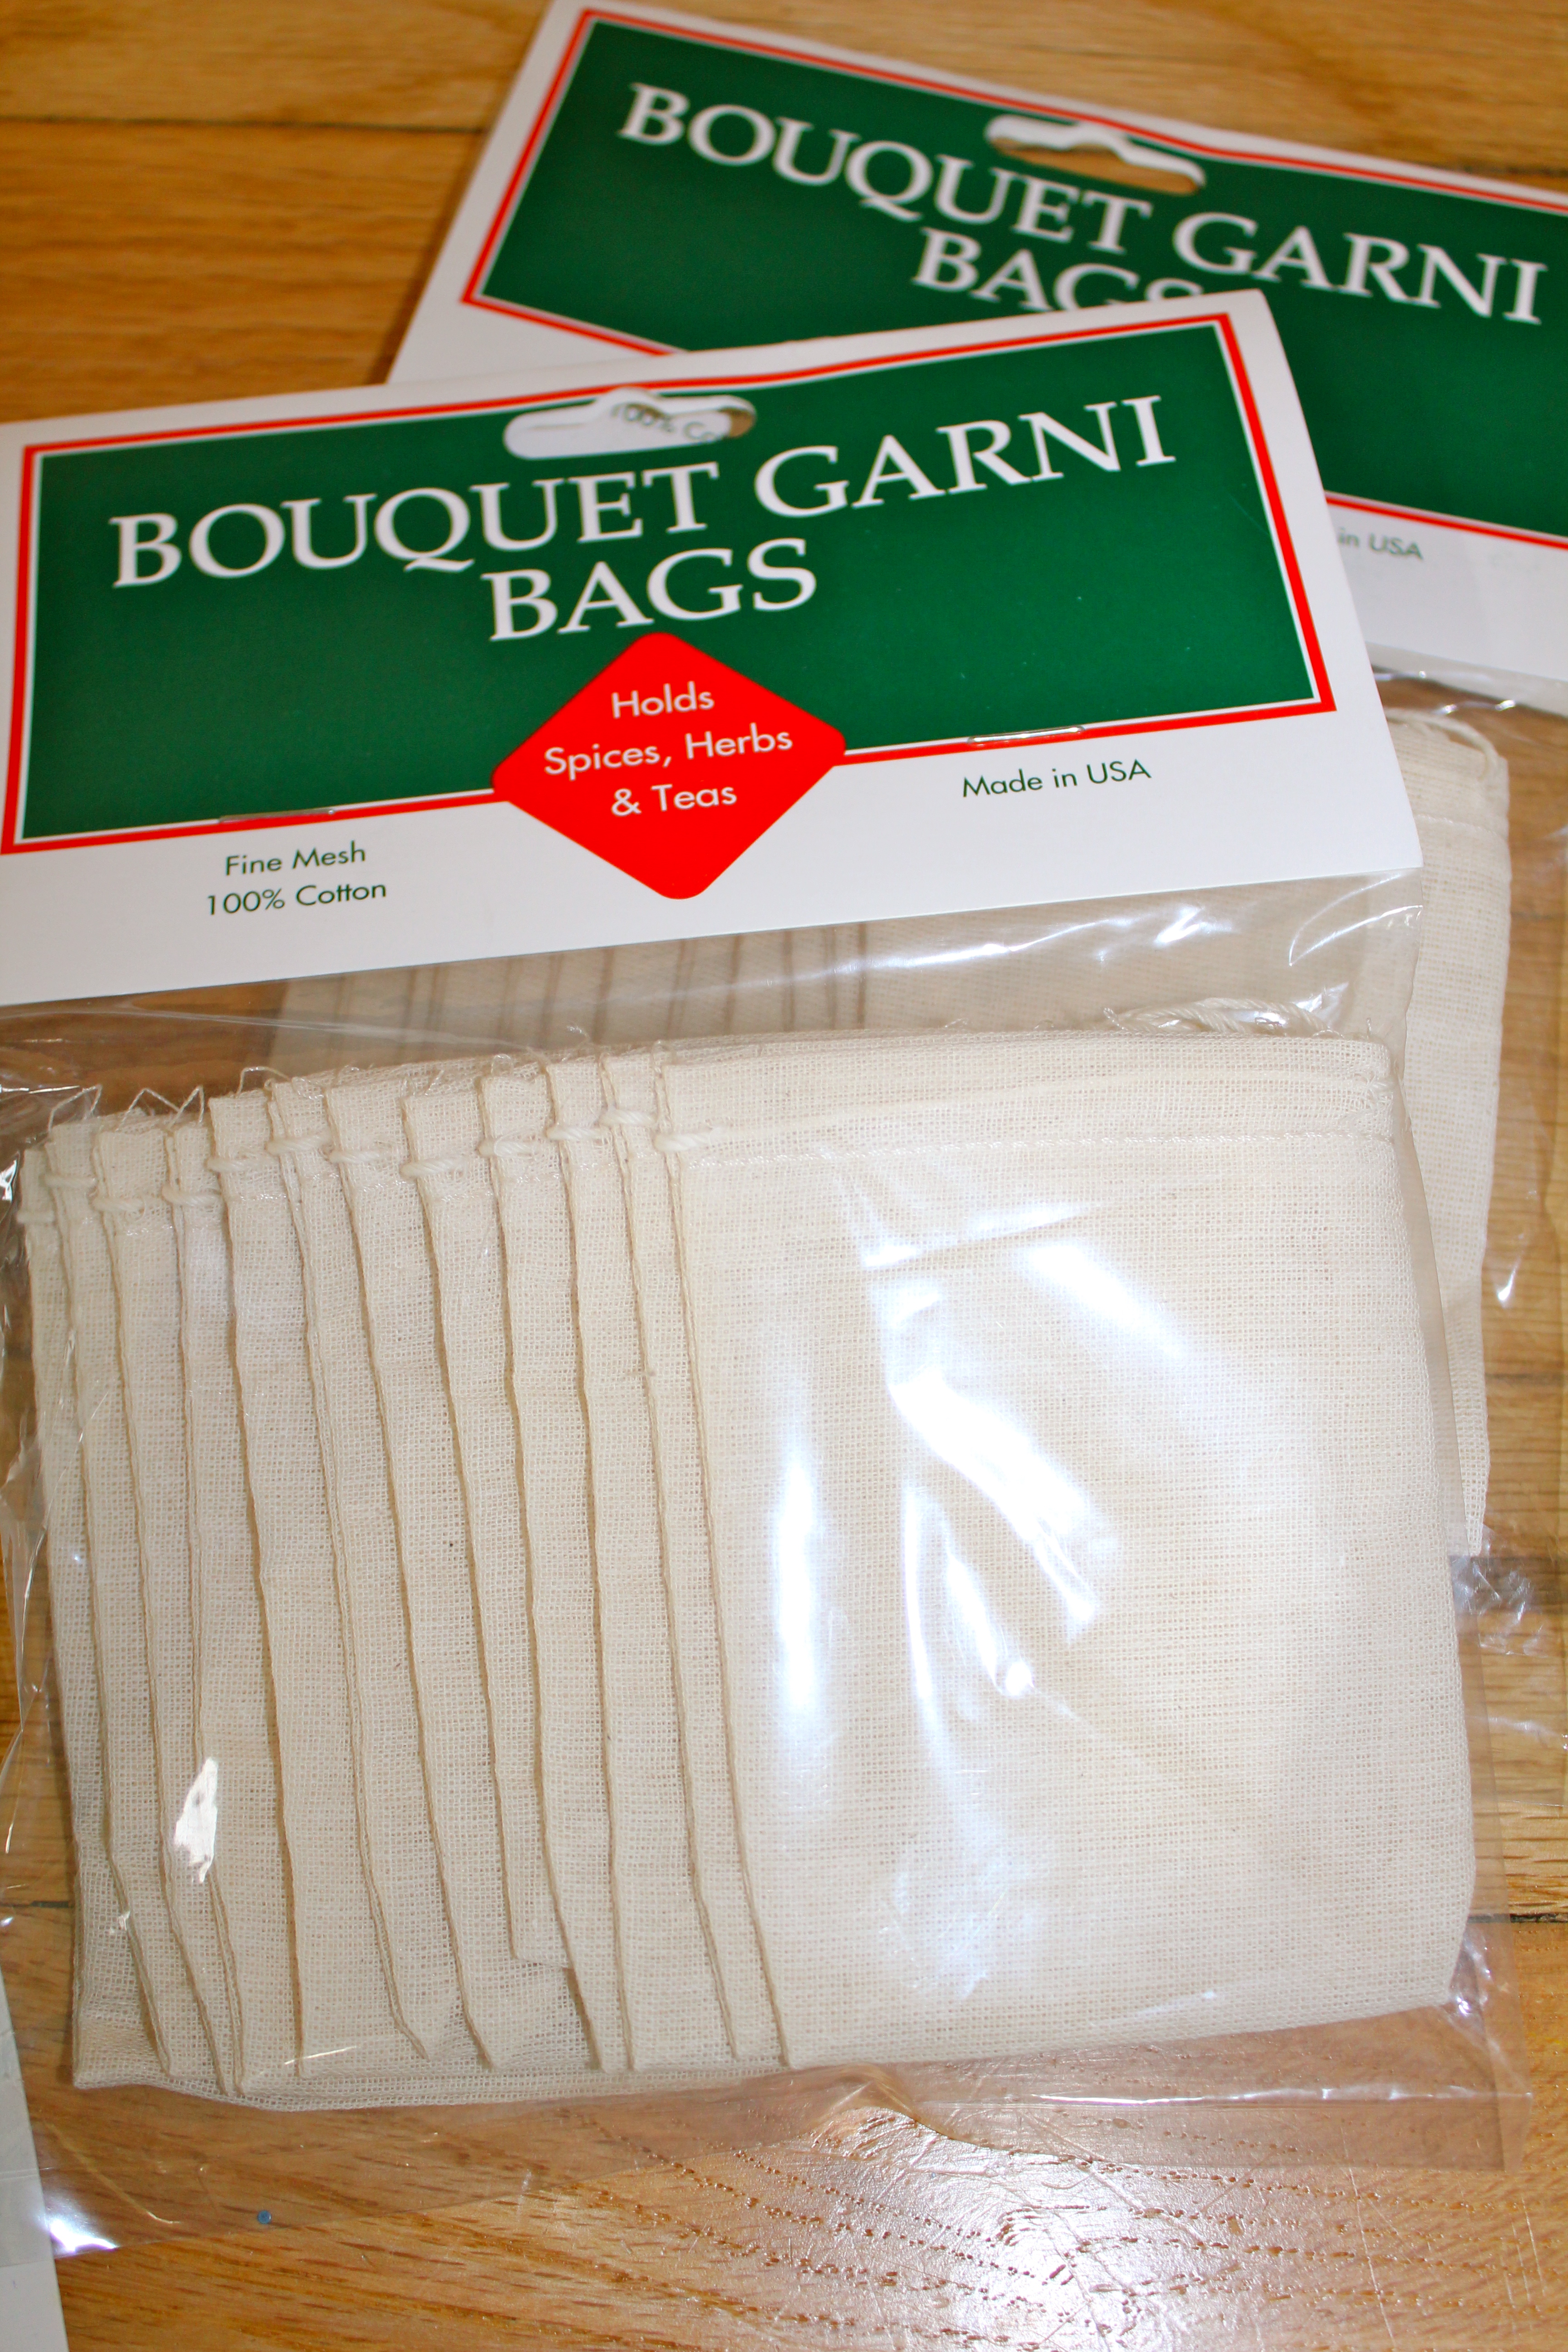
With my ‘once-lost-and-now-found’ bags in hand, I could finally begin! Here are the supplies I gathered for this project: Martha Stewart craft paint in Habanero, foam pouncers for applying the paint, stencils, and stencil tape if you want to keep the stencil in place (I ended up not using it).

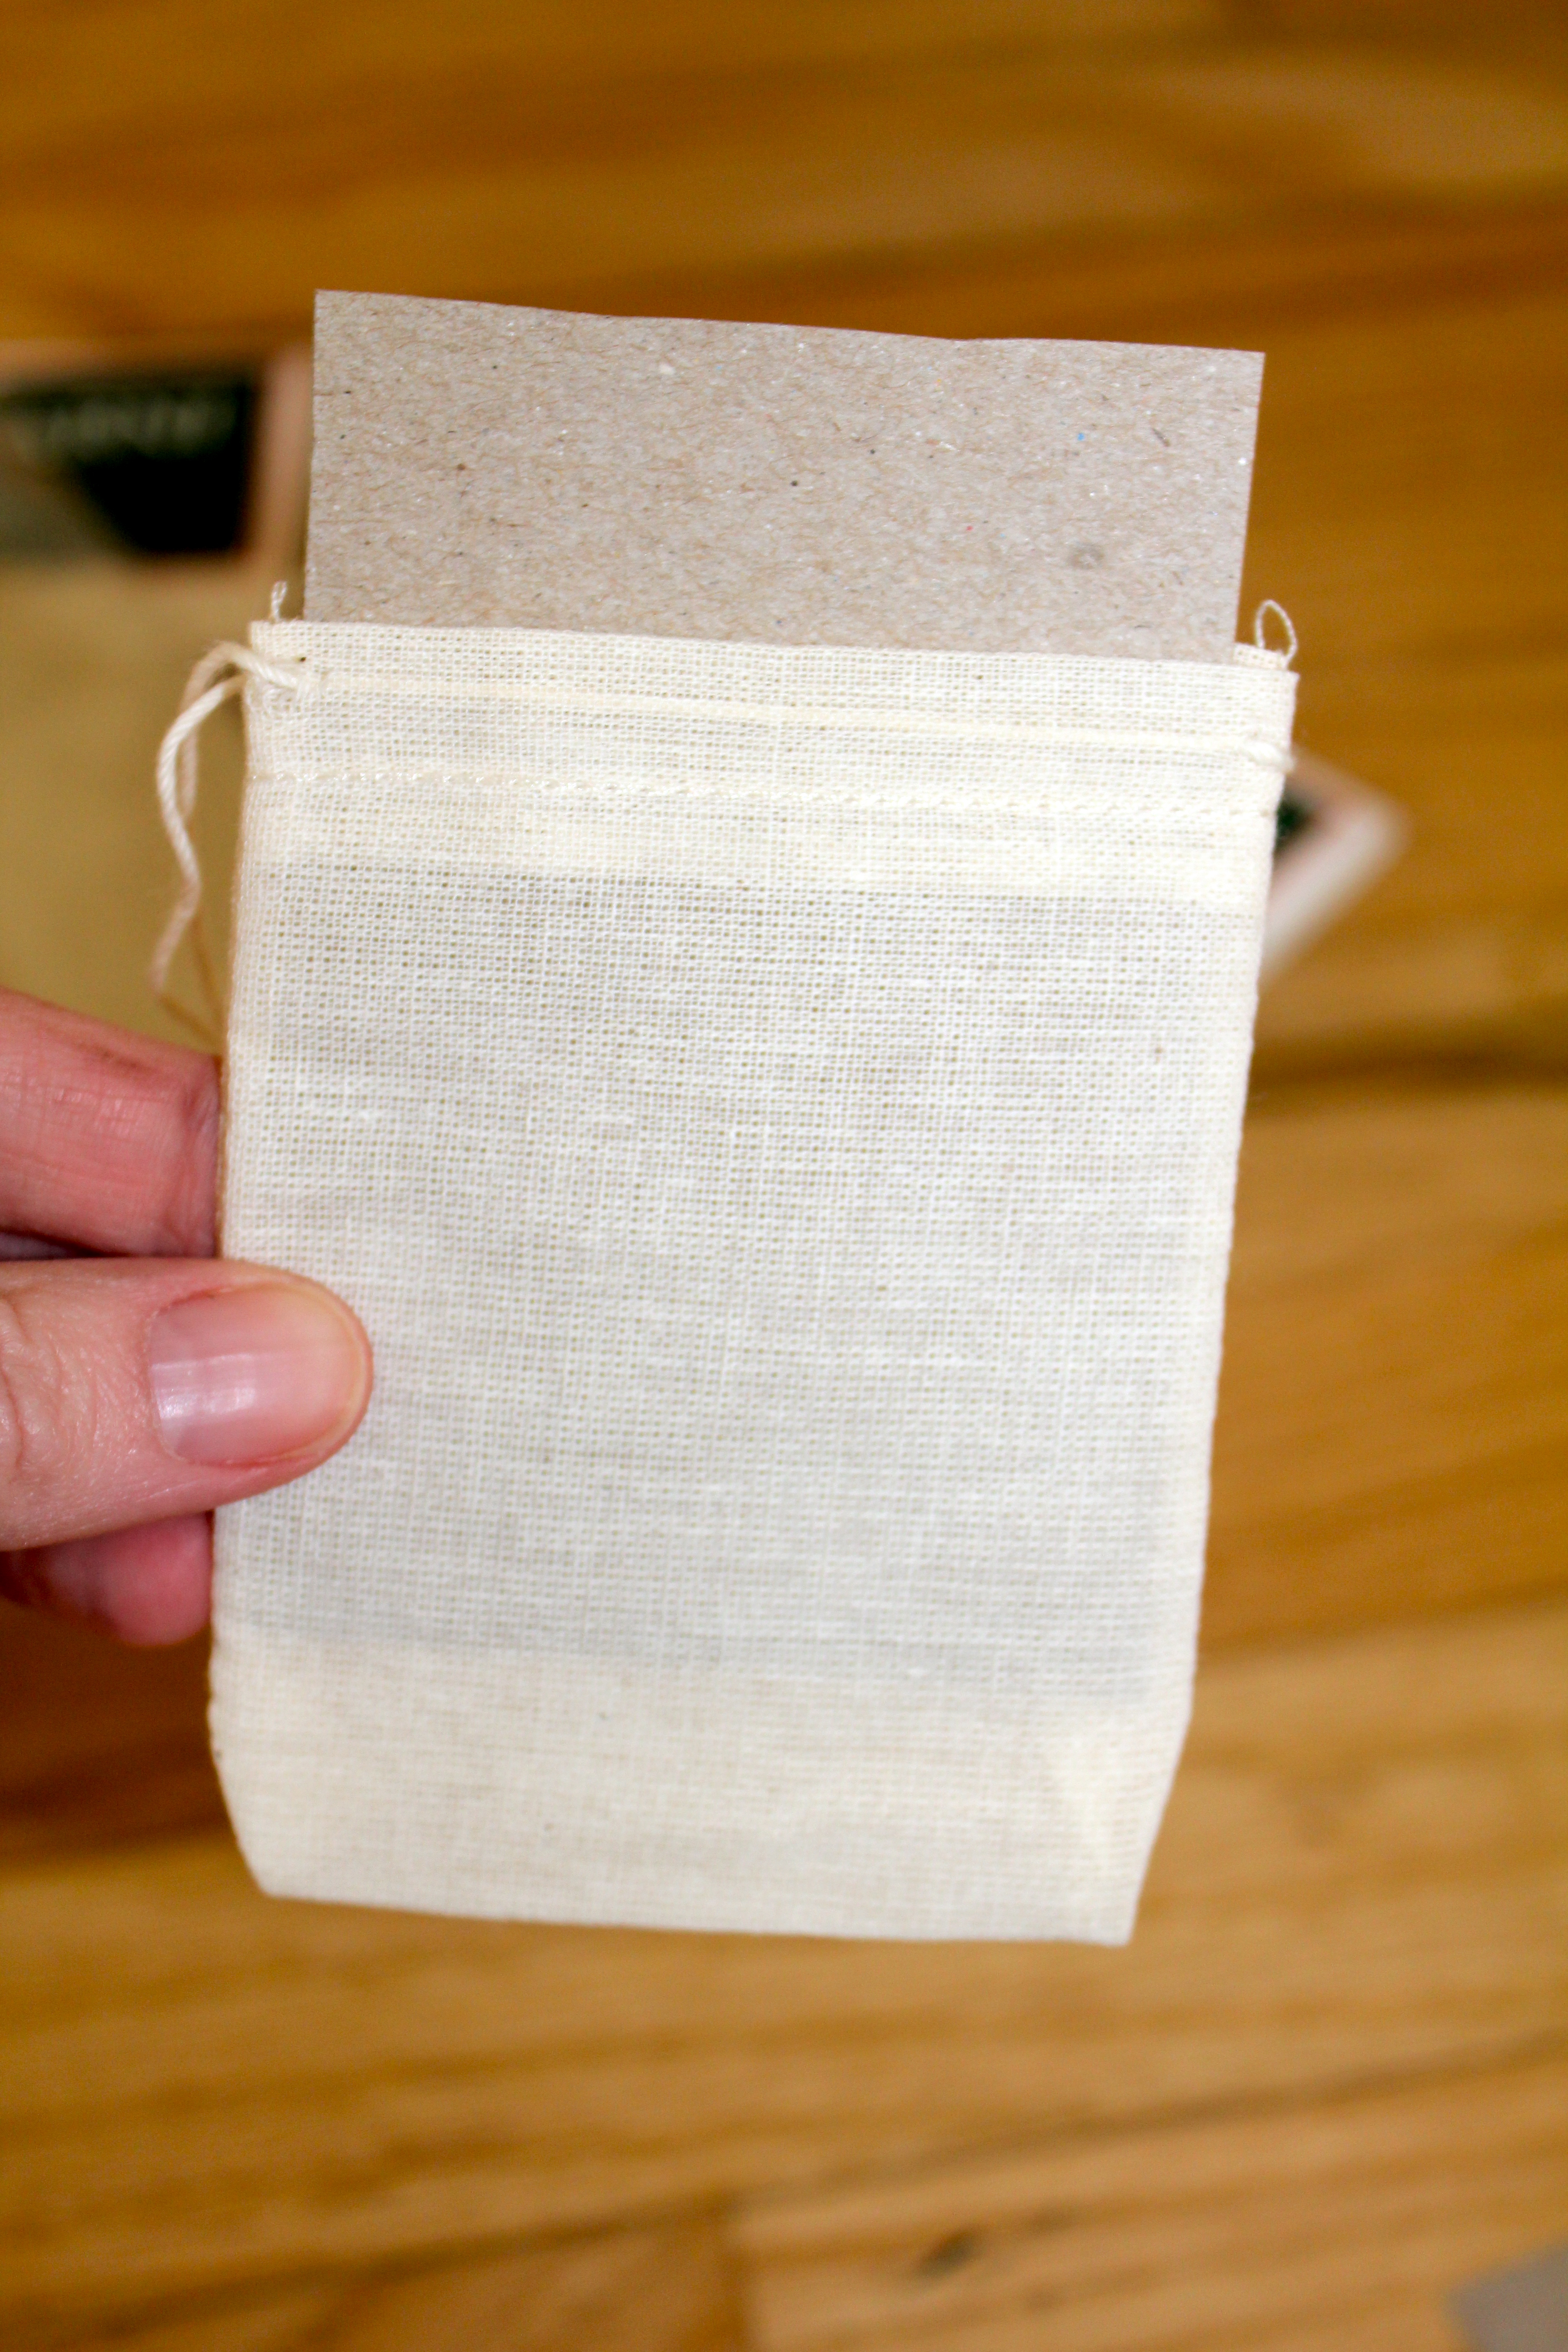
I then cut out a small piece of cardboard to fit inside the goodie bag.
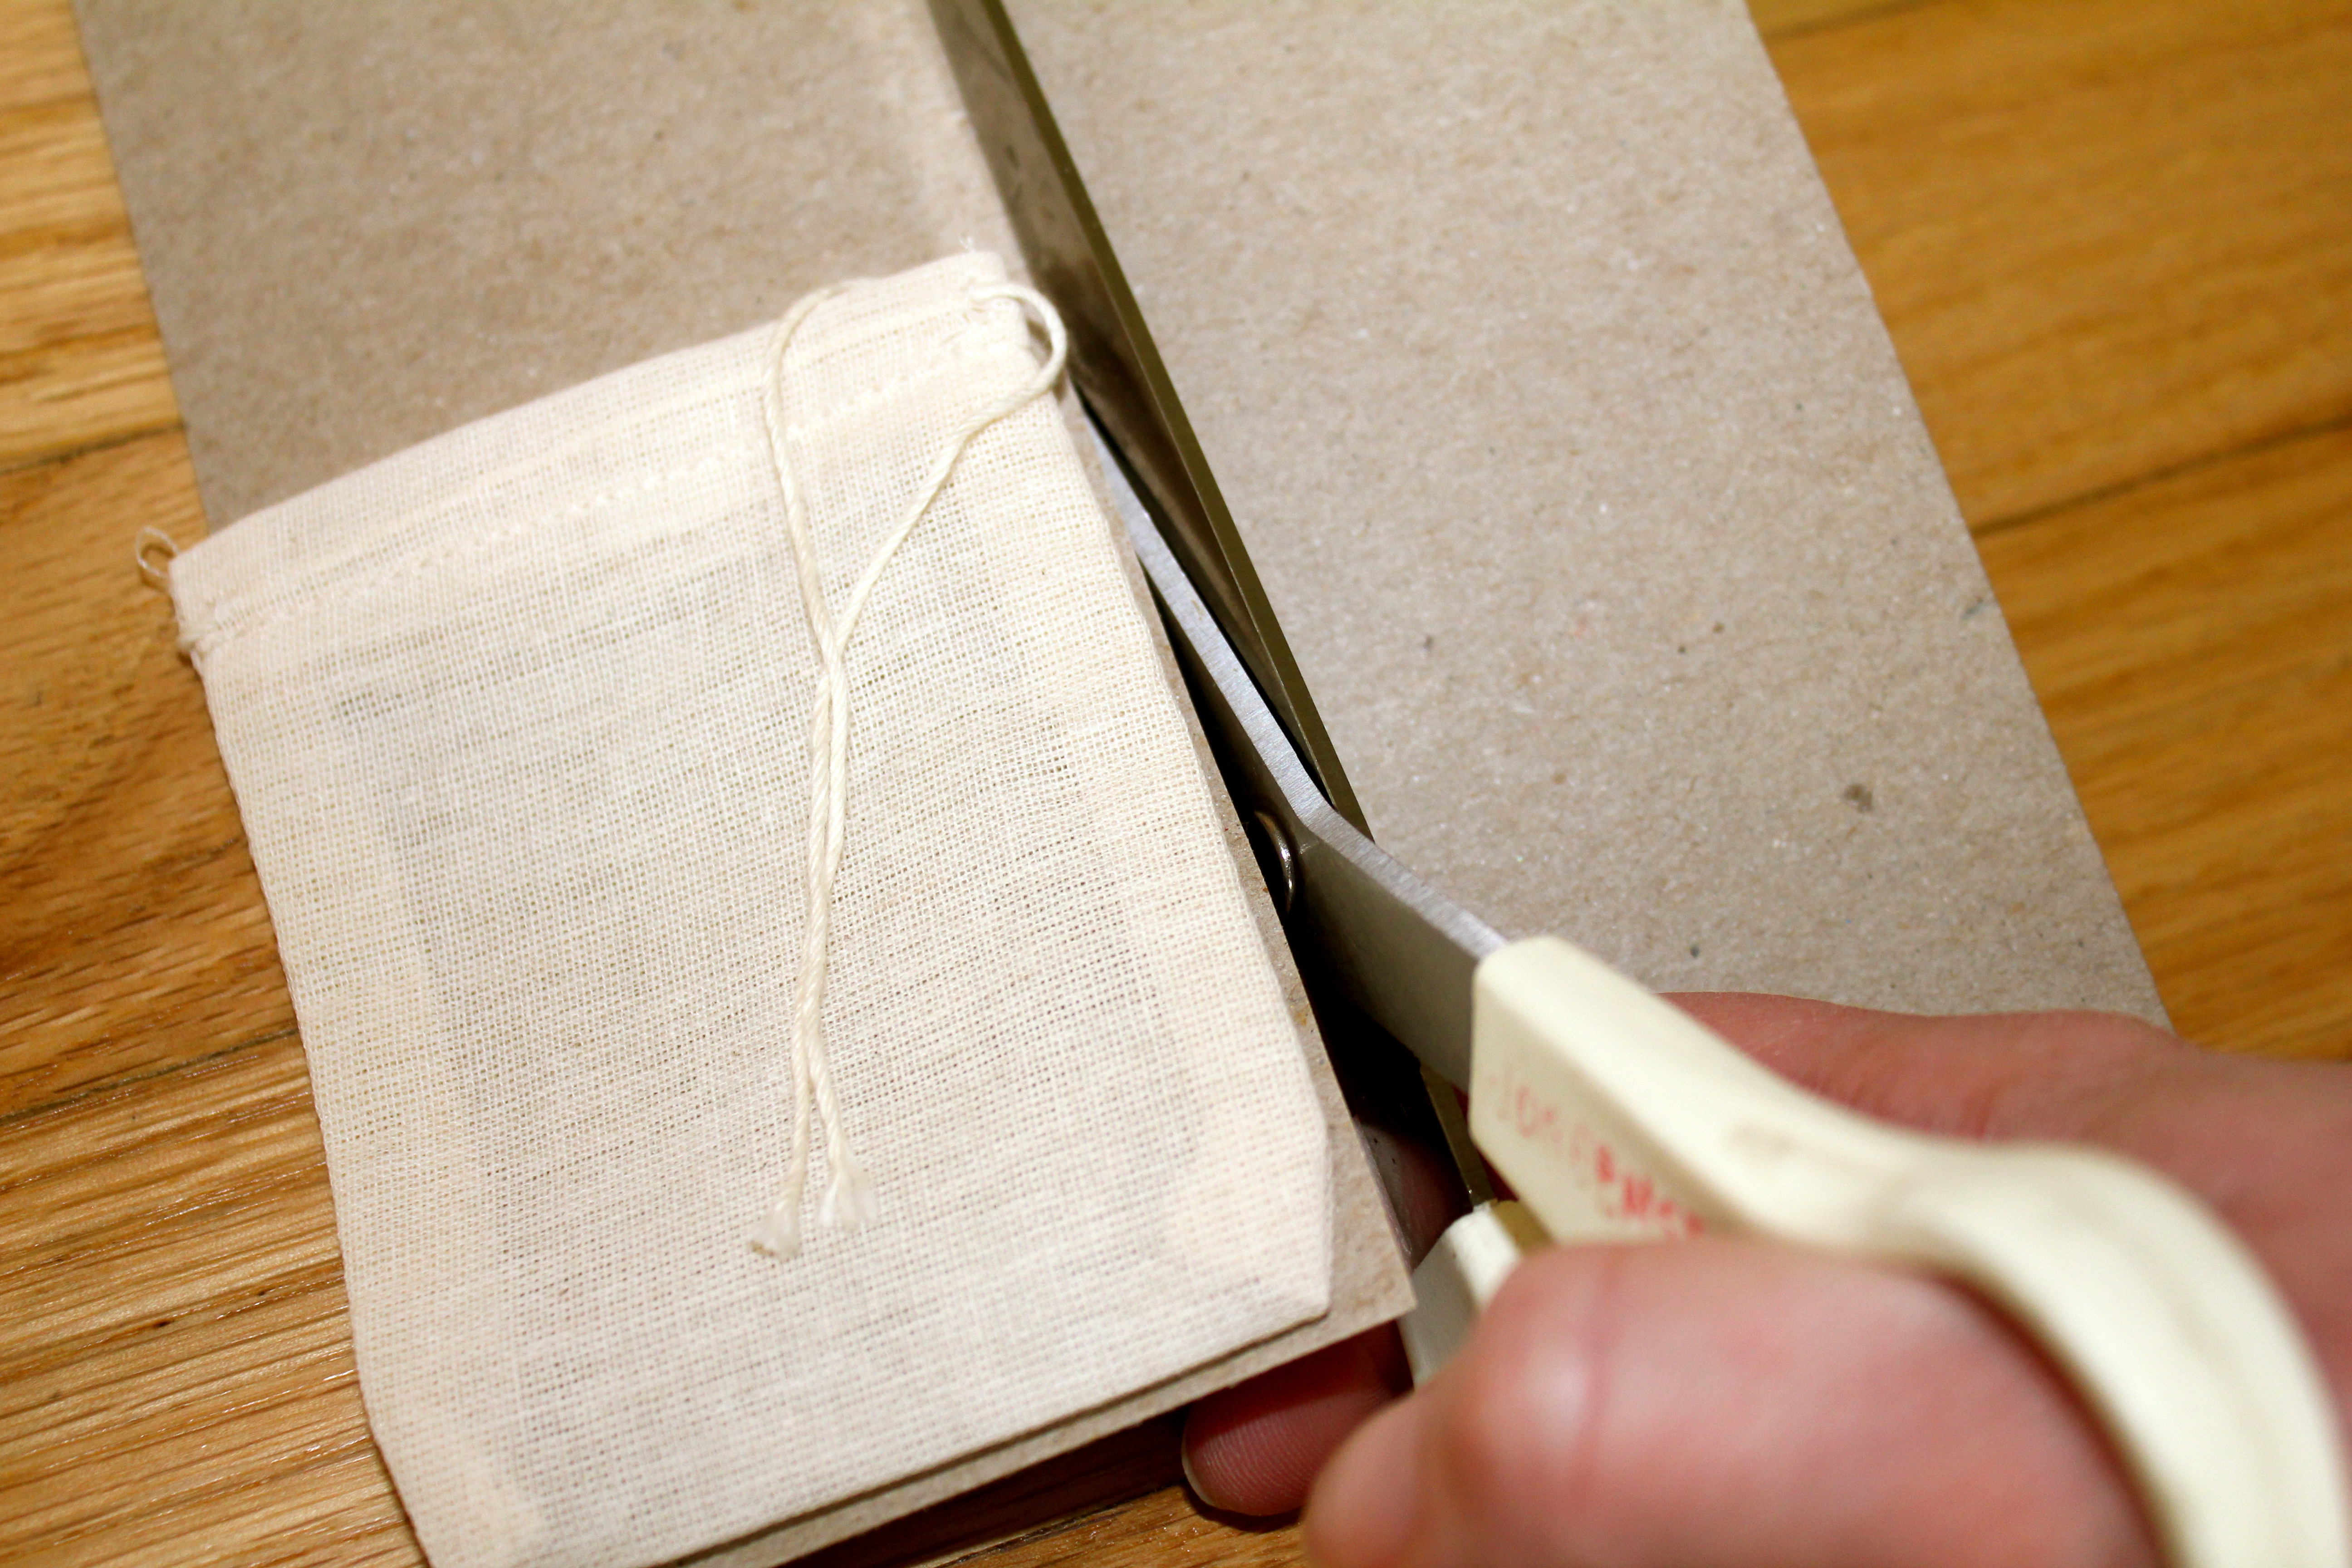
This step is muy importante if you want to keep the paint from bleeding through your bag.
I then started stenciling the numbers 1 through 24. I just eyeballed each one since I was going for a rustic look (rustic = fancy for not perfect).

One done and 23 to go!!!!!
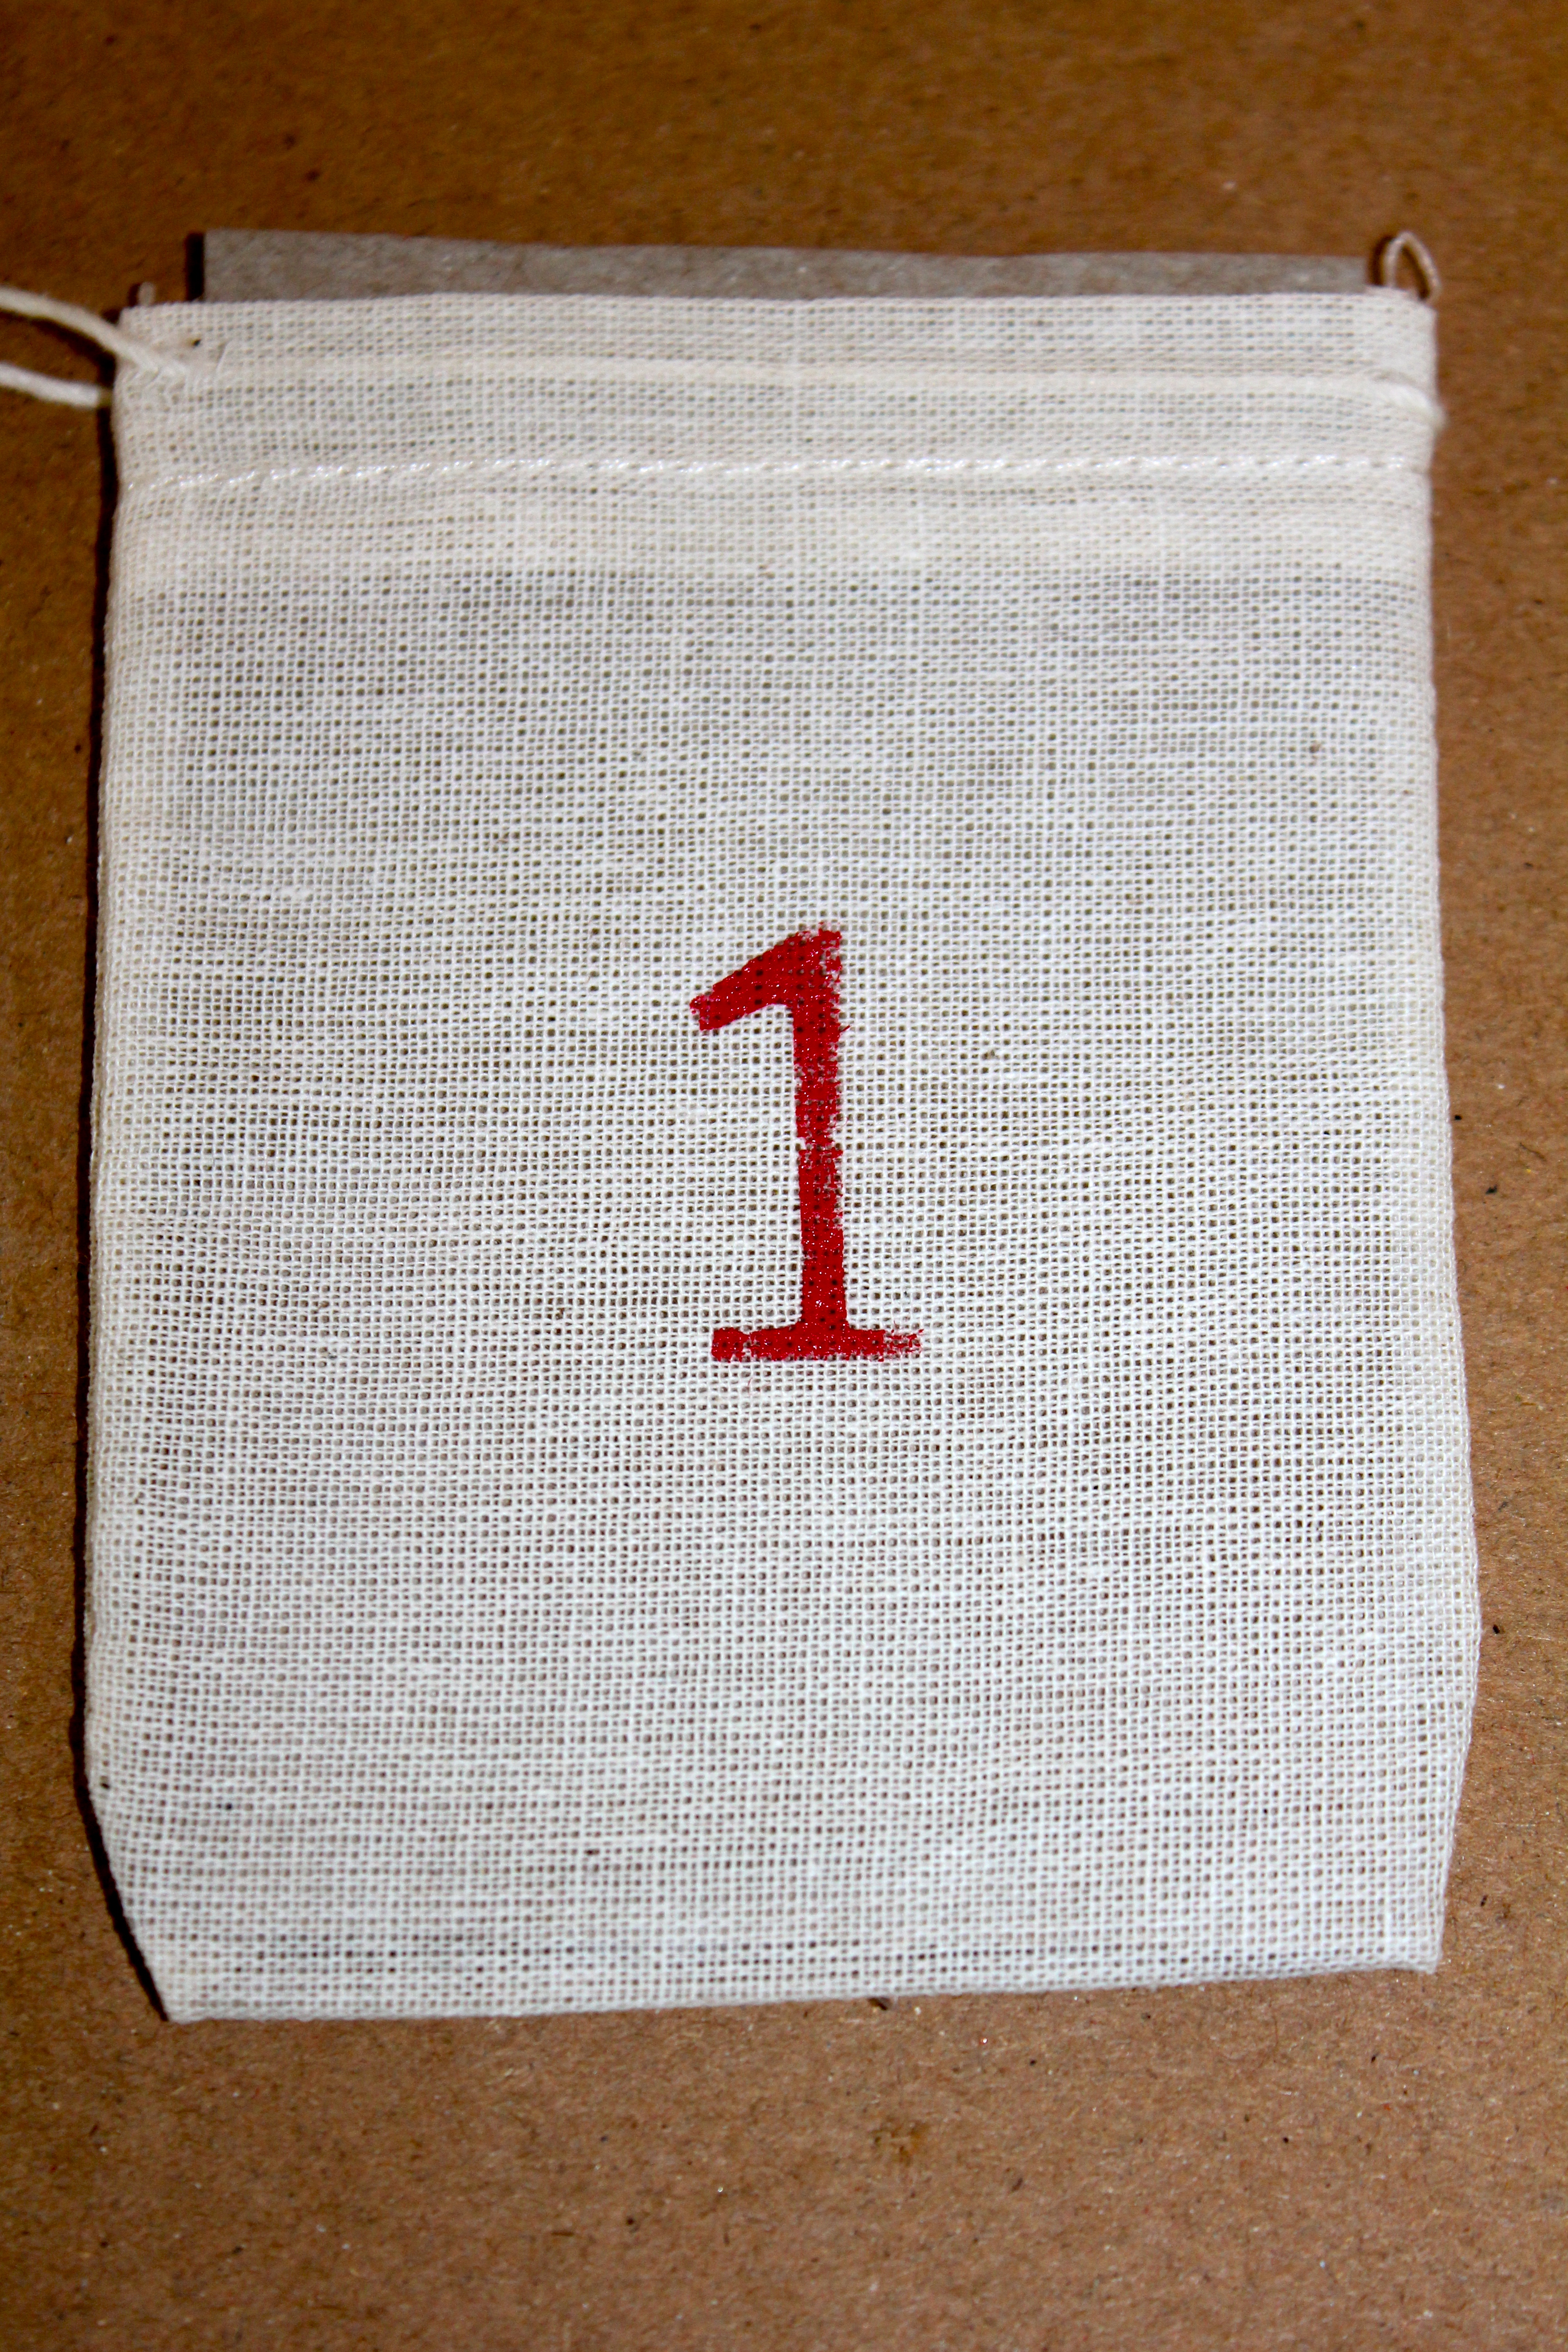
I was so happy with the way these stenciled bags turned out. The deep red looks really striking against the natural palette of the bags. And the best part? I can reuse these bags year after year. Oh! And they hold chocolate really nicely. Because if we are being really honest here that truly is the most important part, isn’t it?
Next step? I wanted our advent calendar to include the real meaning of Christmas…the Christmas Story. I had every intention of breaking down the story myself into 24 parts but I decided to first turn to Google and see if anyone had already done it for me. Voila! They had! There are several different options out there but I decided to use this one from double the fun parties.

This design was simple and pretty….
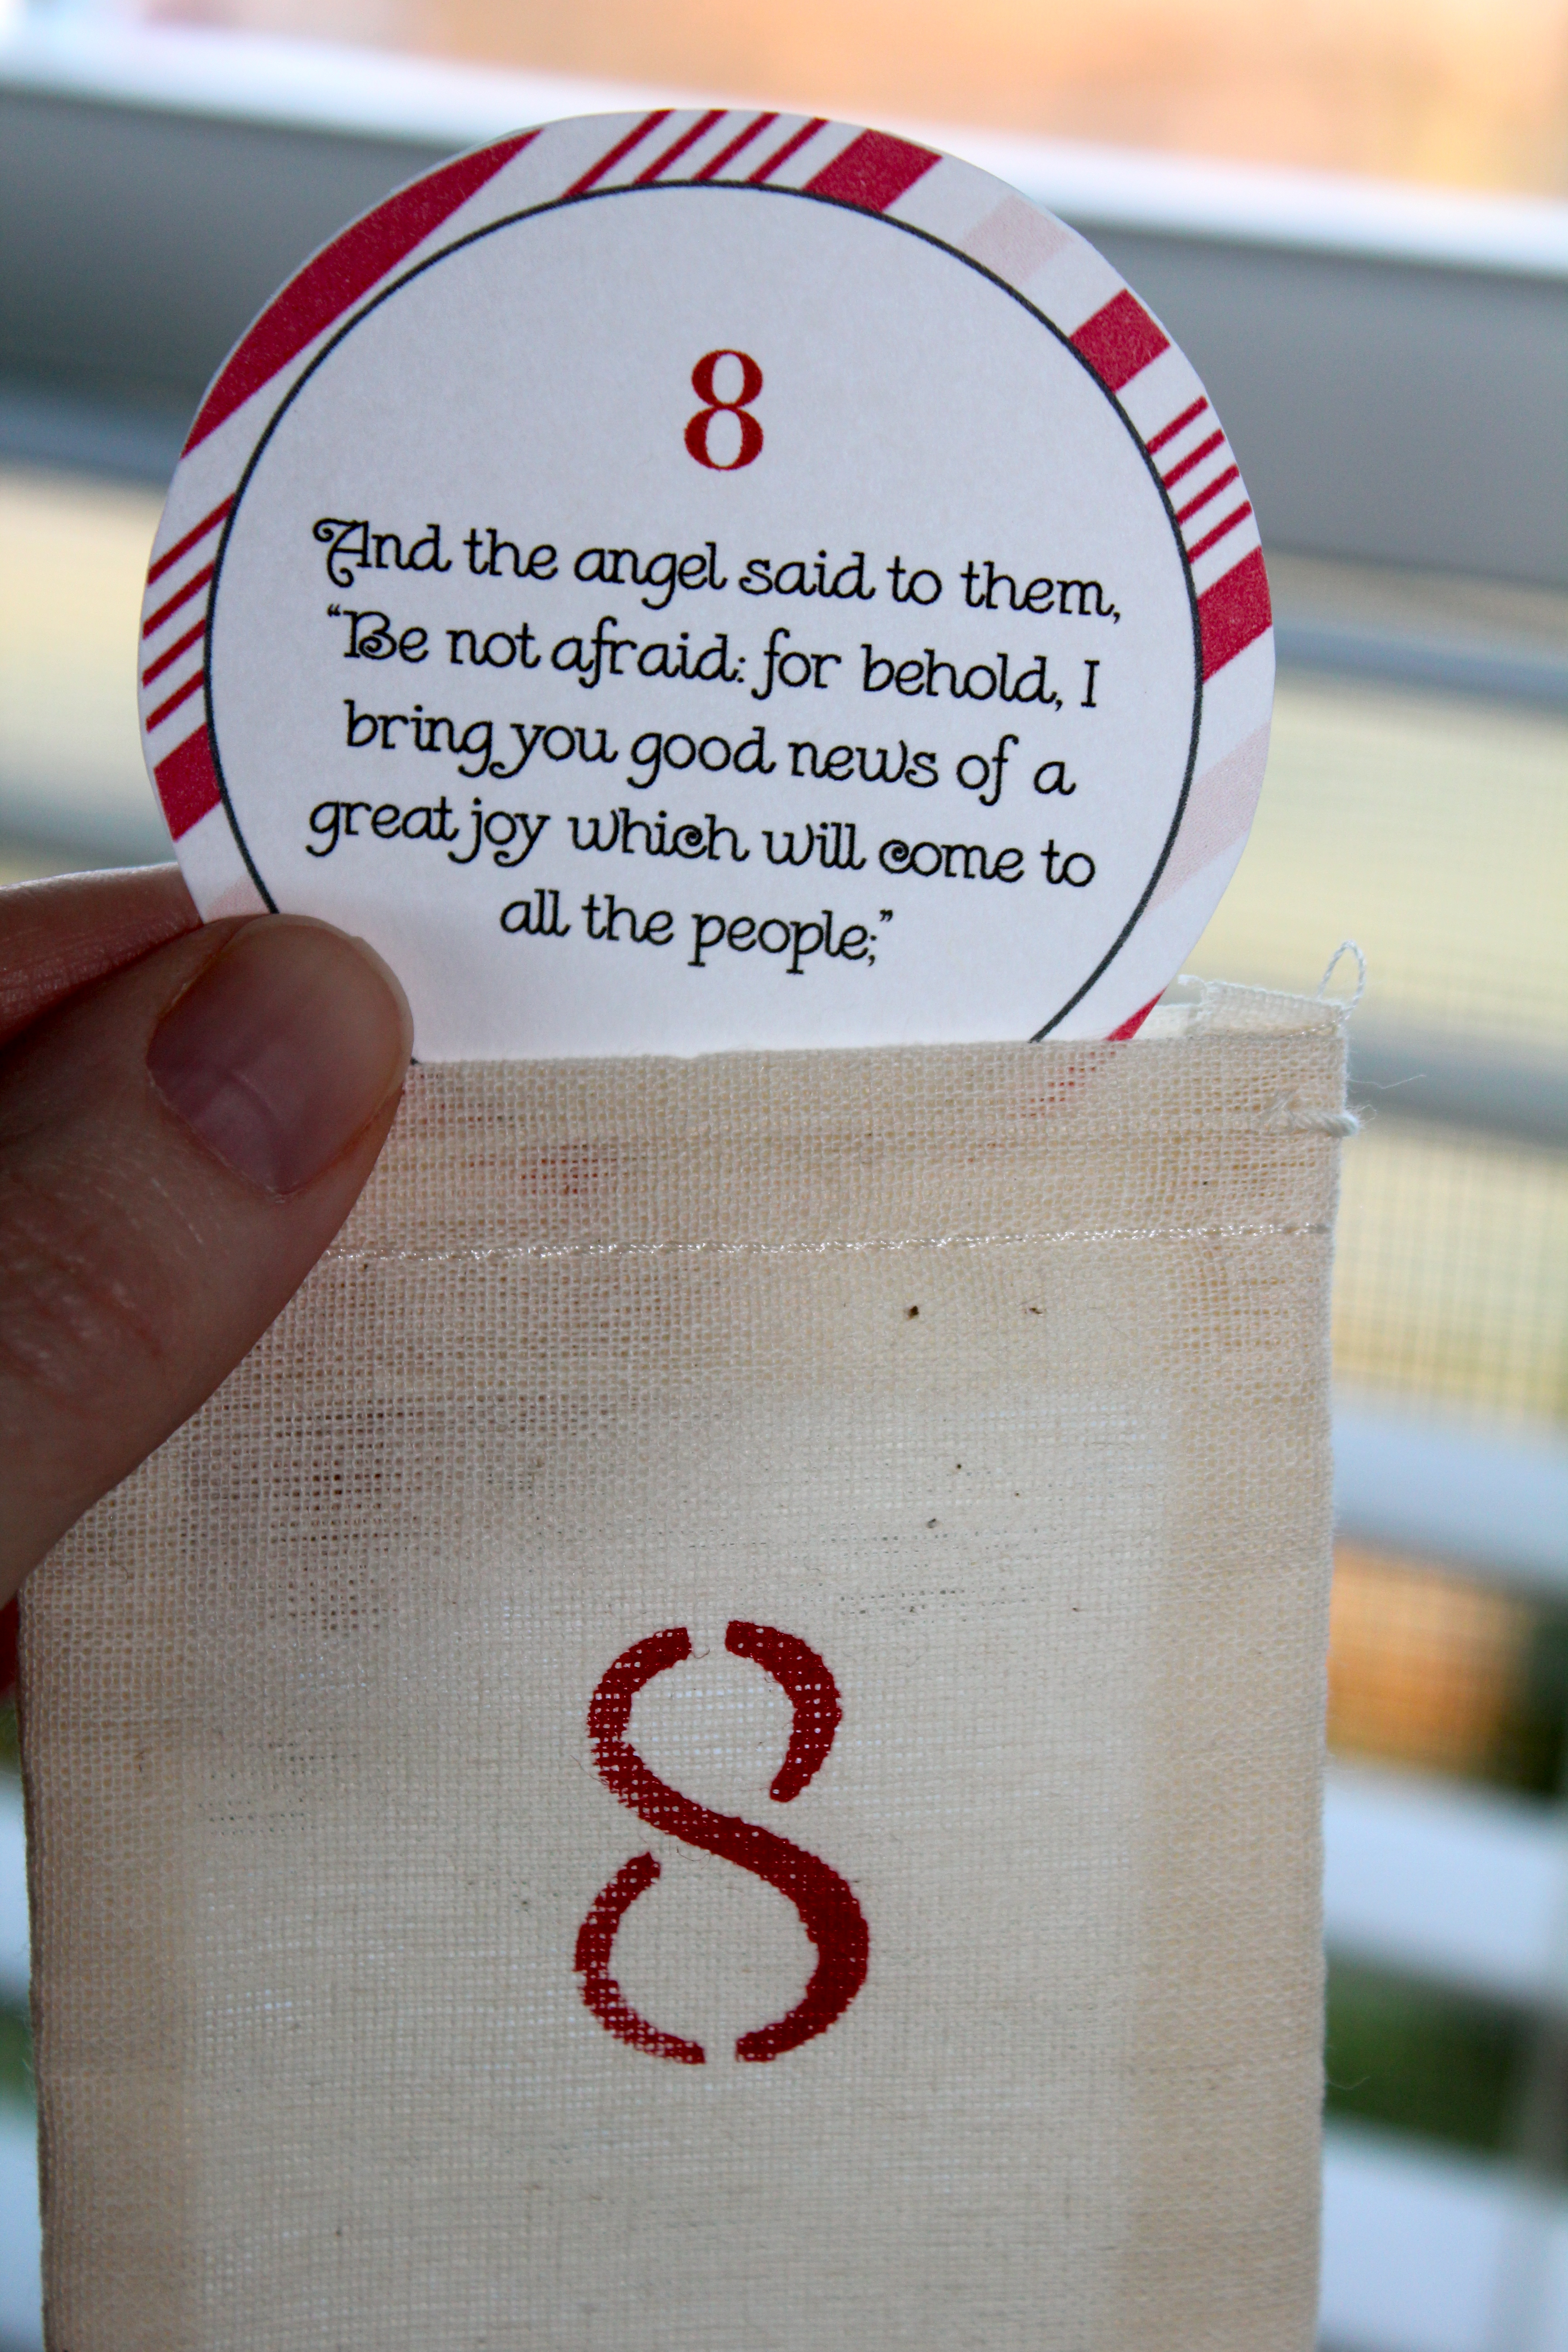
…and matched the color scheme of my advent calendar. It also reminded me of my daughter’s Candy Cane costume for her upcoming performance of the Nutcracker so we went with it! I printed the design on heavy card stock and cut out each circle.

And now the fun part…filling the bags! As you can see we have sweet teeth around these parts. Individual sized candies are the perfect size for this advent calendar and the perfect price point. My whole intent of this project was to keep it affordable and I didn’t want to blow that in the filling process. I found some gold (chocolate coins) and Christmas stamps in the dollar section at Target.
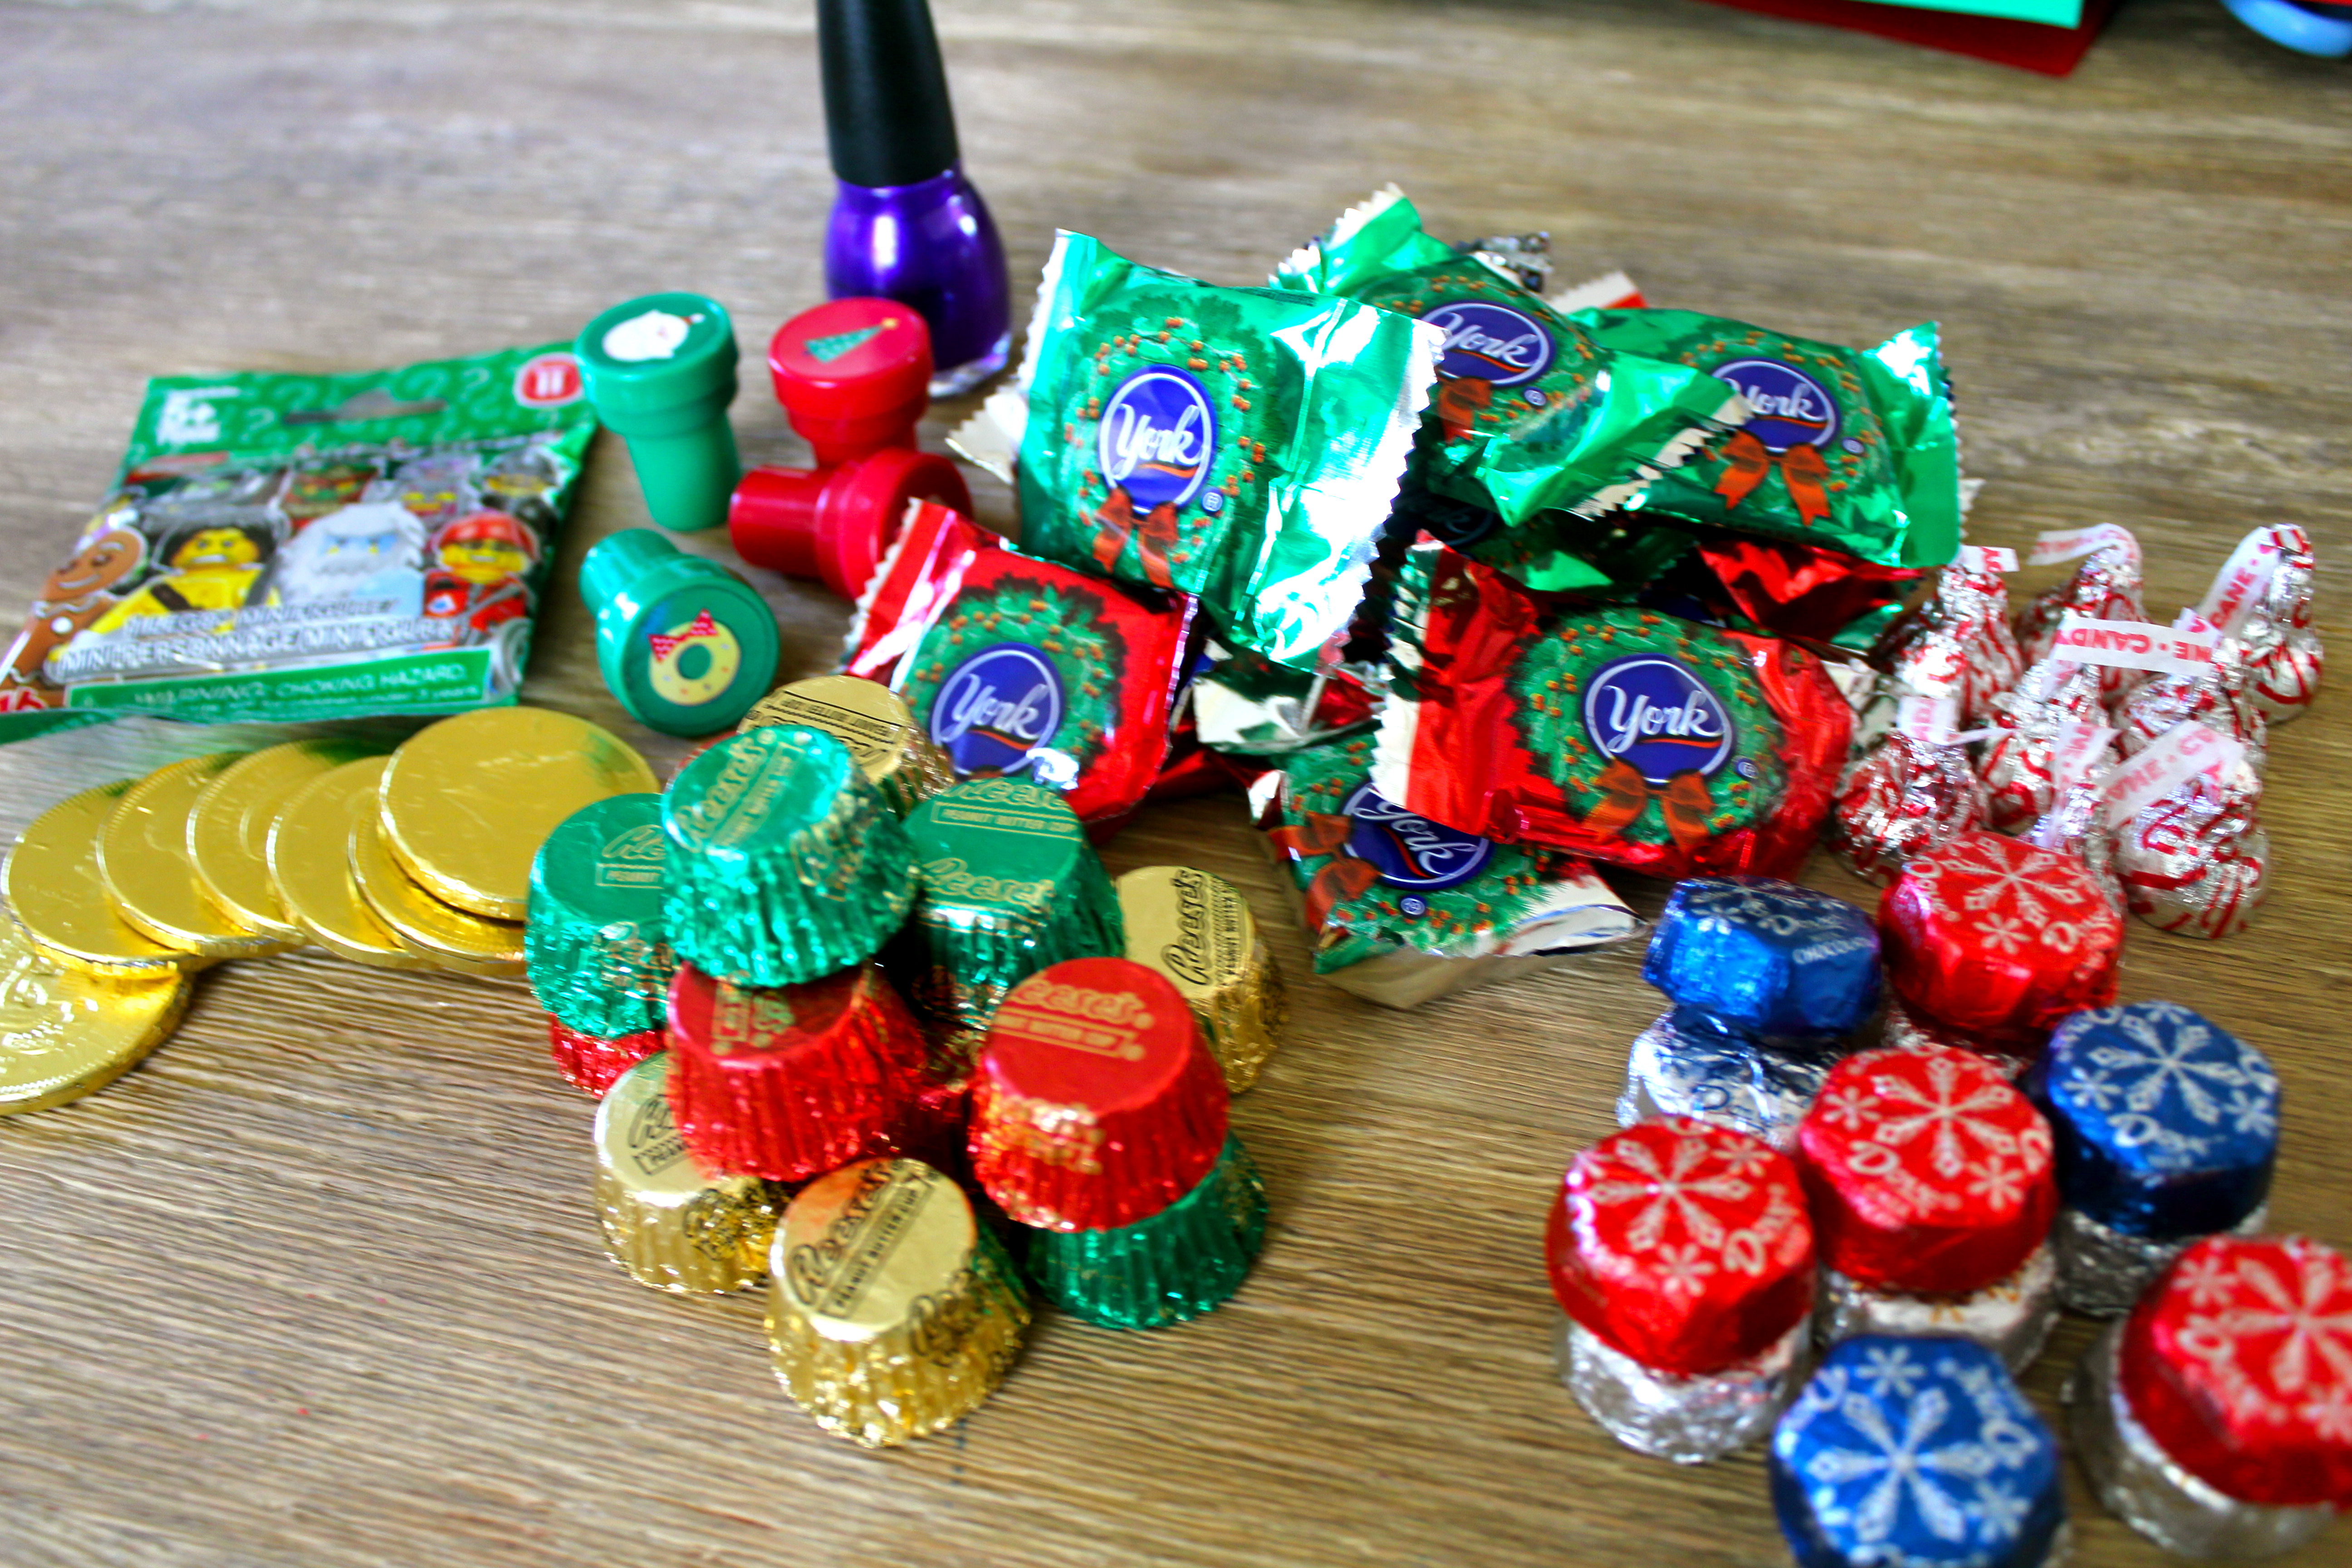
I did spend a bit extra to put a small Lego toy in one of the bags since Beaut.two celebrates his birthday in December.

It fits! Whew!!!!

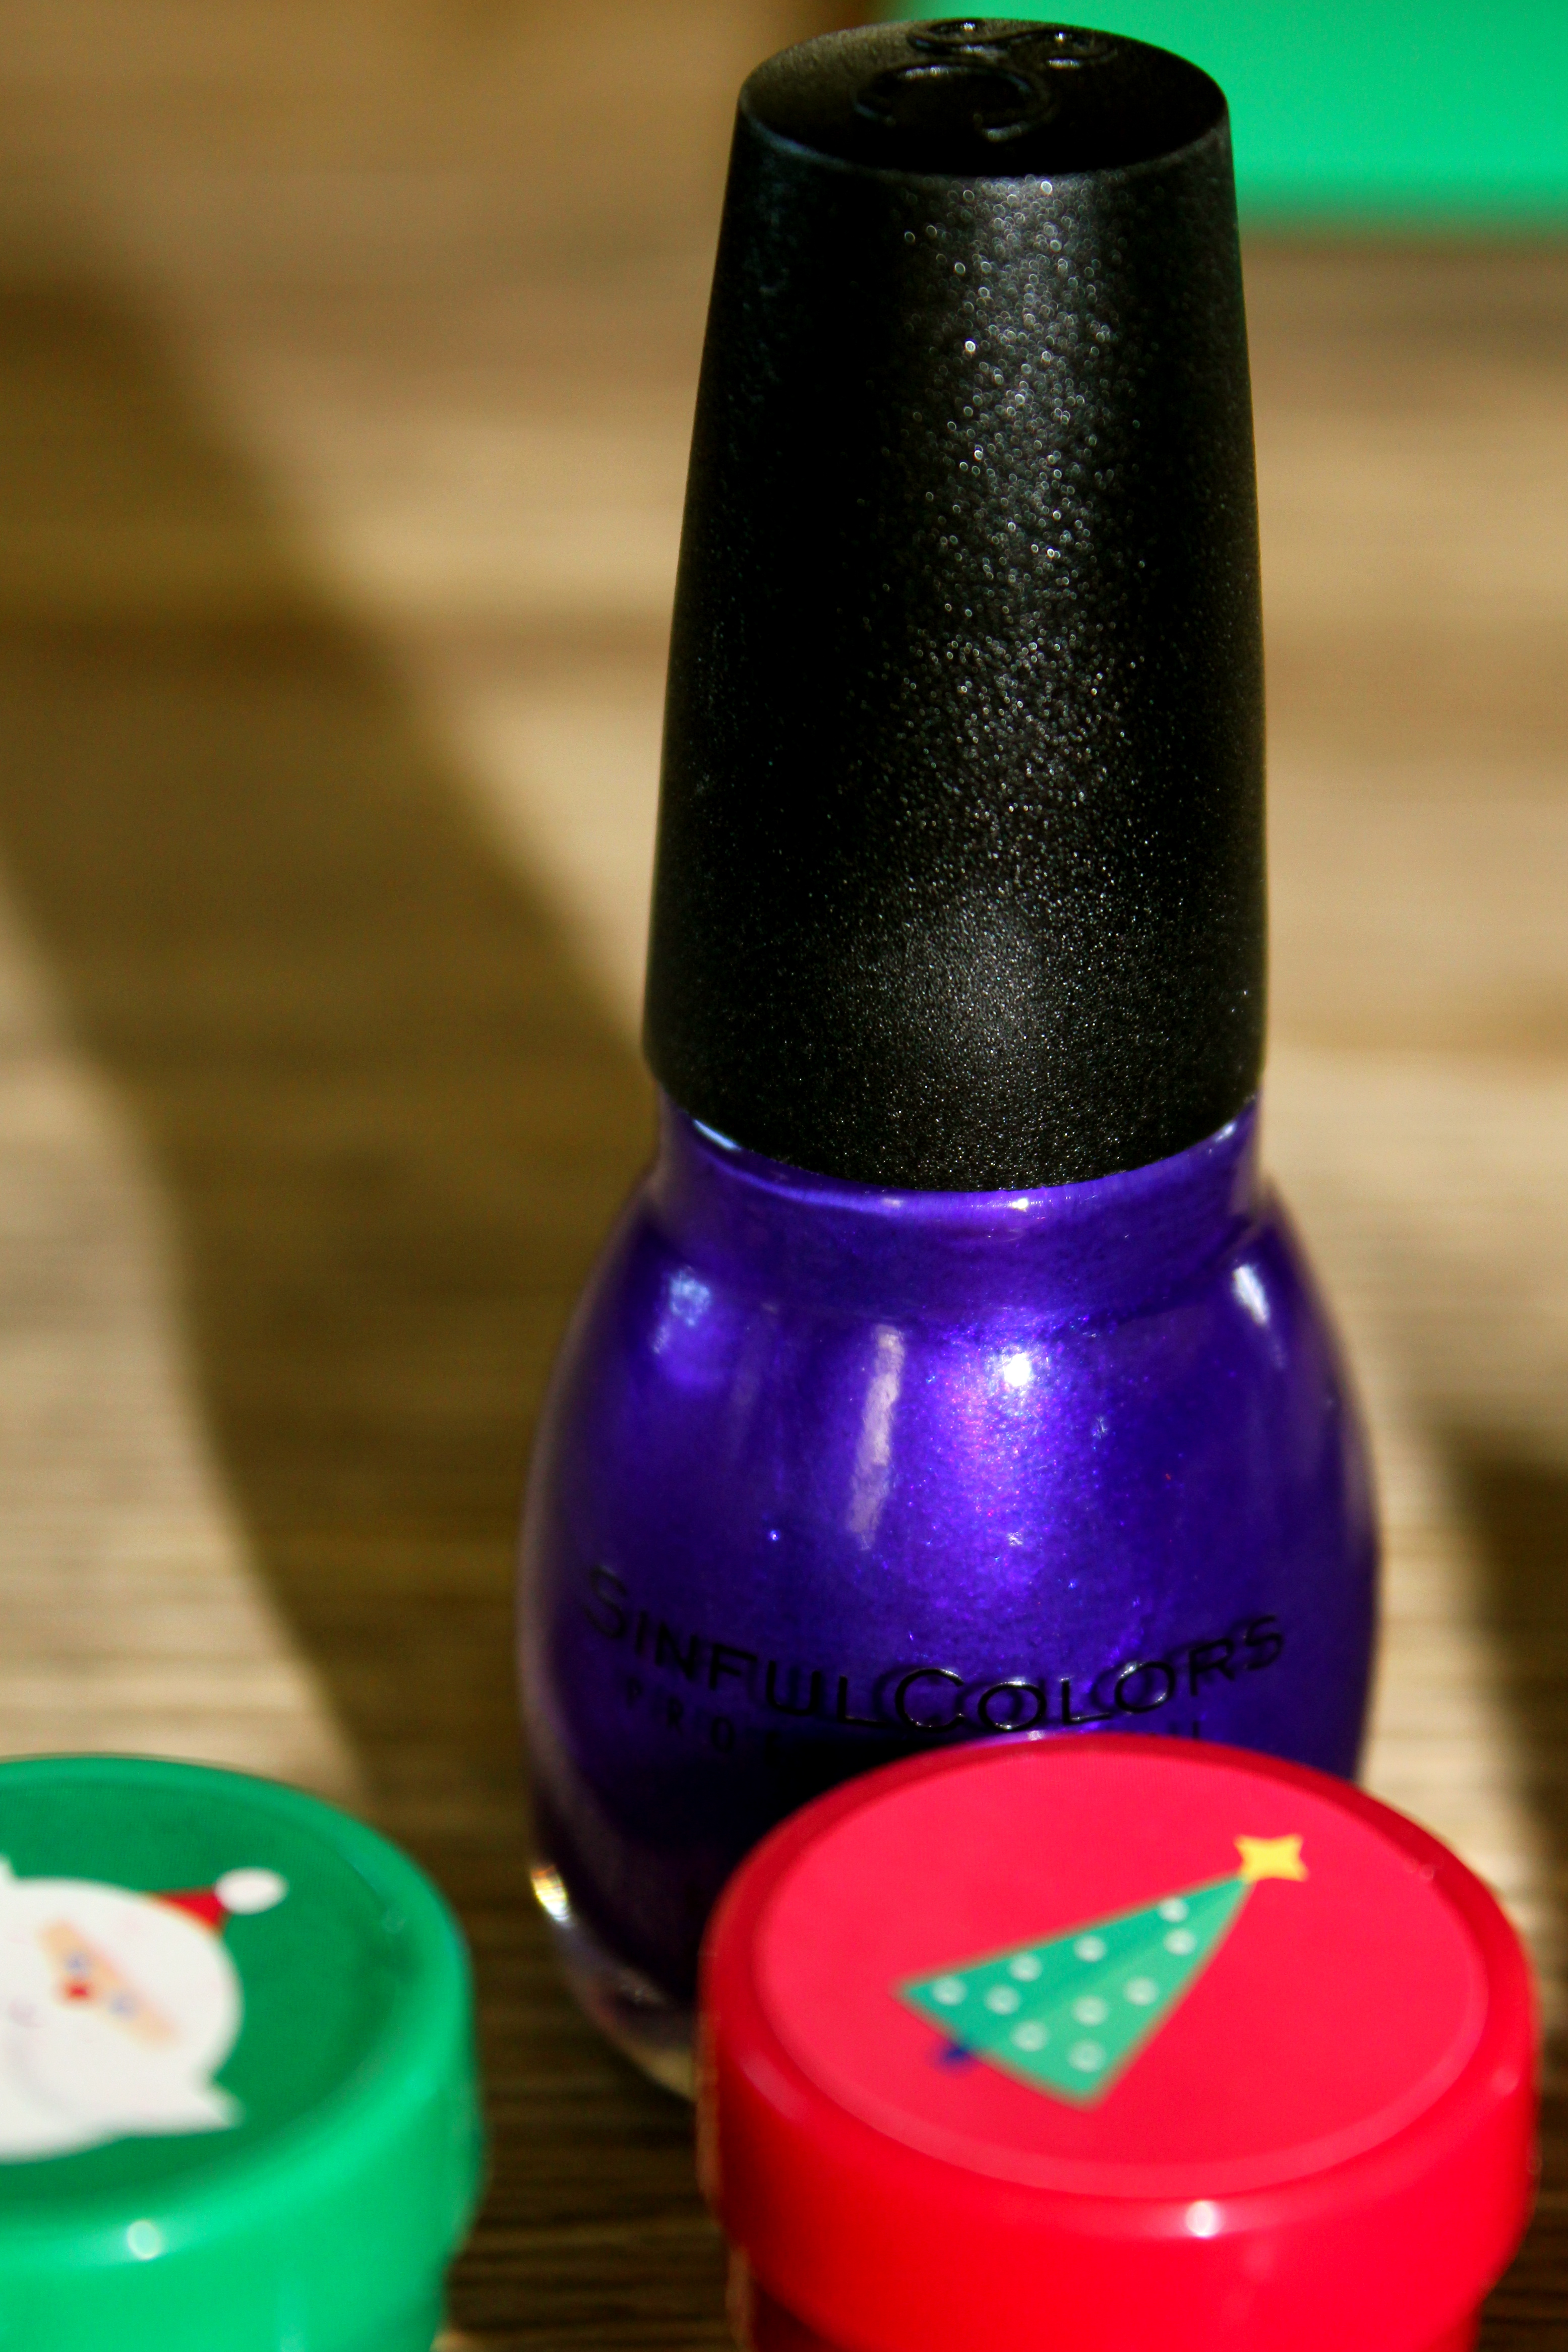
I also splurged a bit to buy a bottle of nail polish in honor of Beaut.one’s opening night of the Nutcracker.
To commemorate Christmas Day itself, I took an ornament and wrote Merry Christmas on it in chalk. I have been recently informed that this is indeed Beaut.one’s favorite part.

And here is the final product! I am really pleased with the way it turned out and I can safely say that the entire family is very excited to put it to use this season.

Expectantly waiting for all that lies ahead this season,
Stacey
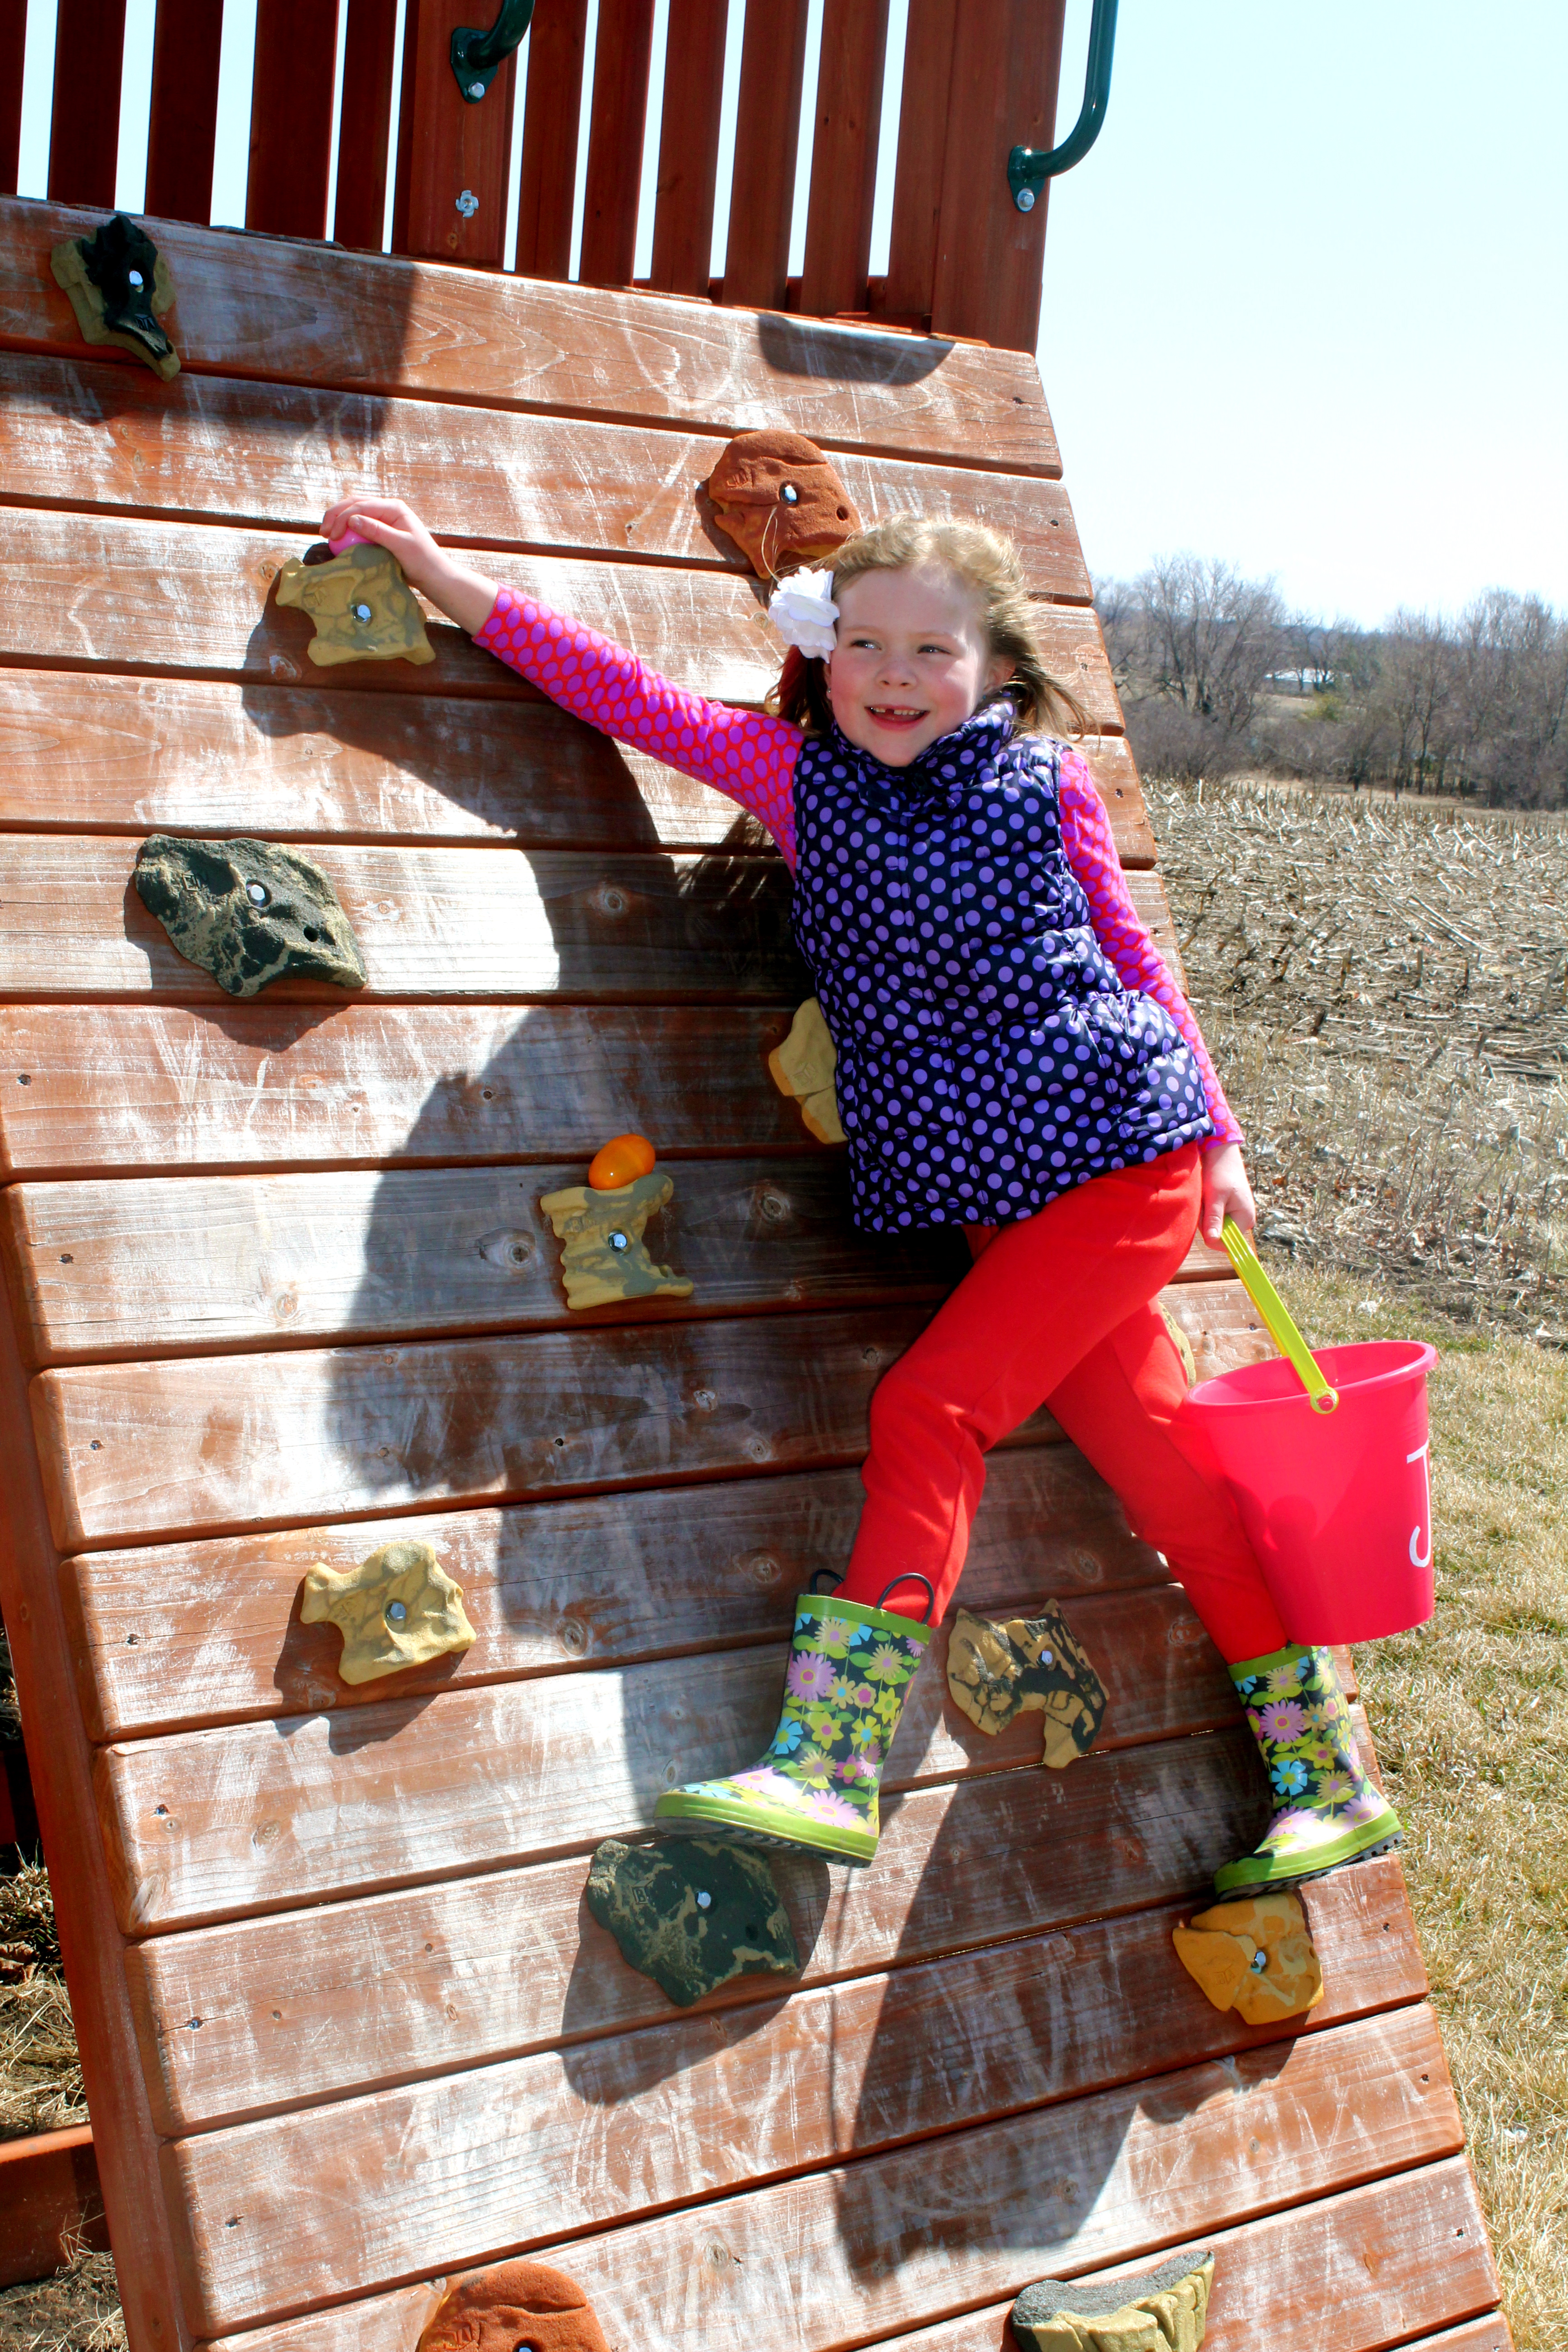
We love fall. We love Halloween. We love pumpkin patches and apple orchards. We love silly family photos with floppy hats and swords. We love candy, trick-or-treating and the Monster Mash. And we would love to share our adventures with you in our fall round-up!

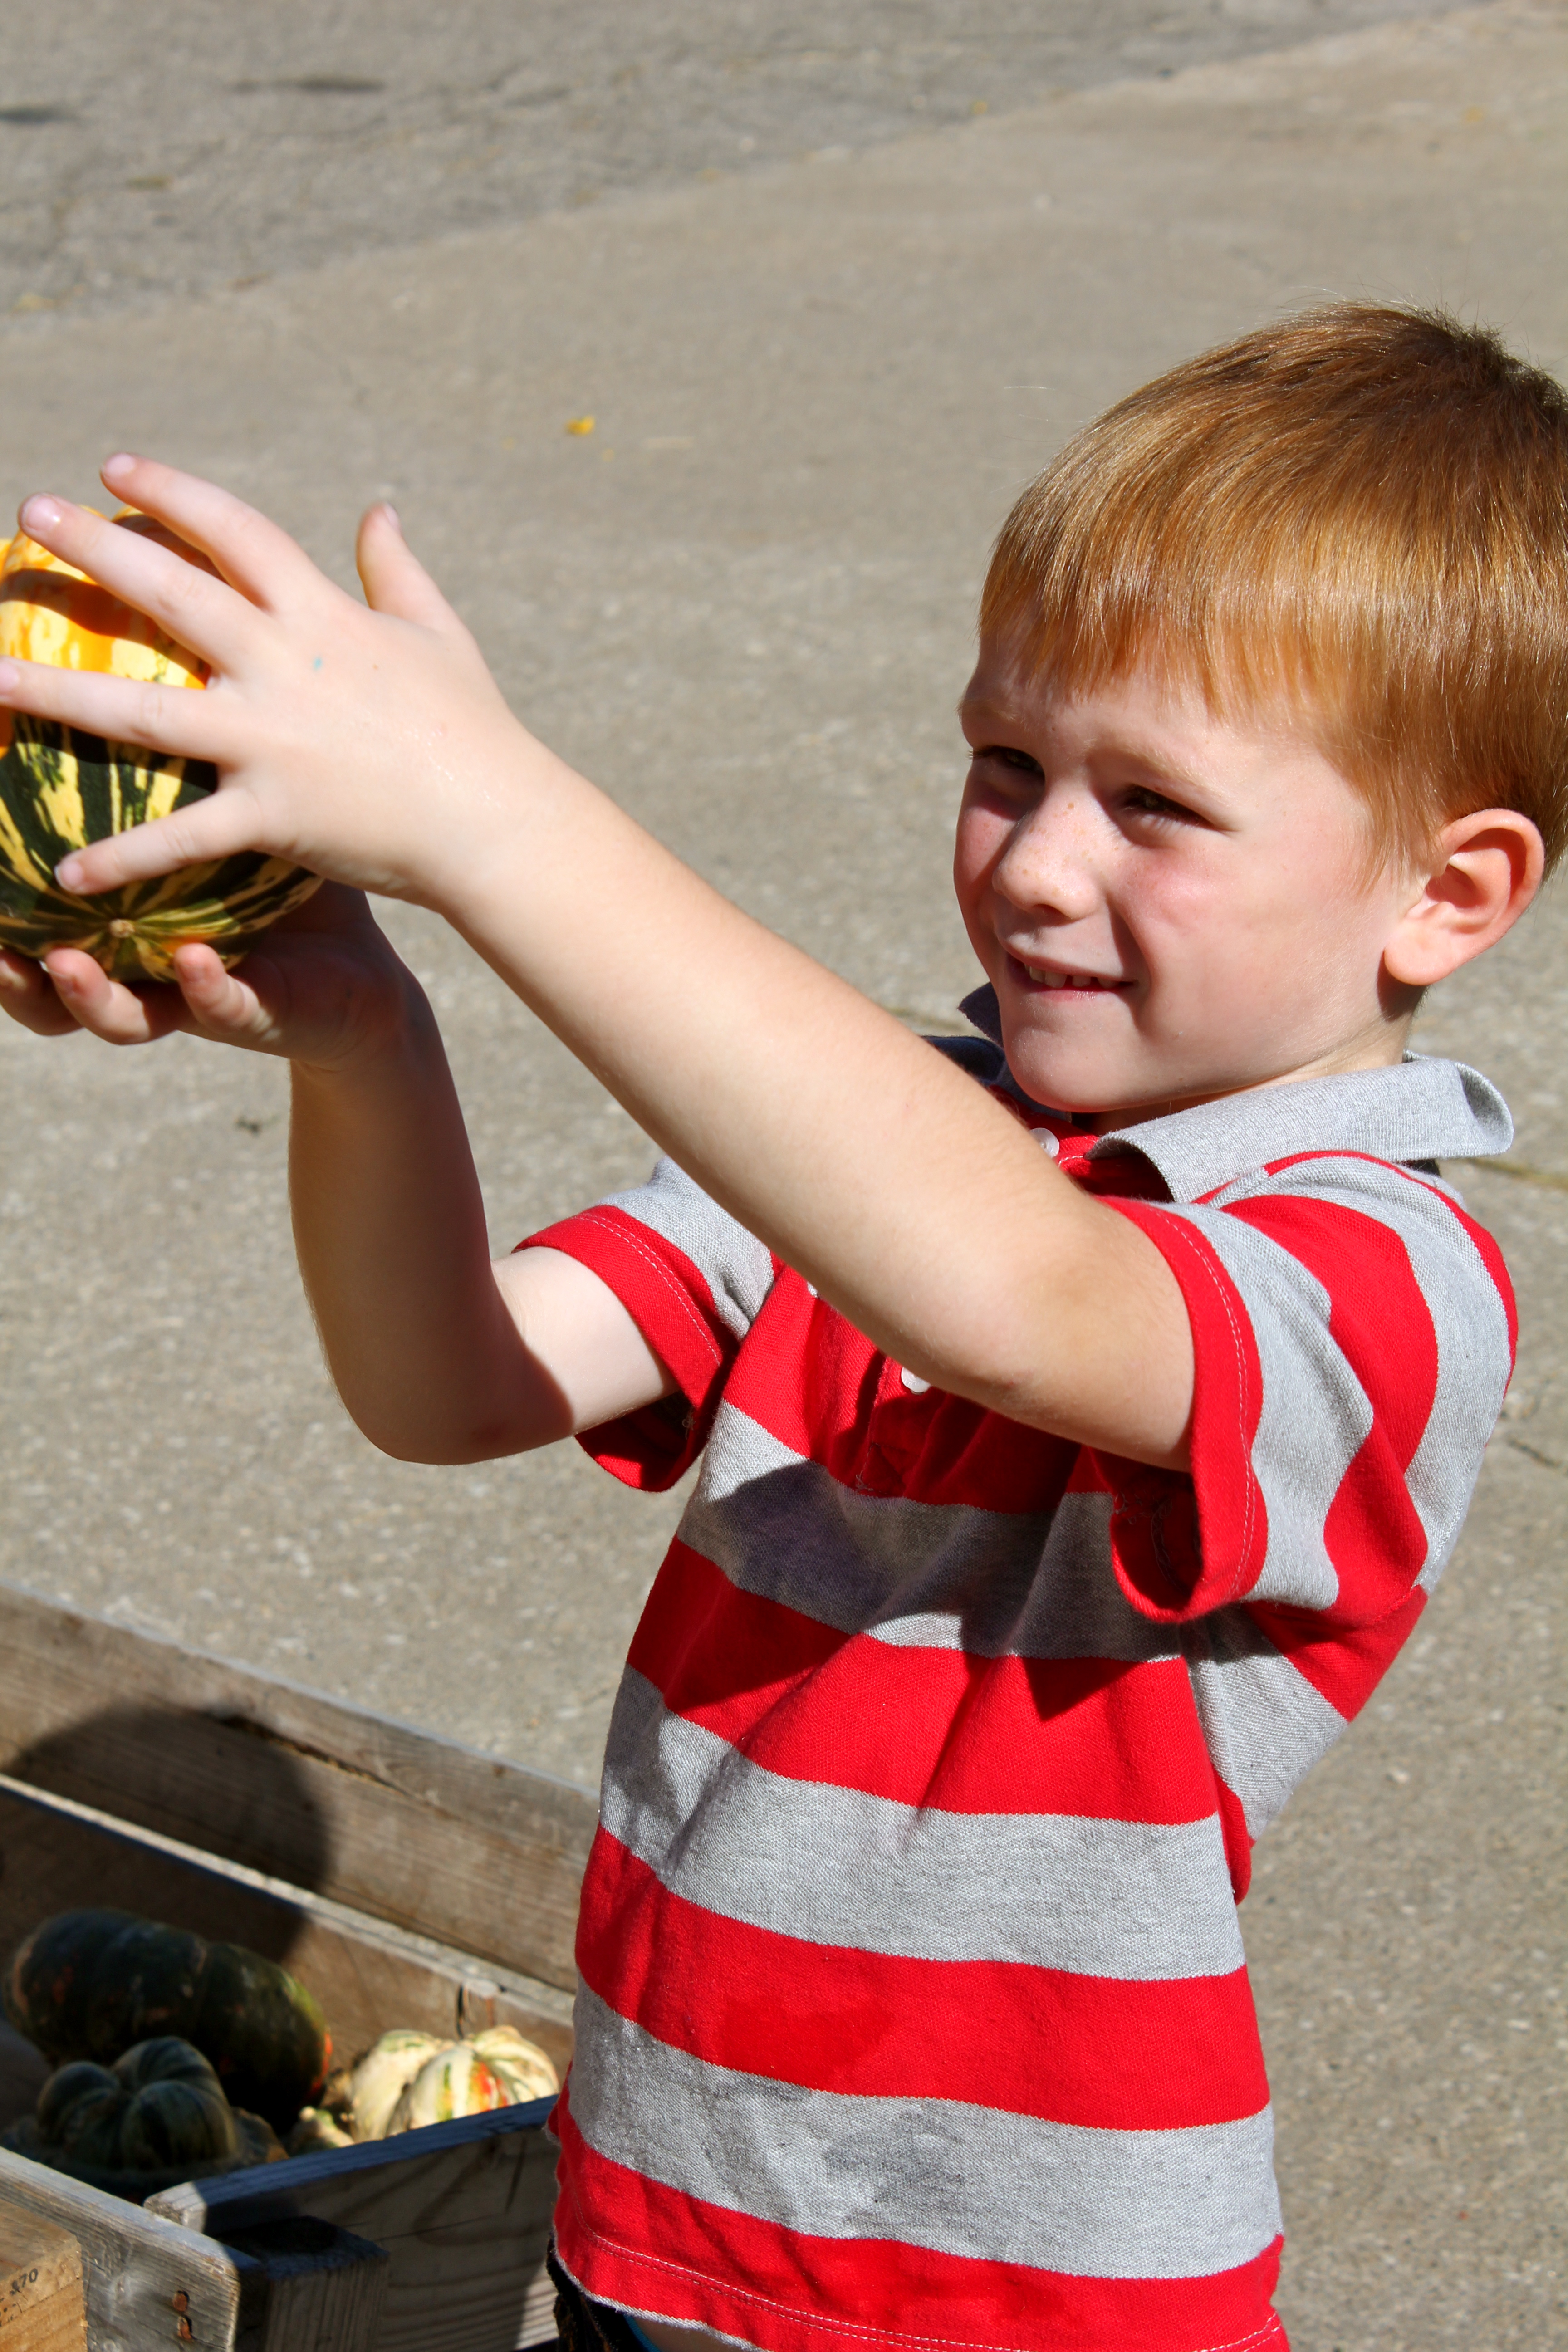
Beaut.two and I kicked off our fall fun by heading to a local pumpkin patch. In my humble opinion, this is THE local spot to get any type of pumpkin or gourd or squash that your sweet fall lovin’ heart desires. Welcome to Pumpkin World!

If you are looking for traditional pumpkins for carving and decorating…they’ve got ’em!

Gourds for birdhouses? No problem. They’ve got one or two for you to choose from.

Something a bit more on the exotic side of the pumpkin/gourd/squash world? Well…they’ve got that covered too. Last year we went this route for our fall decor after a visit to Pumpkin World. I really enjoy walking around and dreaming about how we can decorate not just for Halloween but all the way through Thanksgiving.

Beaut.two was my guide for the day through this cornucopia of squash. Fun horticulture fact: pumpkins are actually squash, at least according to Wikipedia. In hindsight I think I may put too much blind faith in that whole Wikipedia thing-y.

First we searched for the perfect pumpkins…
…then we measured them to ensure they would be just right.

Once we picked our newest family members…(is it weird that I humanize common objects?)

…we loaded them into a trusty Radio Flyer wagon. And by we I mean he. He loaded. He loves showing off his muscles and brute strength. And what kind of mother would I be to deny him such joy?

What a trooper!

Our haul: Cinderella, peanut and Pokemon pumpkins, with some ambercup and carnival acorn squash thrown in for good measure.

My eyes! My eyes!

Beaut.two’s work for the day was far from over. He wheeled our newly acquired treasures to our truck.

And then helped his mamma load the pumpkins in the back all nice and snuggly next to our weekly groceries. The pumpkins and the pumpkin bread mix (heaven in a Trader Joe’s box) became fast friends.

After a short drive home, my boy was at it again…hauling pumpkins to our front steps.

We stopped to admire our work and take a wind-blown picture for good measure.

Here is the final product.
Me while gazing at our front door: “I think it was well worth all the effort don’t you?”
Beaut.two: “Can we go inside and have a glass of lemonade?”
Me: “You bet buddy.”
Beaut.two: “Can I watch an episode of Phineas and Ferb?”
Me: “Sure. You were a great help today!”
Beaut.two: “Can I have two cookies and an arm massage?”
Me: “Now you’re just pushing it.”
Beaut.two: “Lemonade and Phineas and Ferb it is!”
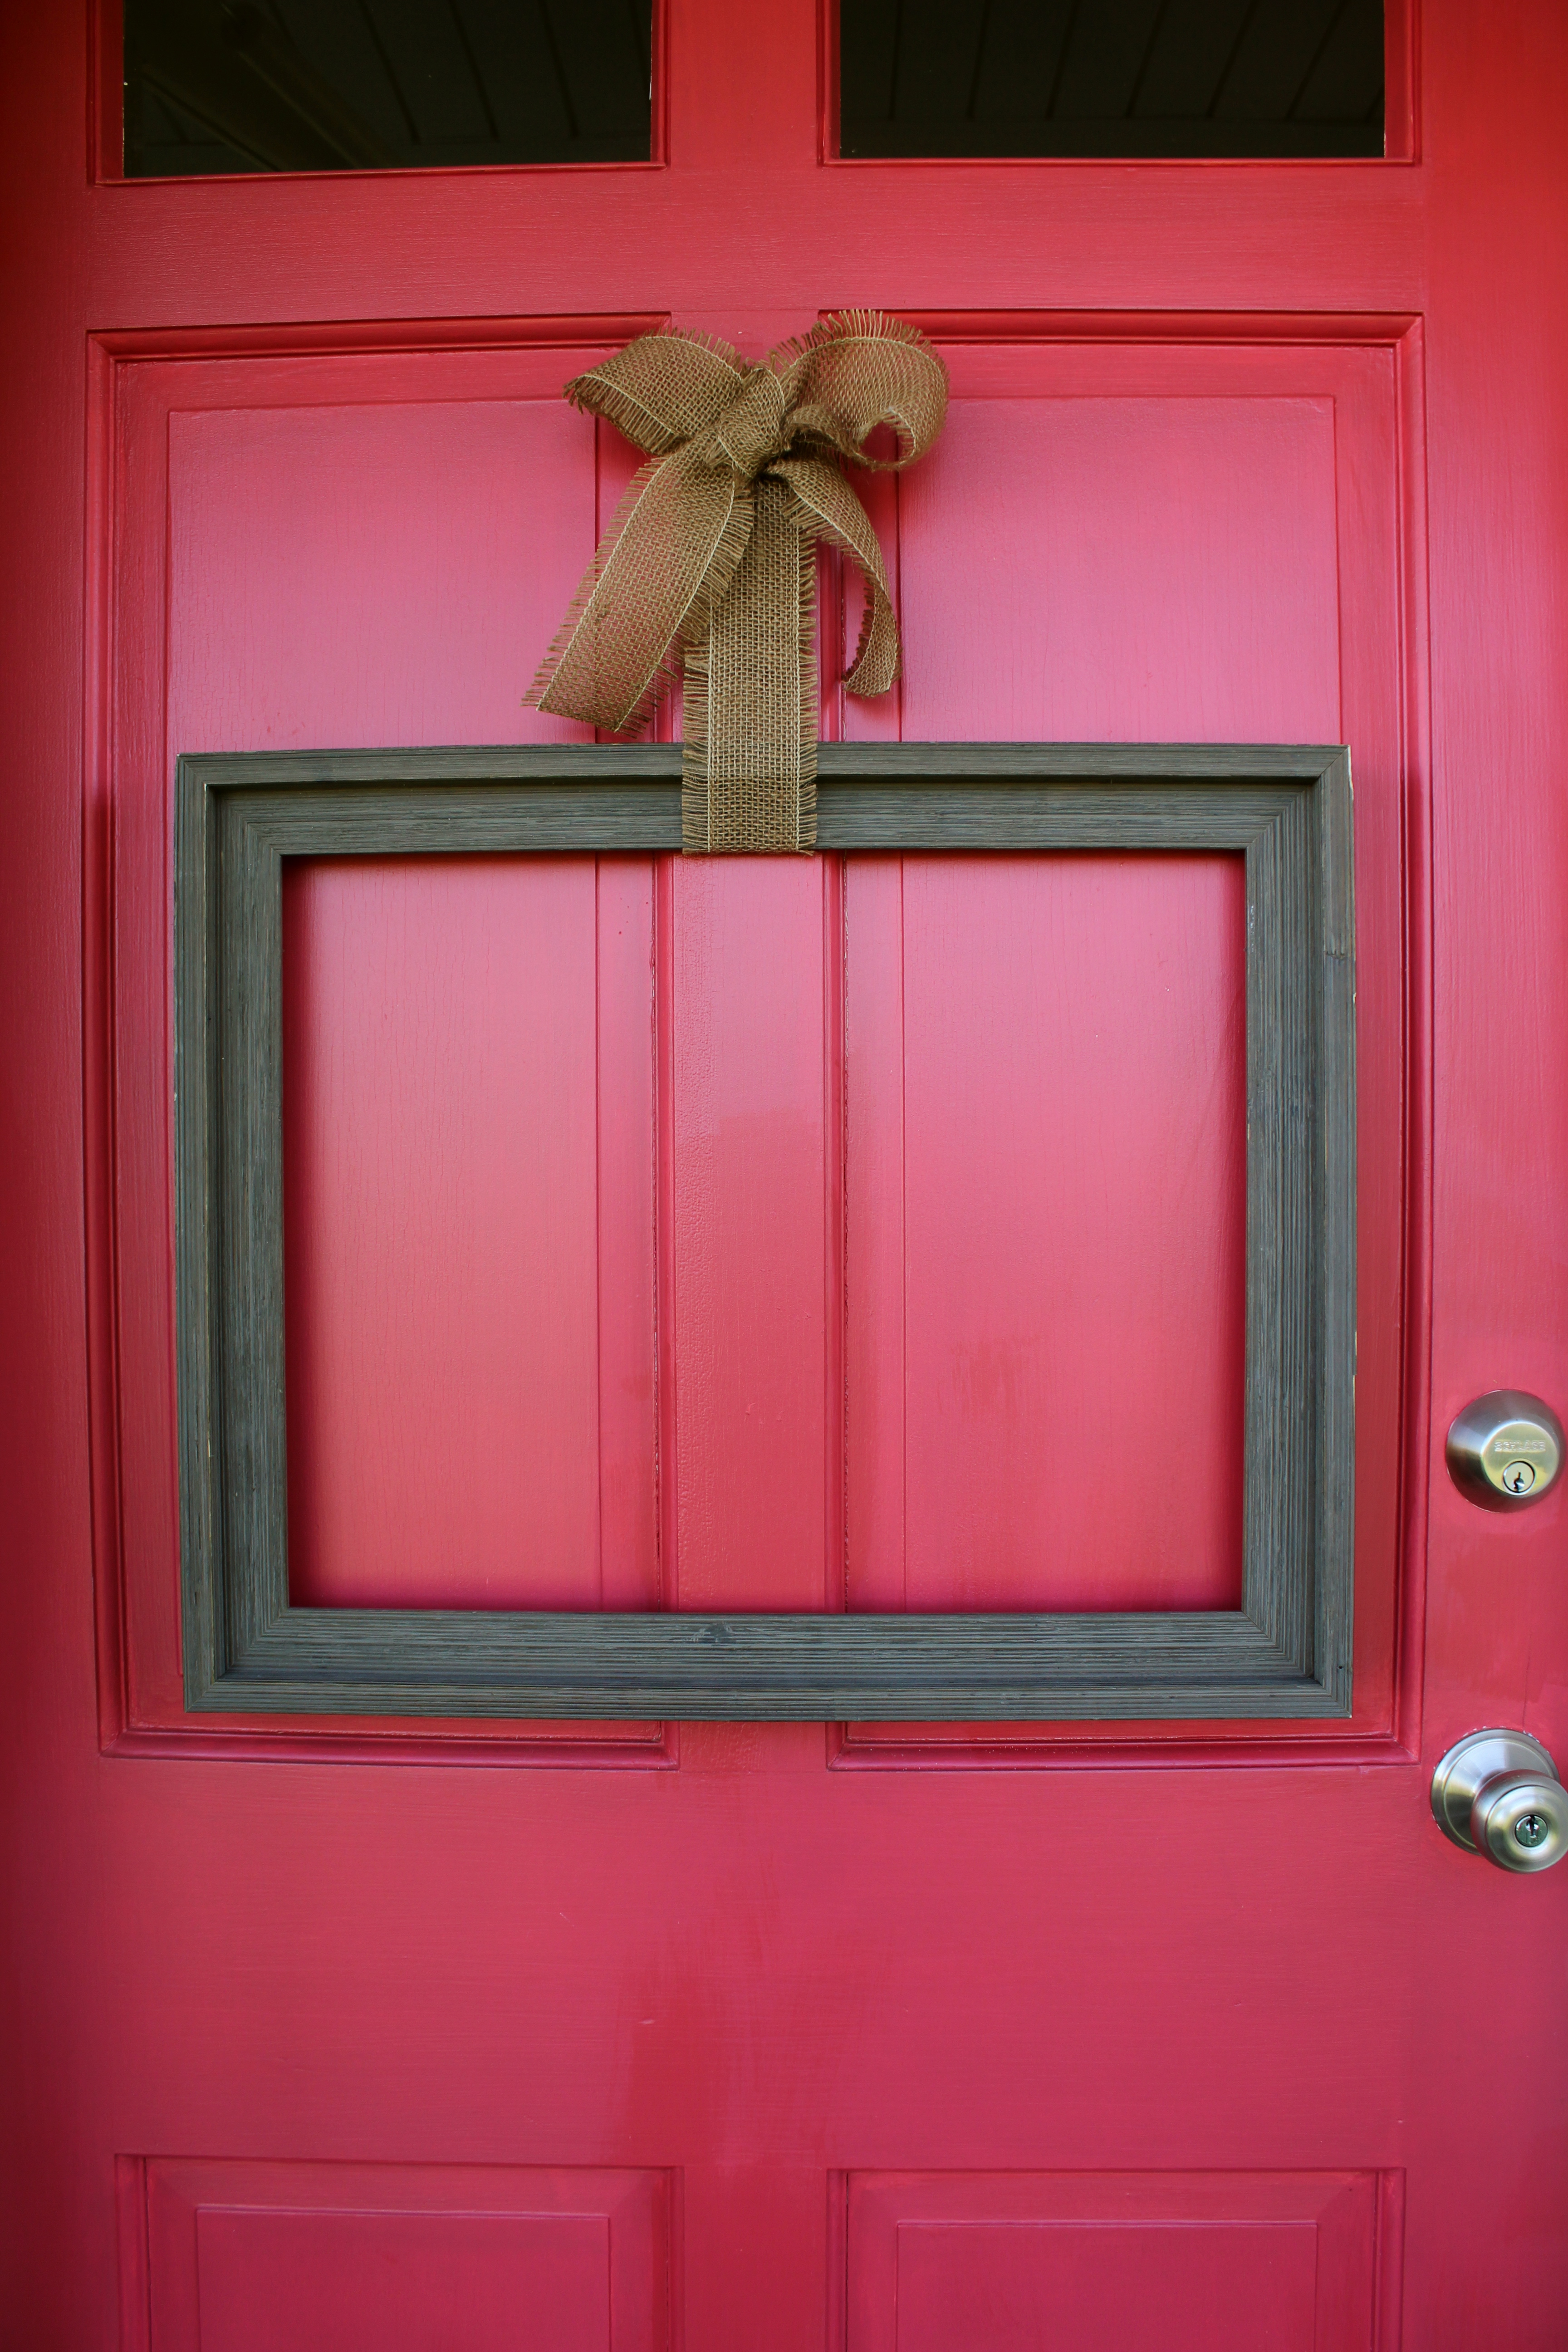
In addition to the pumpkins on our front porch, I hung an open frame I had in storage with some jute ribbon. I really like how it turned out. It is simple and rustic and fall-y.
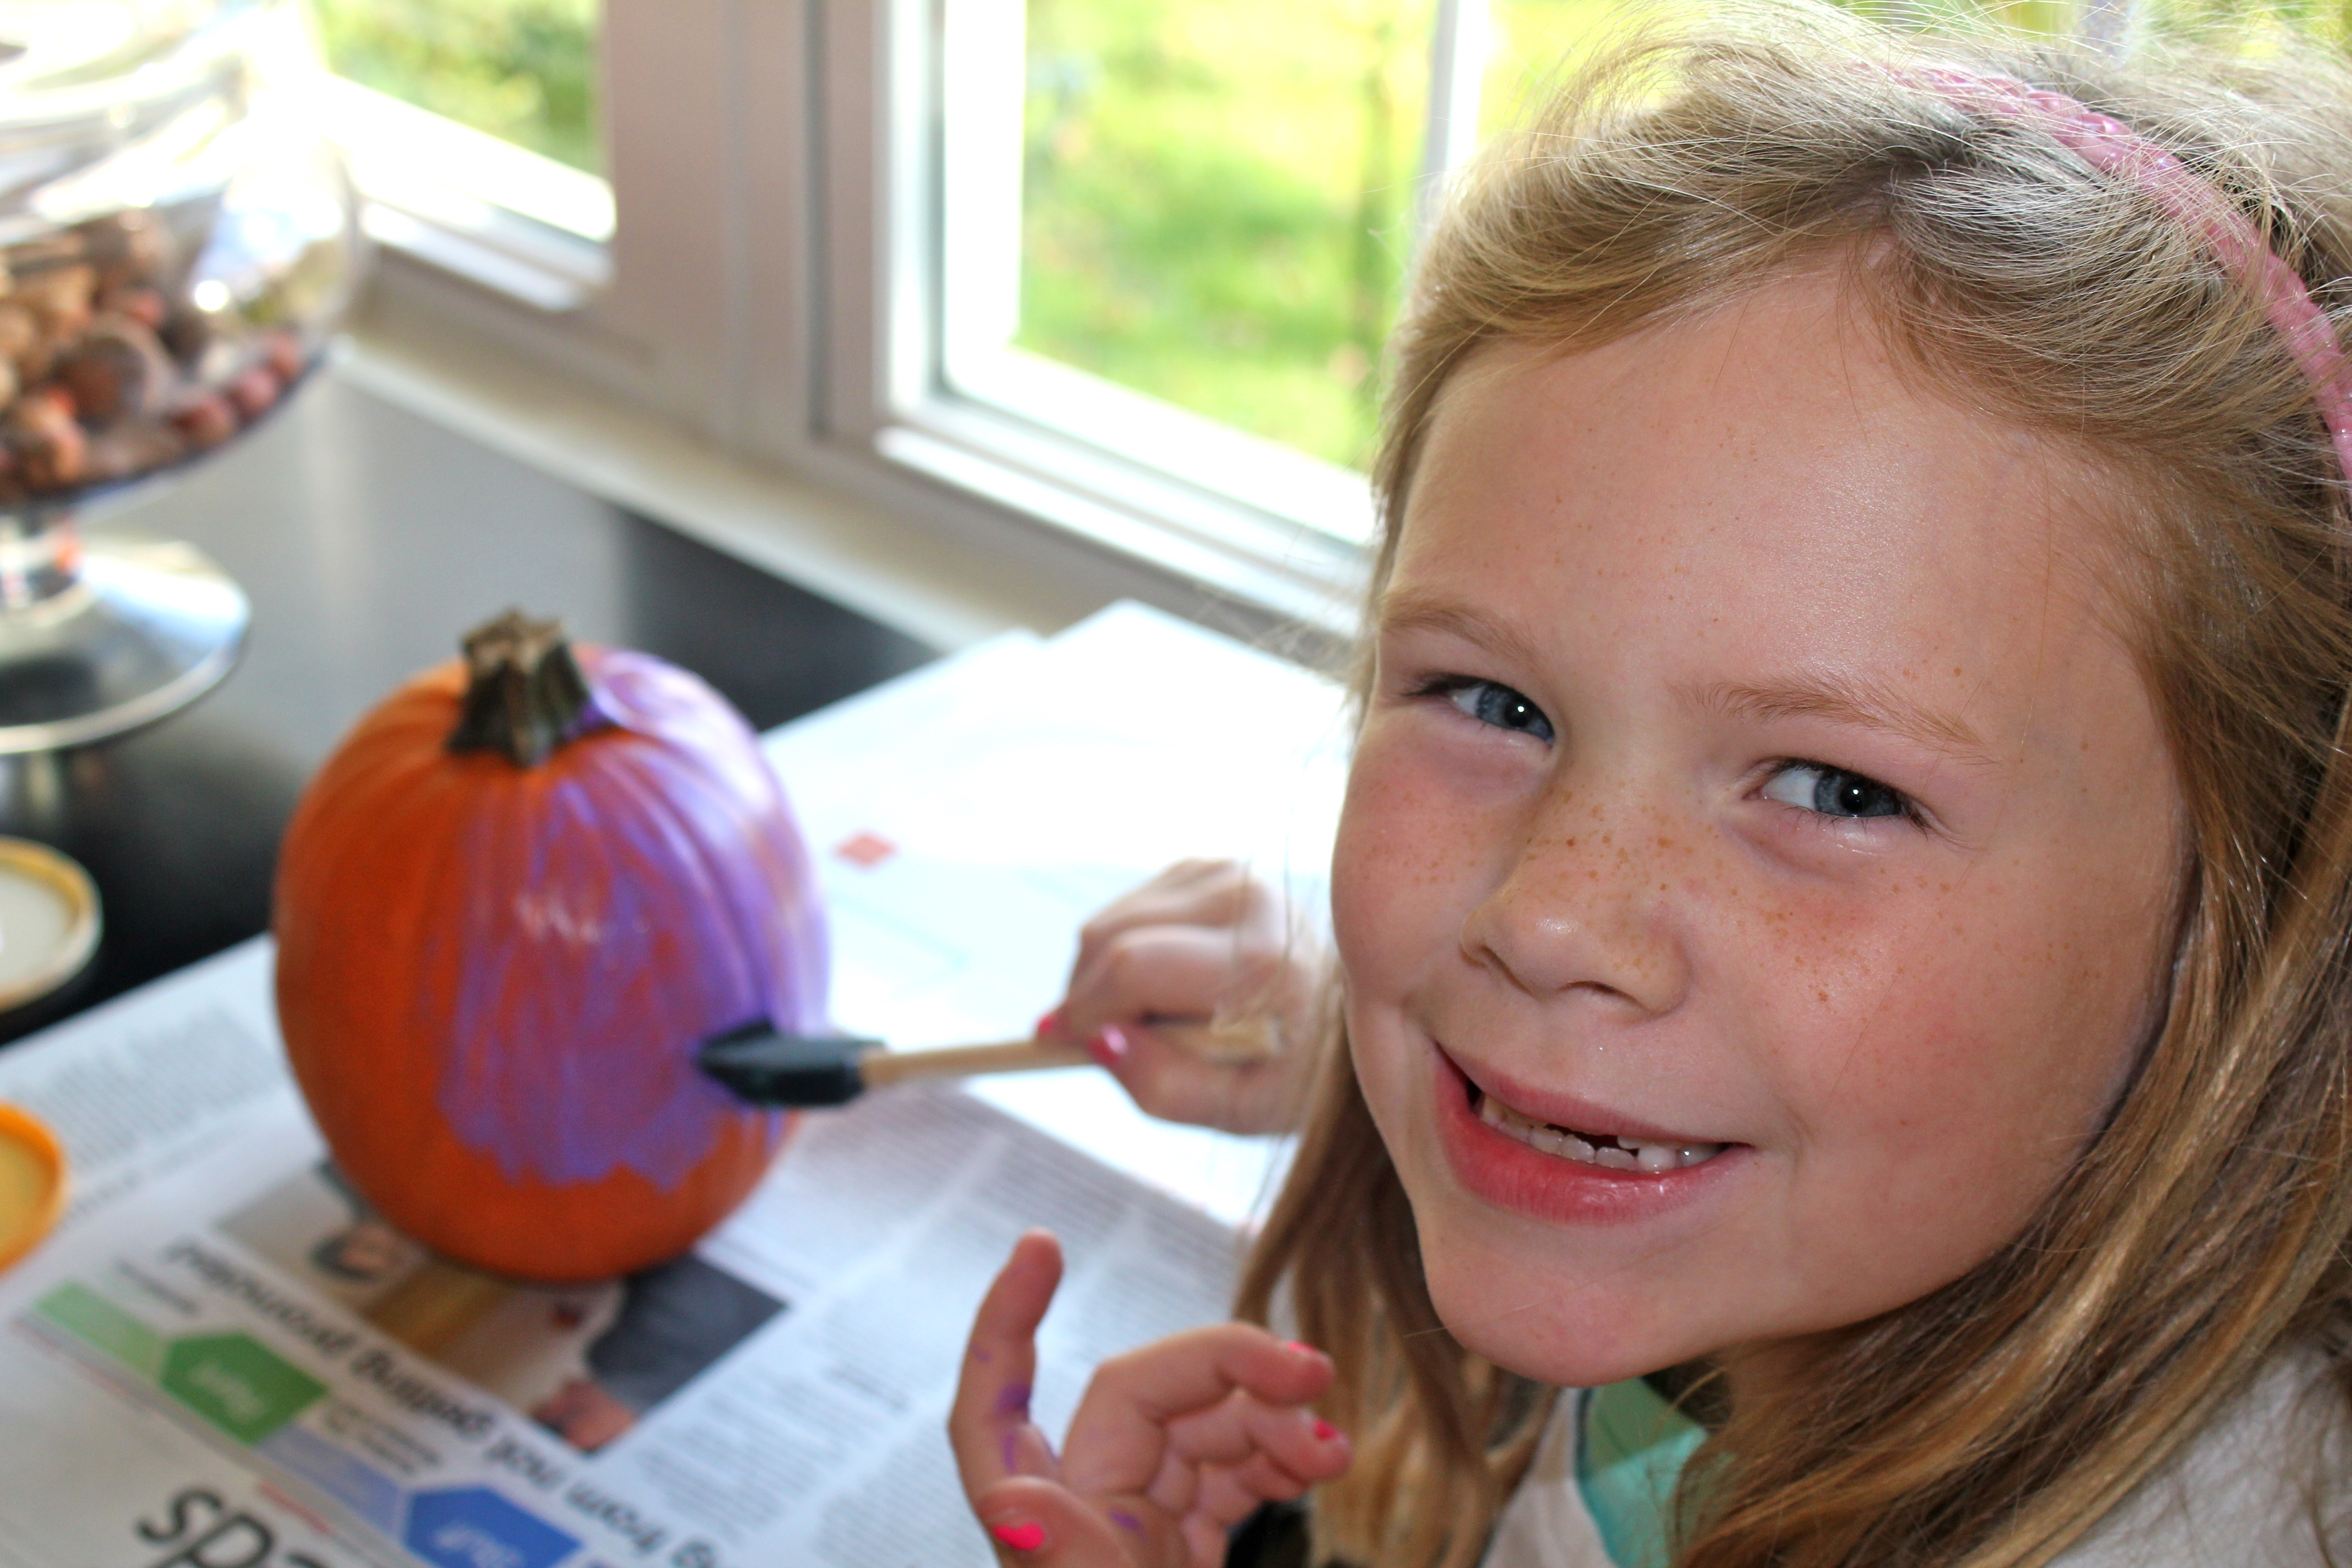
The kids wanted to paint pumpkins again this year so I let them go nuts in my craft paint stash.

We had purples…
…and metallics…

…and polka dots.

We celebrated my birthday this fall with swimming, shopping, homemade gifts…

…and this! These funny face photos capture our family more accurately than anything else. We are silly and weird and nutty and I wouldn’t trade a second of it for the world. My birthday left me feeling grateful, celebrated and optimistic for the future.

Our fall wouldn’t be complete without a trip to our local apple orchard. Without a doubt, it is always one of our very favorite family activities each year. There are various places to stop and take fun photos. Here is this year’s traditional shot…

And last years. What a difference a year makes. My babies are no longer babies. Hold me.

We spend a fair amount of time riding various vehicles at the orchard. Mini tractors this year…

…and last.

Beaut.two ditched the whole mini-tractor gig this year and went for a serious upgrade. Mini tractors? No way Jose.

We raced and became red-faced…this year…

…and last year too.

We took a dip in the corn pool…

…and took a corn cannonball for a spin…

Our adventure in the corn pool last year was a bit more subdued. And my children were still babies.

Not grown-up kids. Excuse me while I wail over here for a wee bit. Wahhhhhhh!

And…I’m back! We took in some serious slide action.
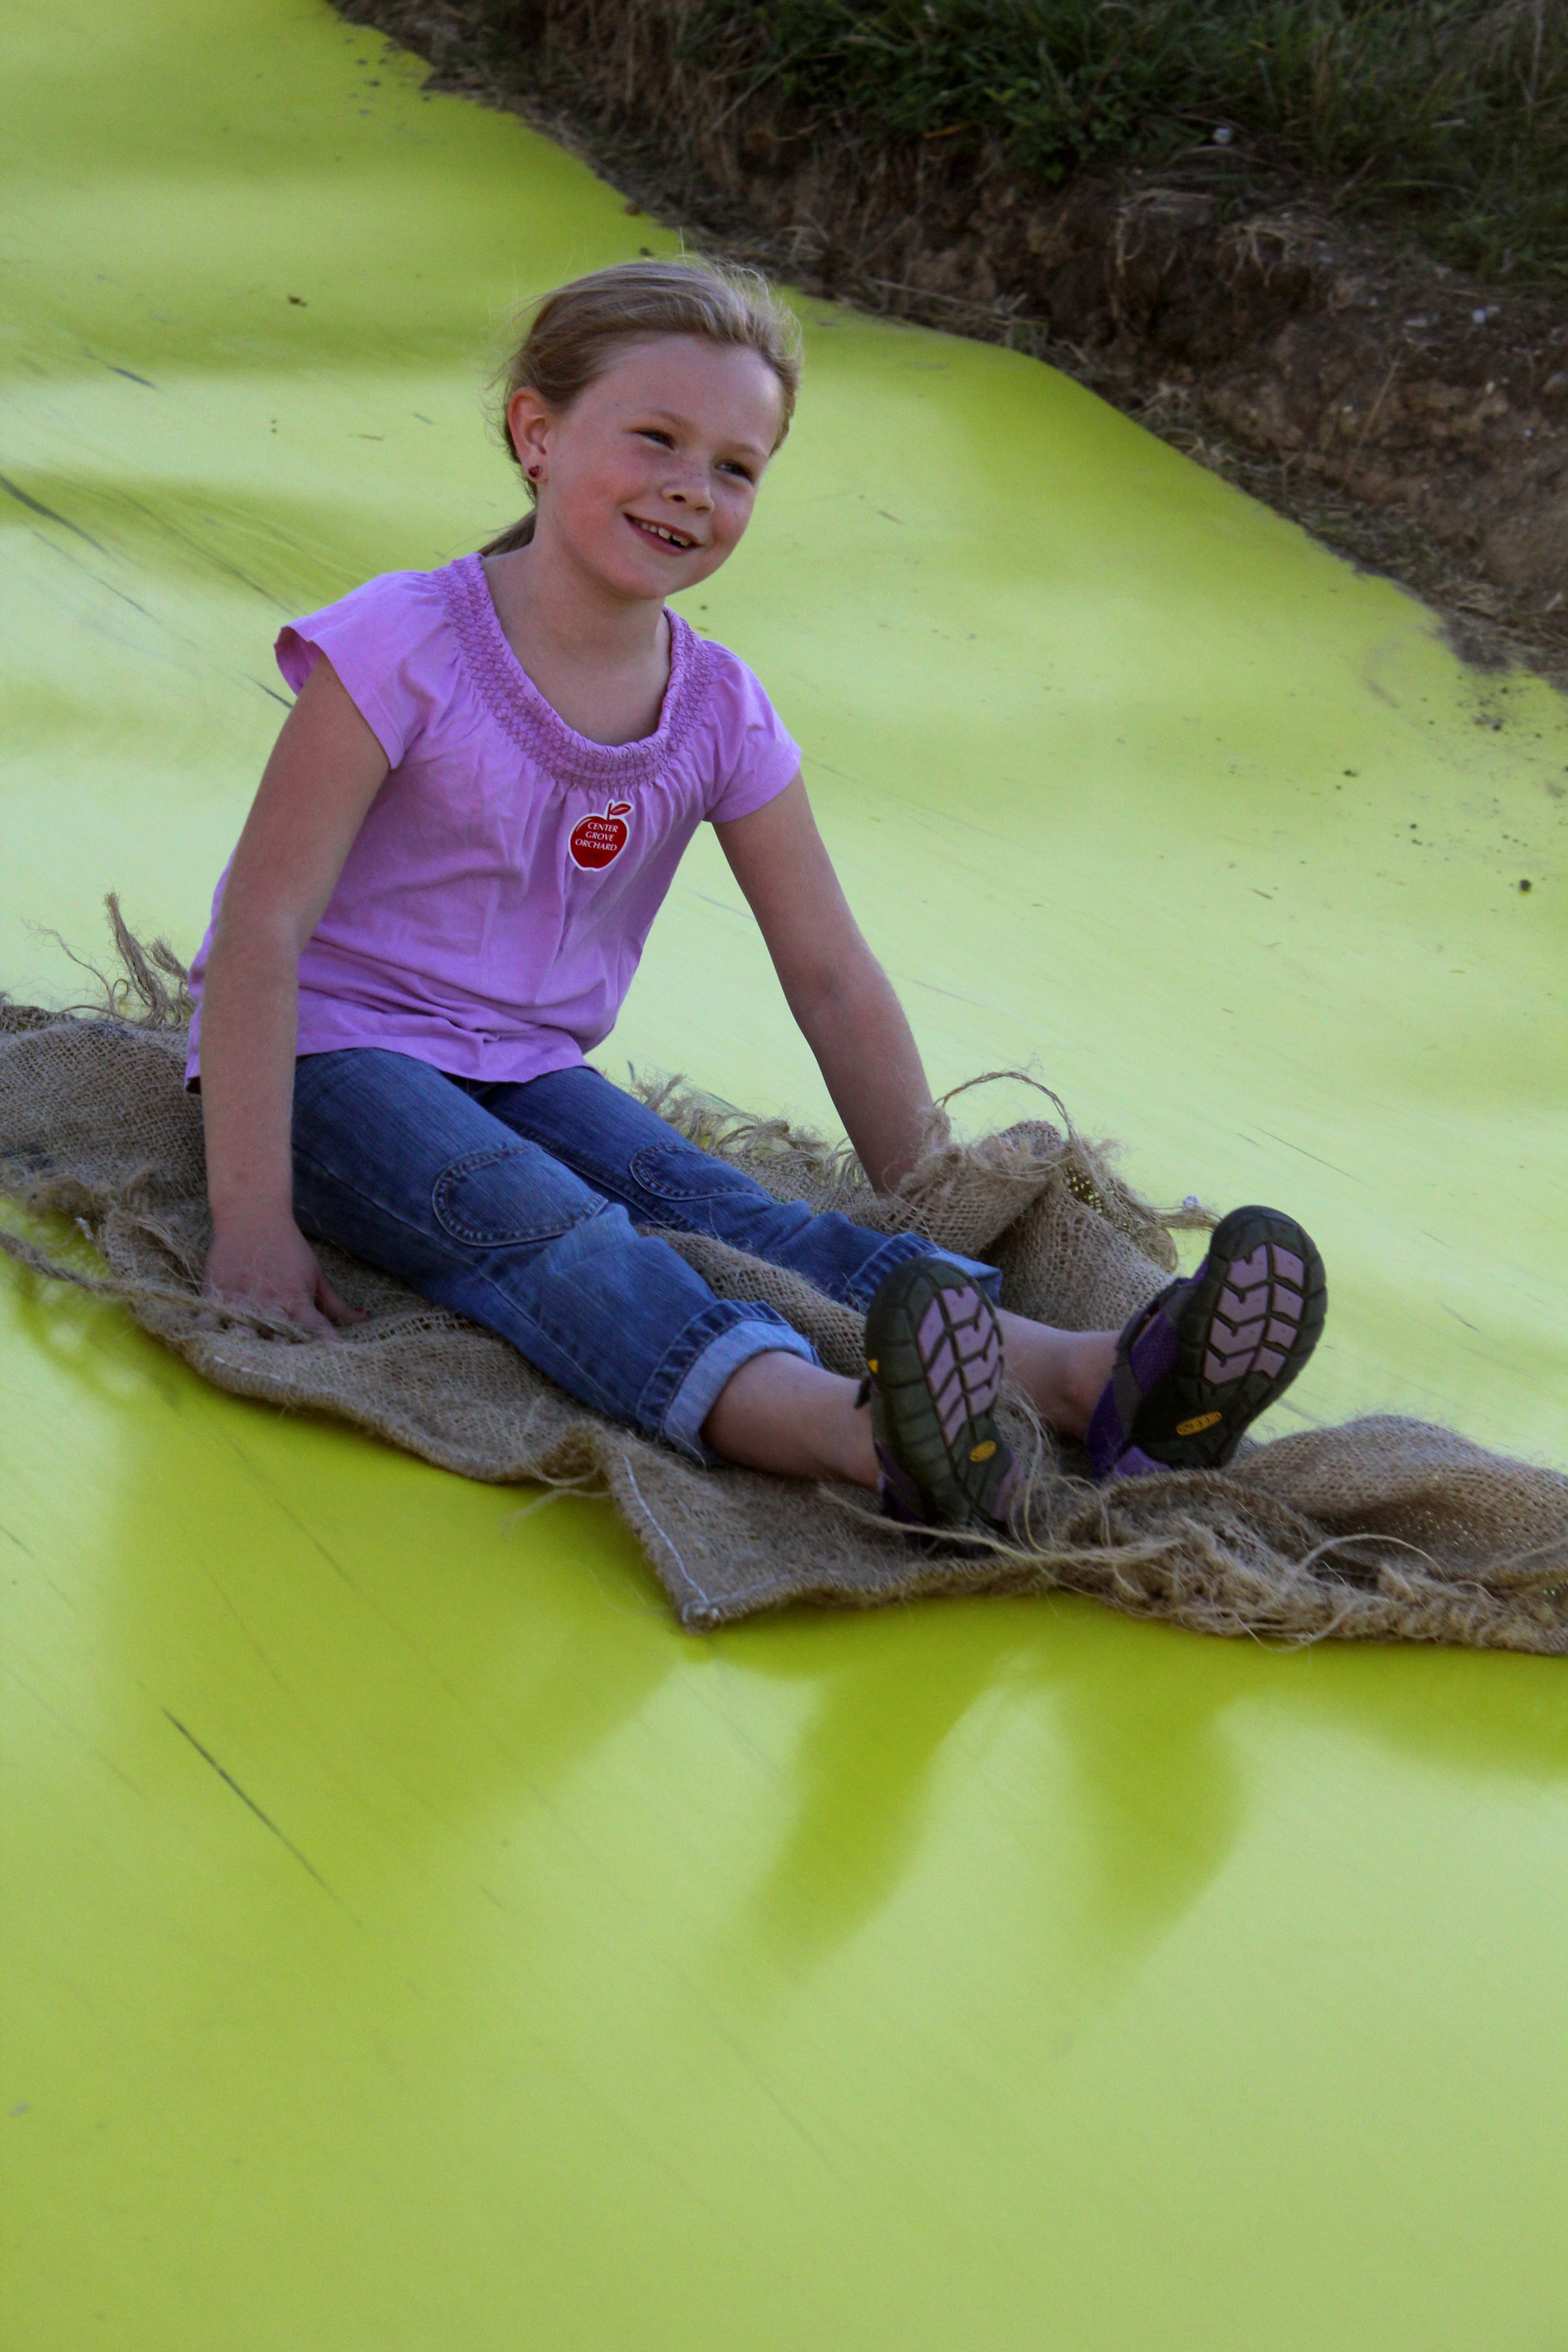
And owned that Super Slide like it was our job…or at the very least a very lucrative side gig.
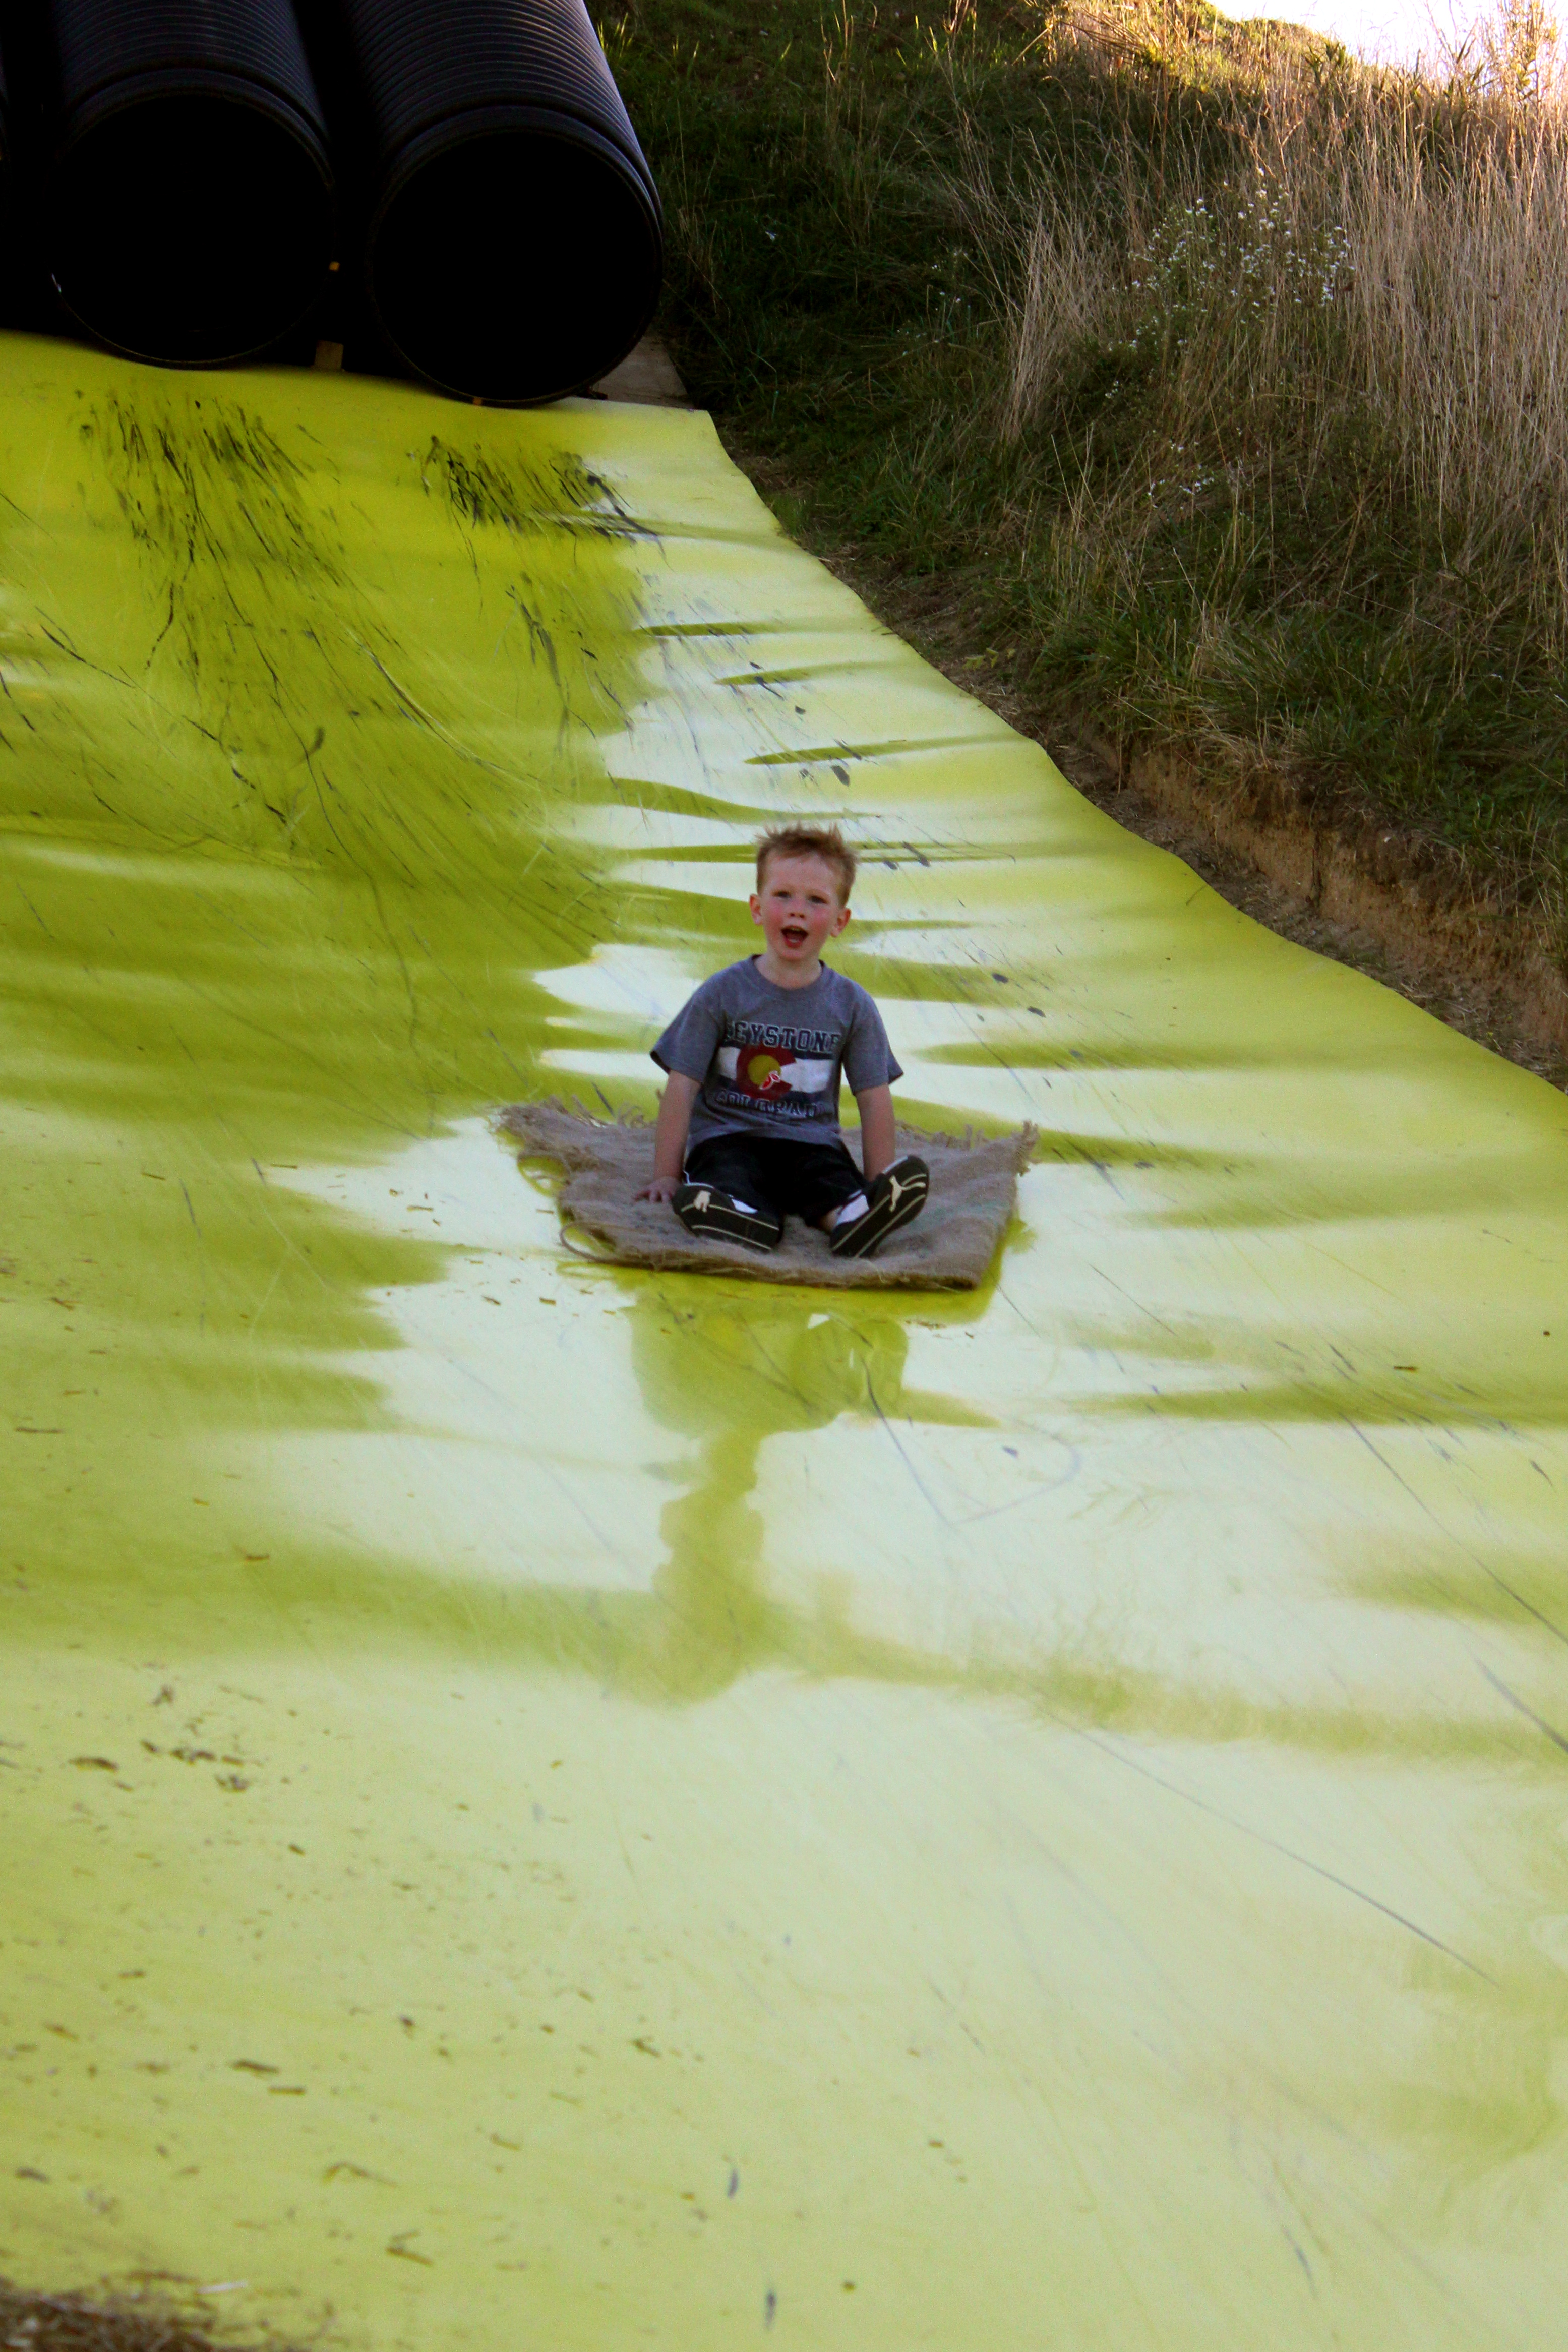
In my humble opinion, I think the slide last year was way more fun than the new one they installed this year.

The individual lanes made it easier (and safer) to race and you didn’t have to worry about crashing into others. You could just be free to slide, as carefree as can be.

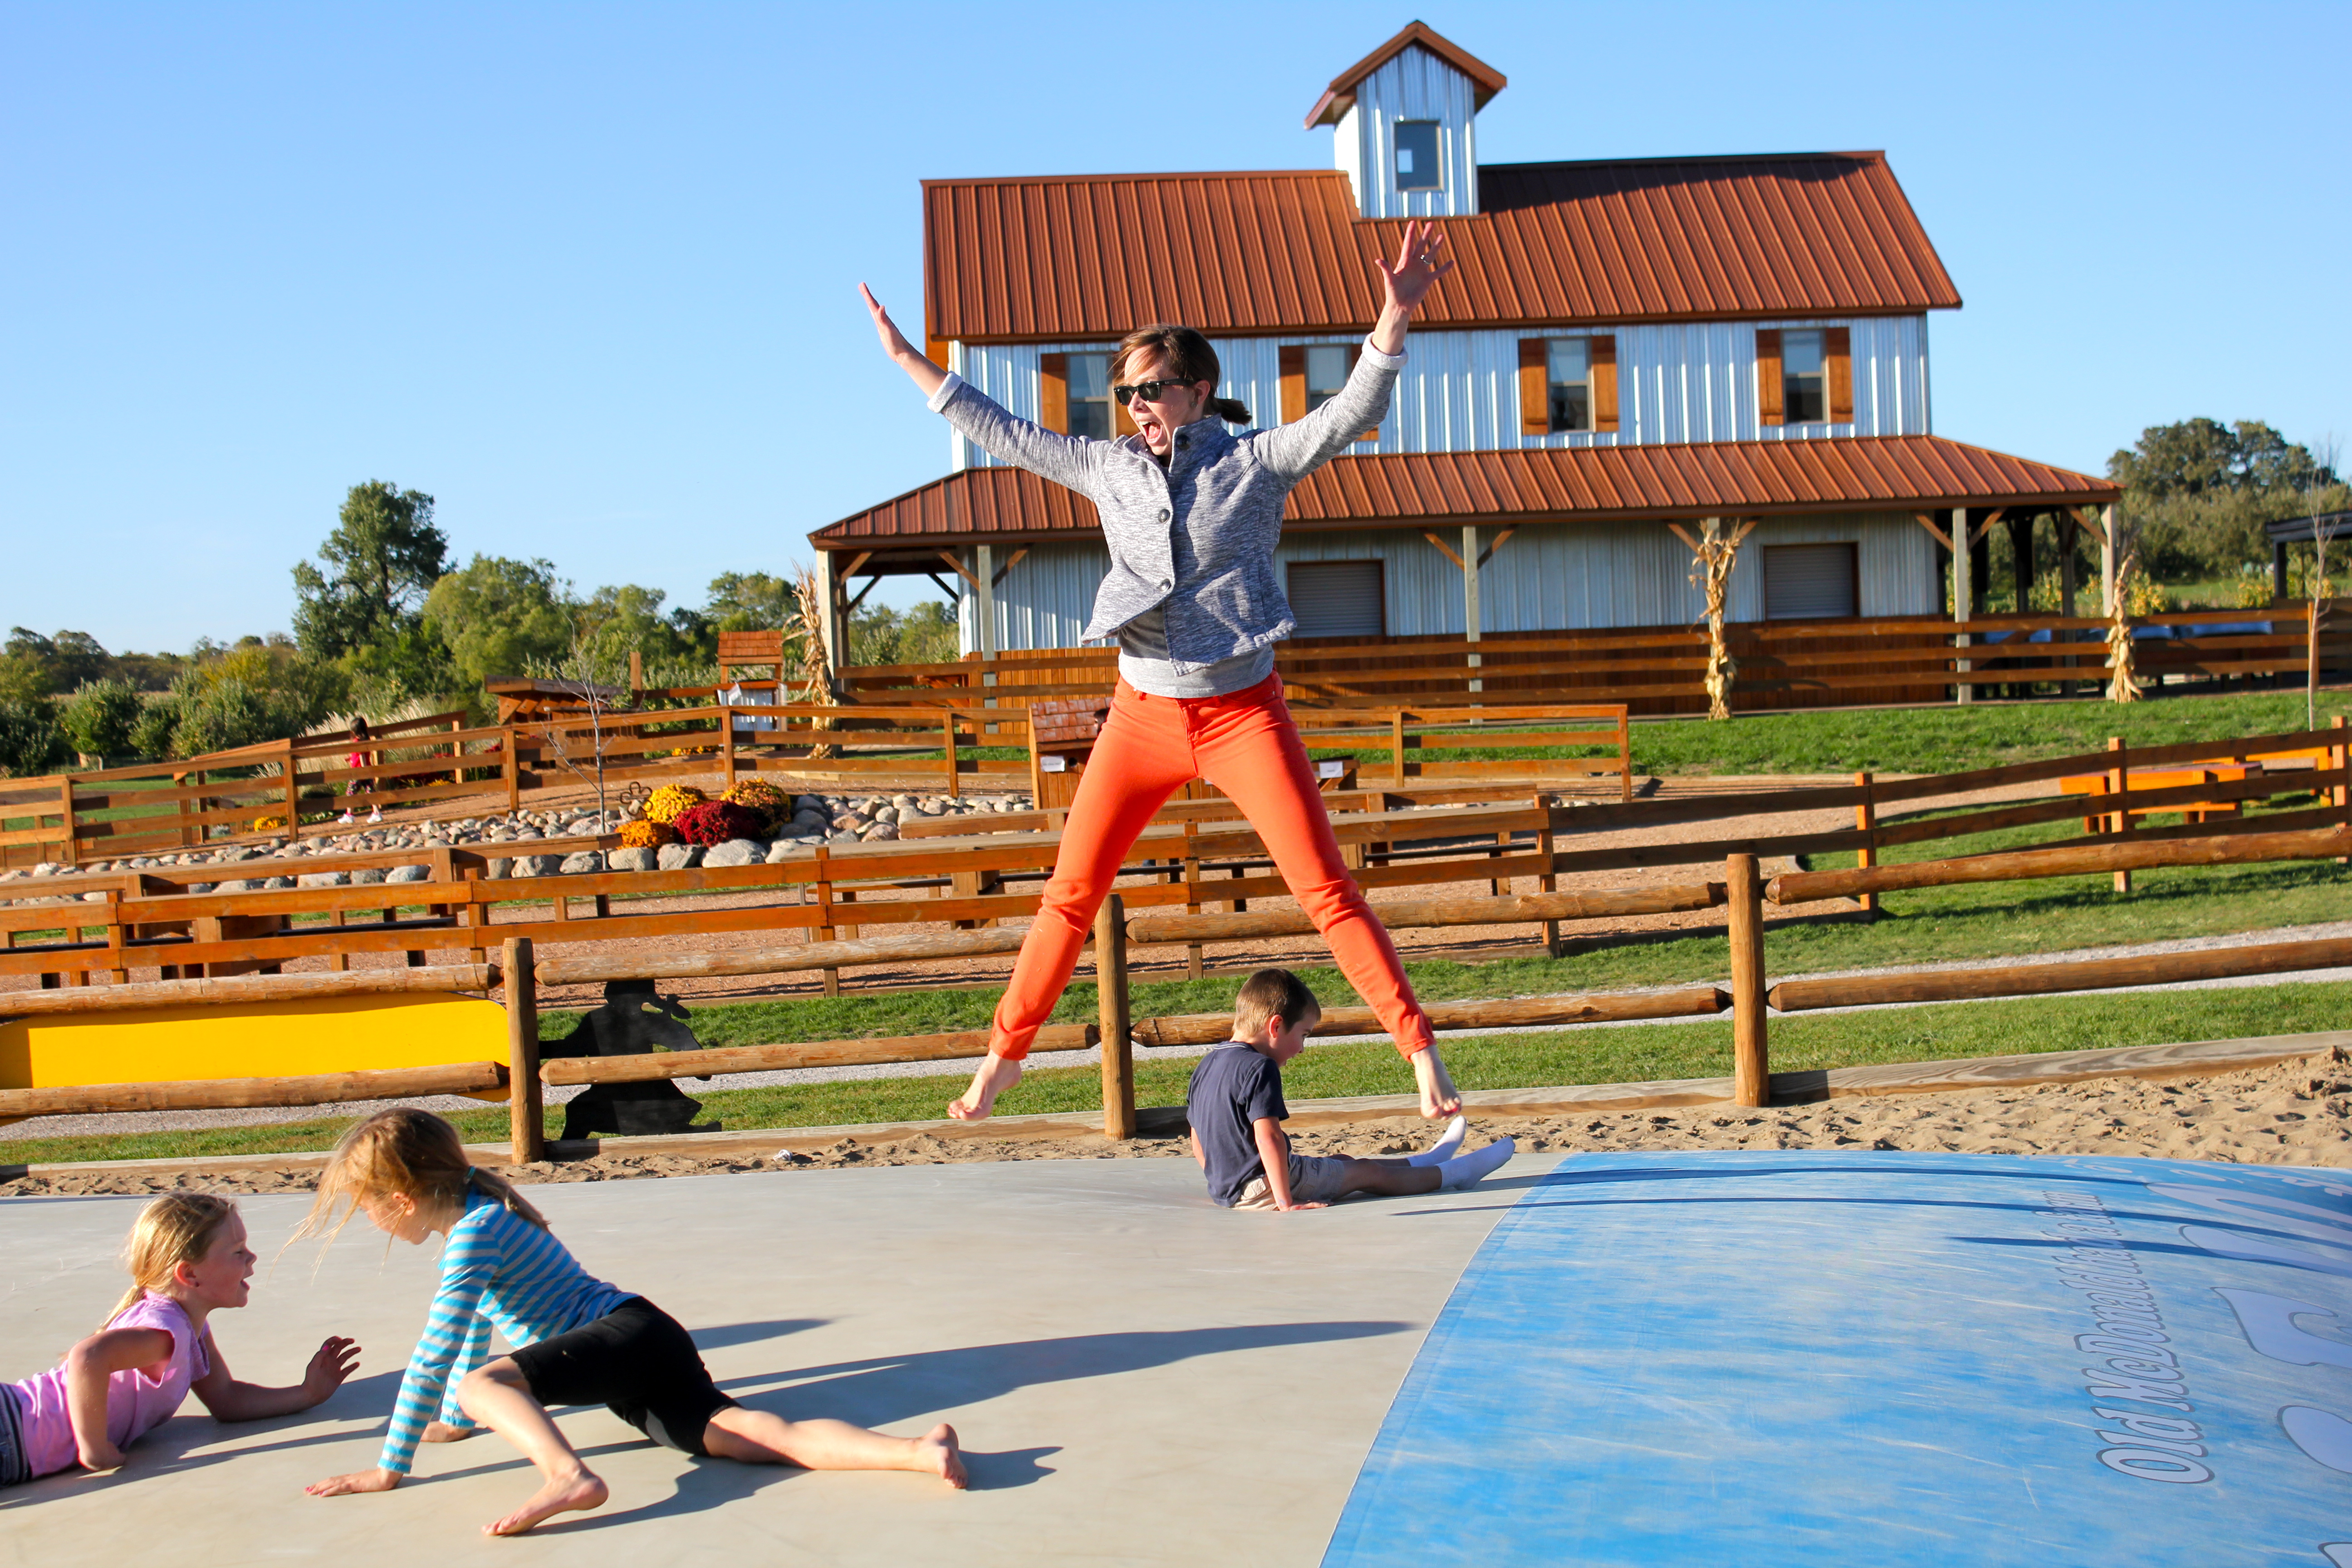
Oh! And who can forget the giant jumping pillow?

I was sore for 2.13 days after this little stunt. Don’t judge me. Jumping on that pillow is exhilarating and exhausting and made my legs and hips and calves really sore. Reference aforementioned recent birthday for reason why.
Beau on the giant pillow last year. He destroyed me on the jump height front but do I win on the style point front? After all, I am wearing bright orange pants!

Our family (minus Beau since he’s taking the picture) picture at CGO last year.

And this year…P.S. Please ignore my windblown mass of bangs. I was not having a stellar hair day. Thanks for your help.

We did some new things this year…like going to the orchard with our best friends.

Oh…and racing inflated zebras.

We also experienced the large corn maze…
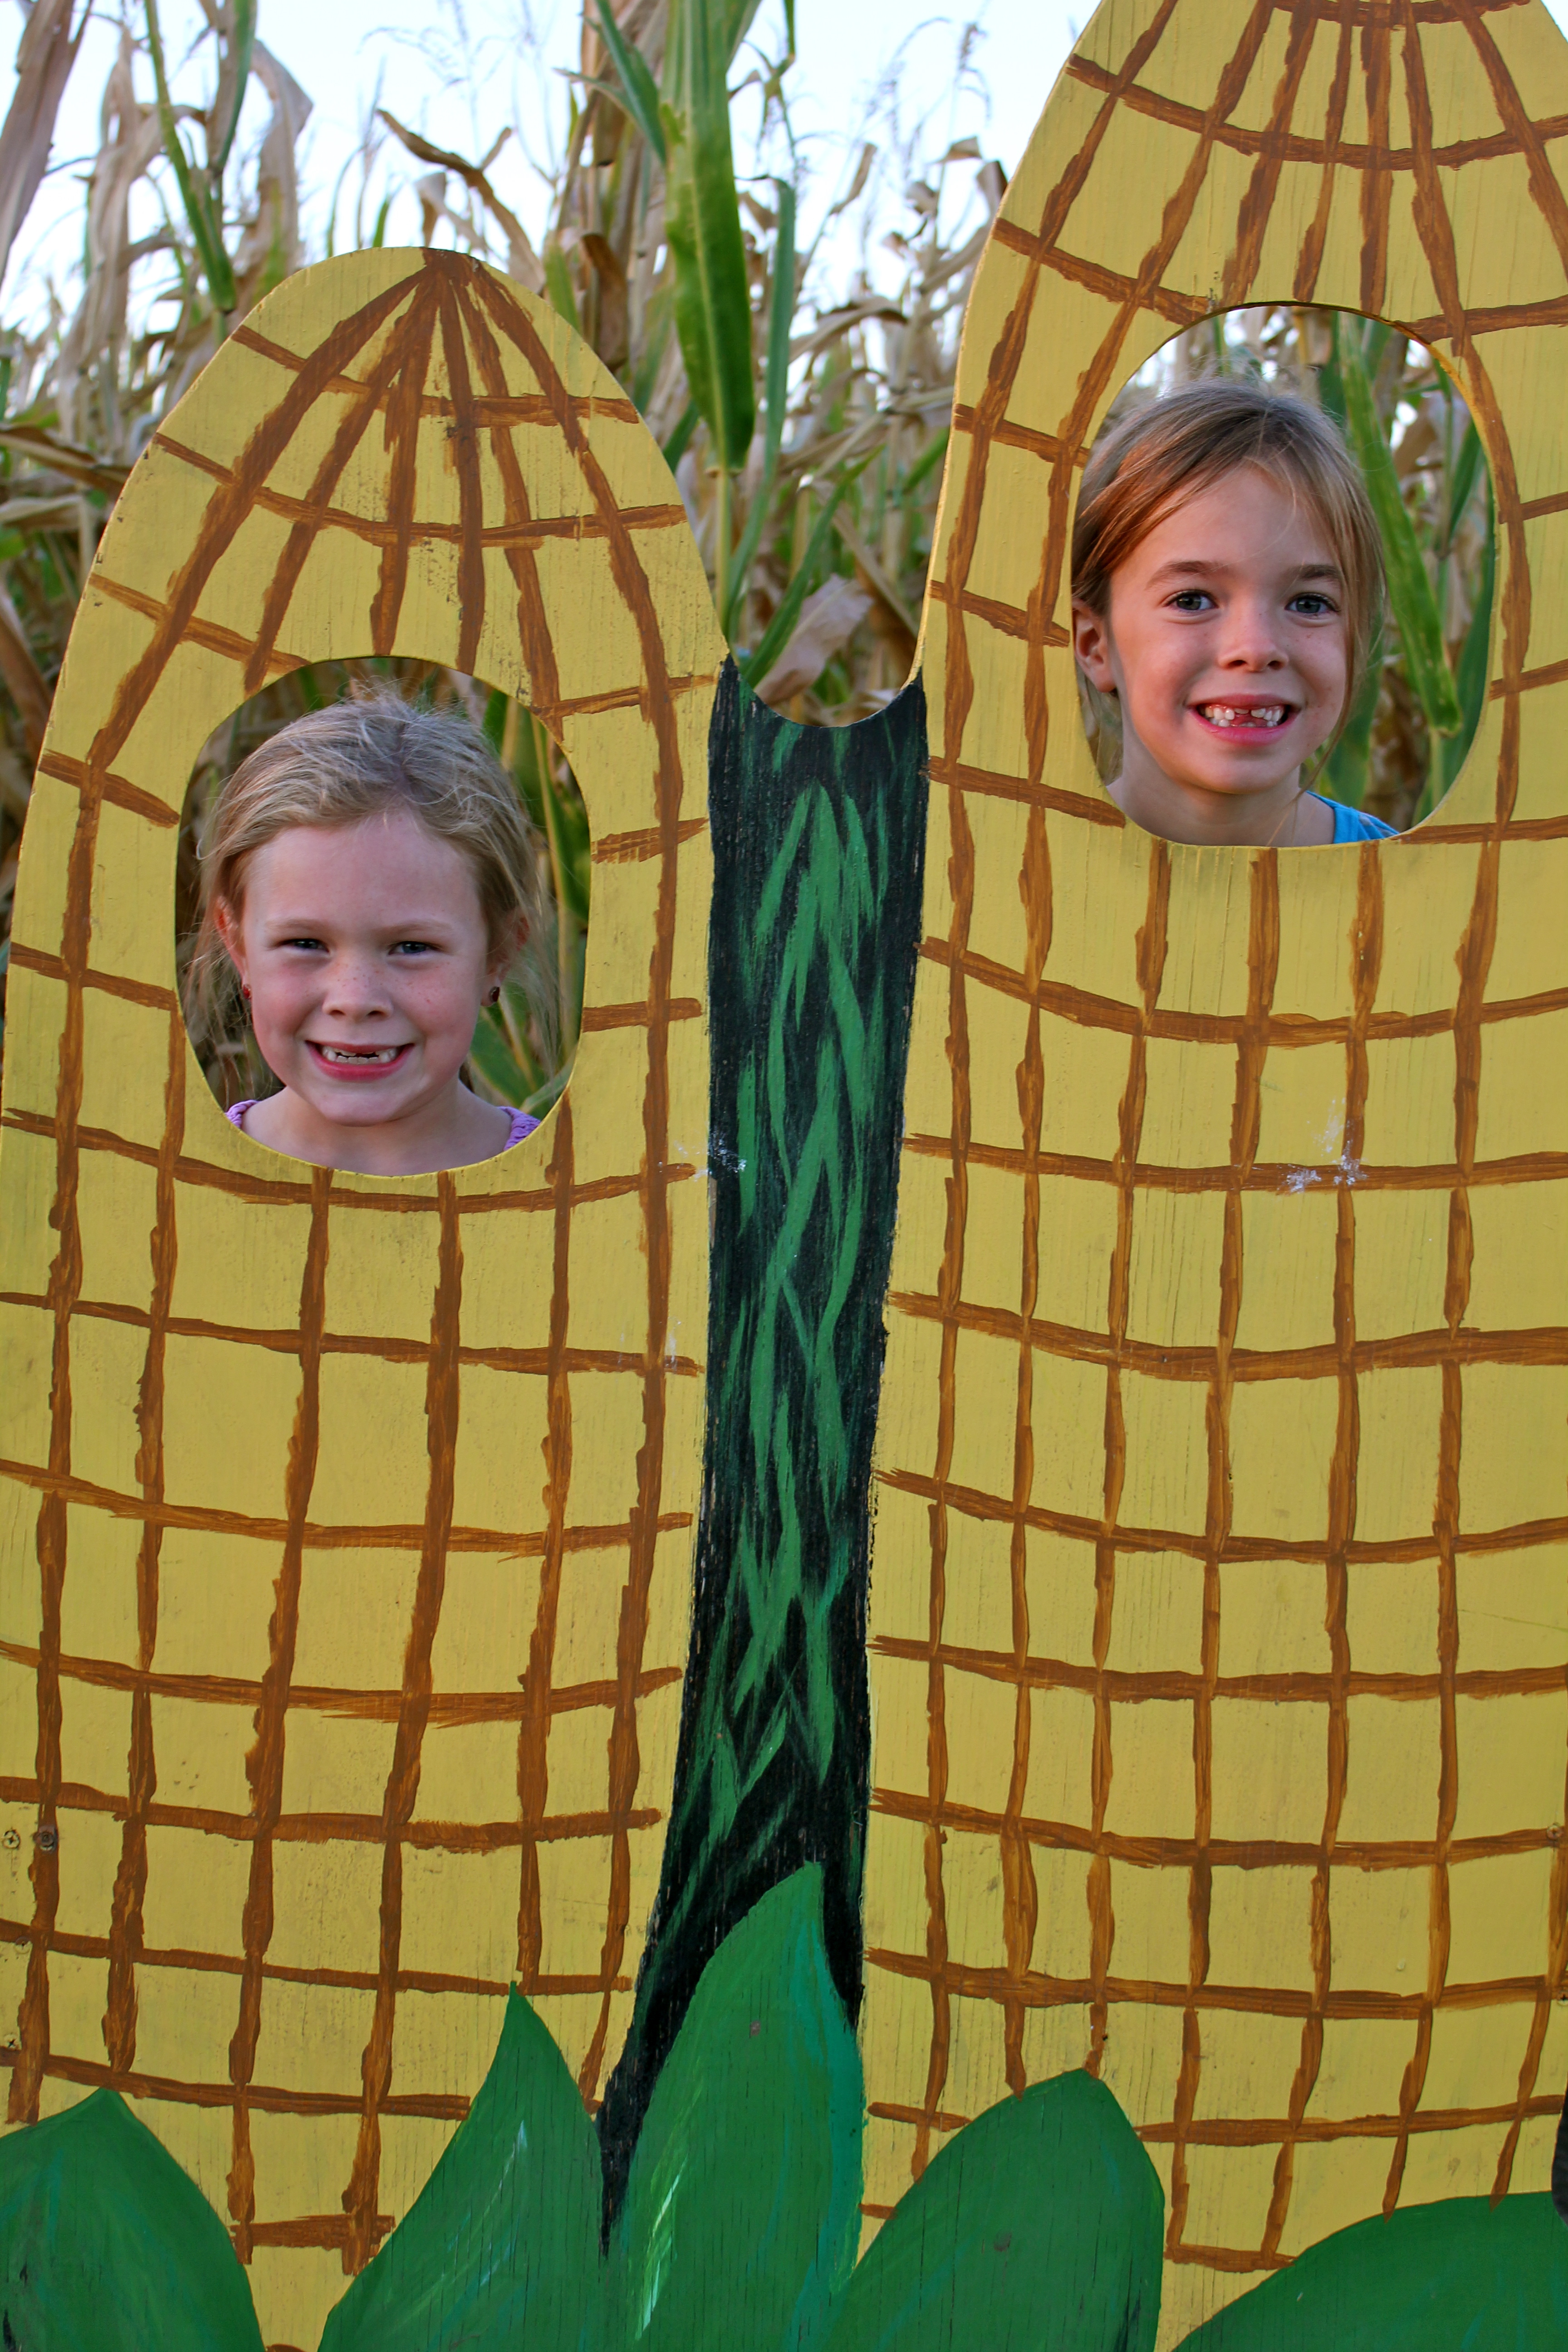
…and had some moments of slight panic as the sun was setting and we were letting two four-year olds lead us. Is it just me or does everything in a corn maze look the same?

We also took a hayride trip…

…and experienced the Alice in Wonderland exhibit.

But can anything really top being lassoed? I didn’t think so either.

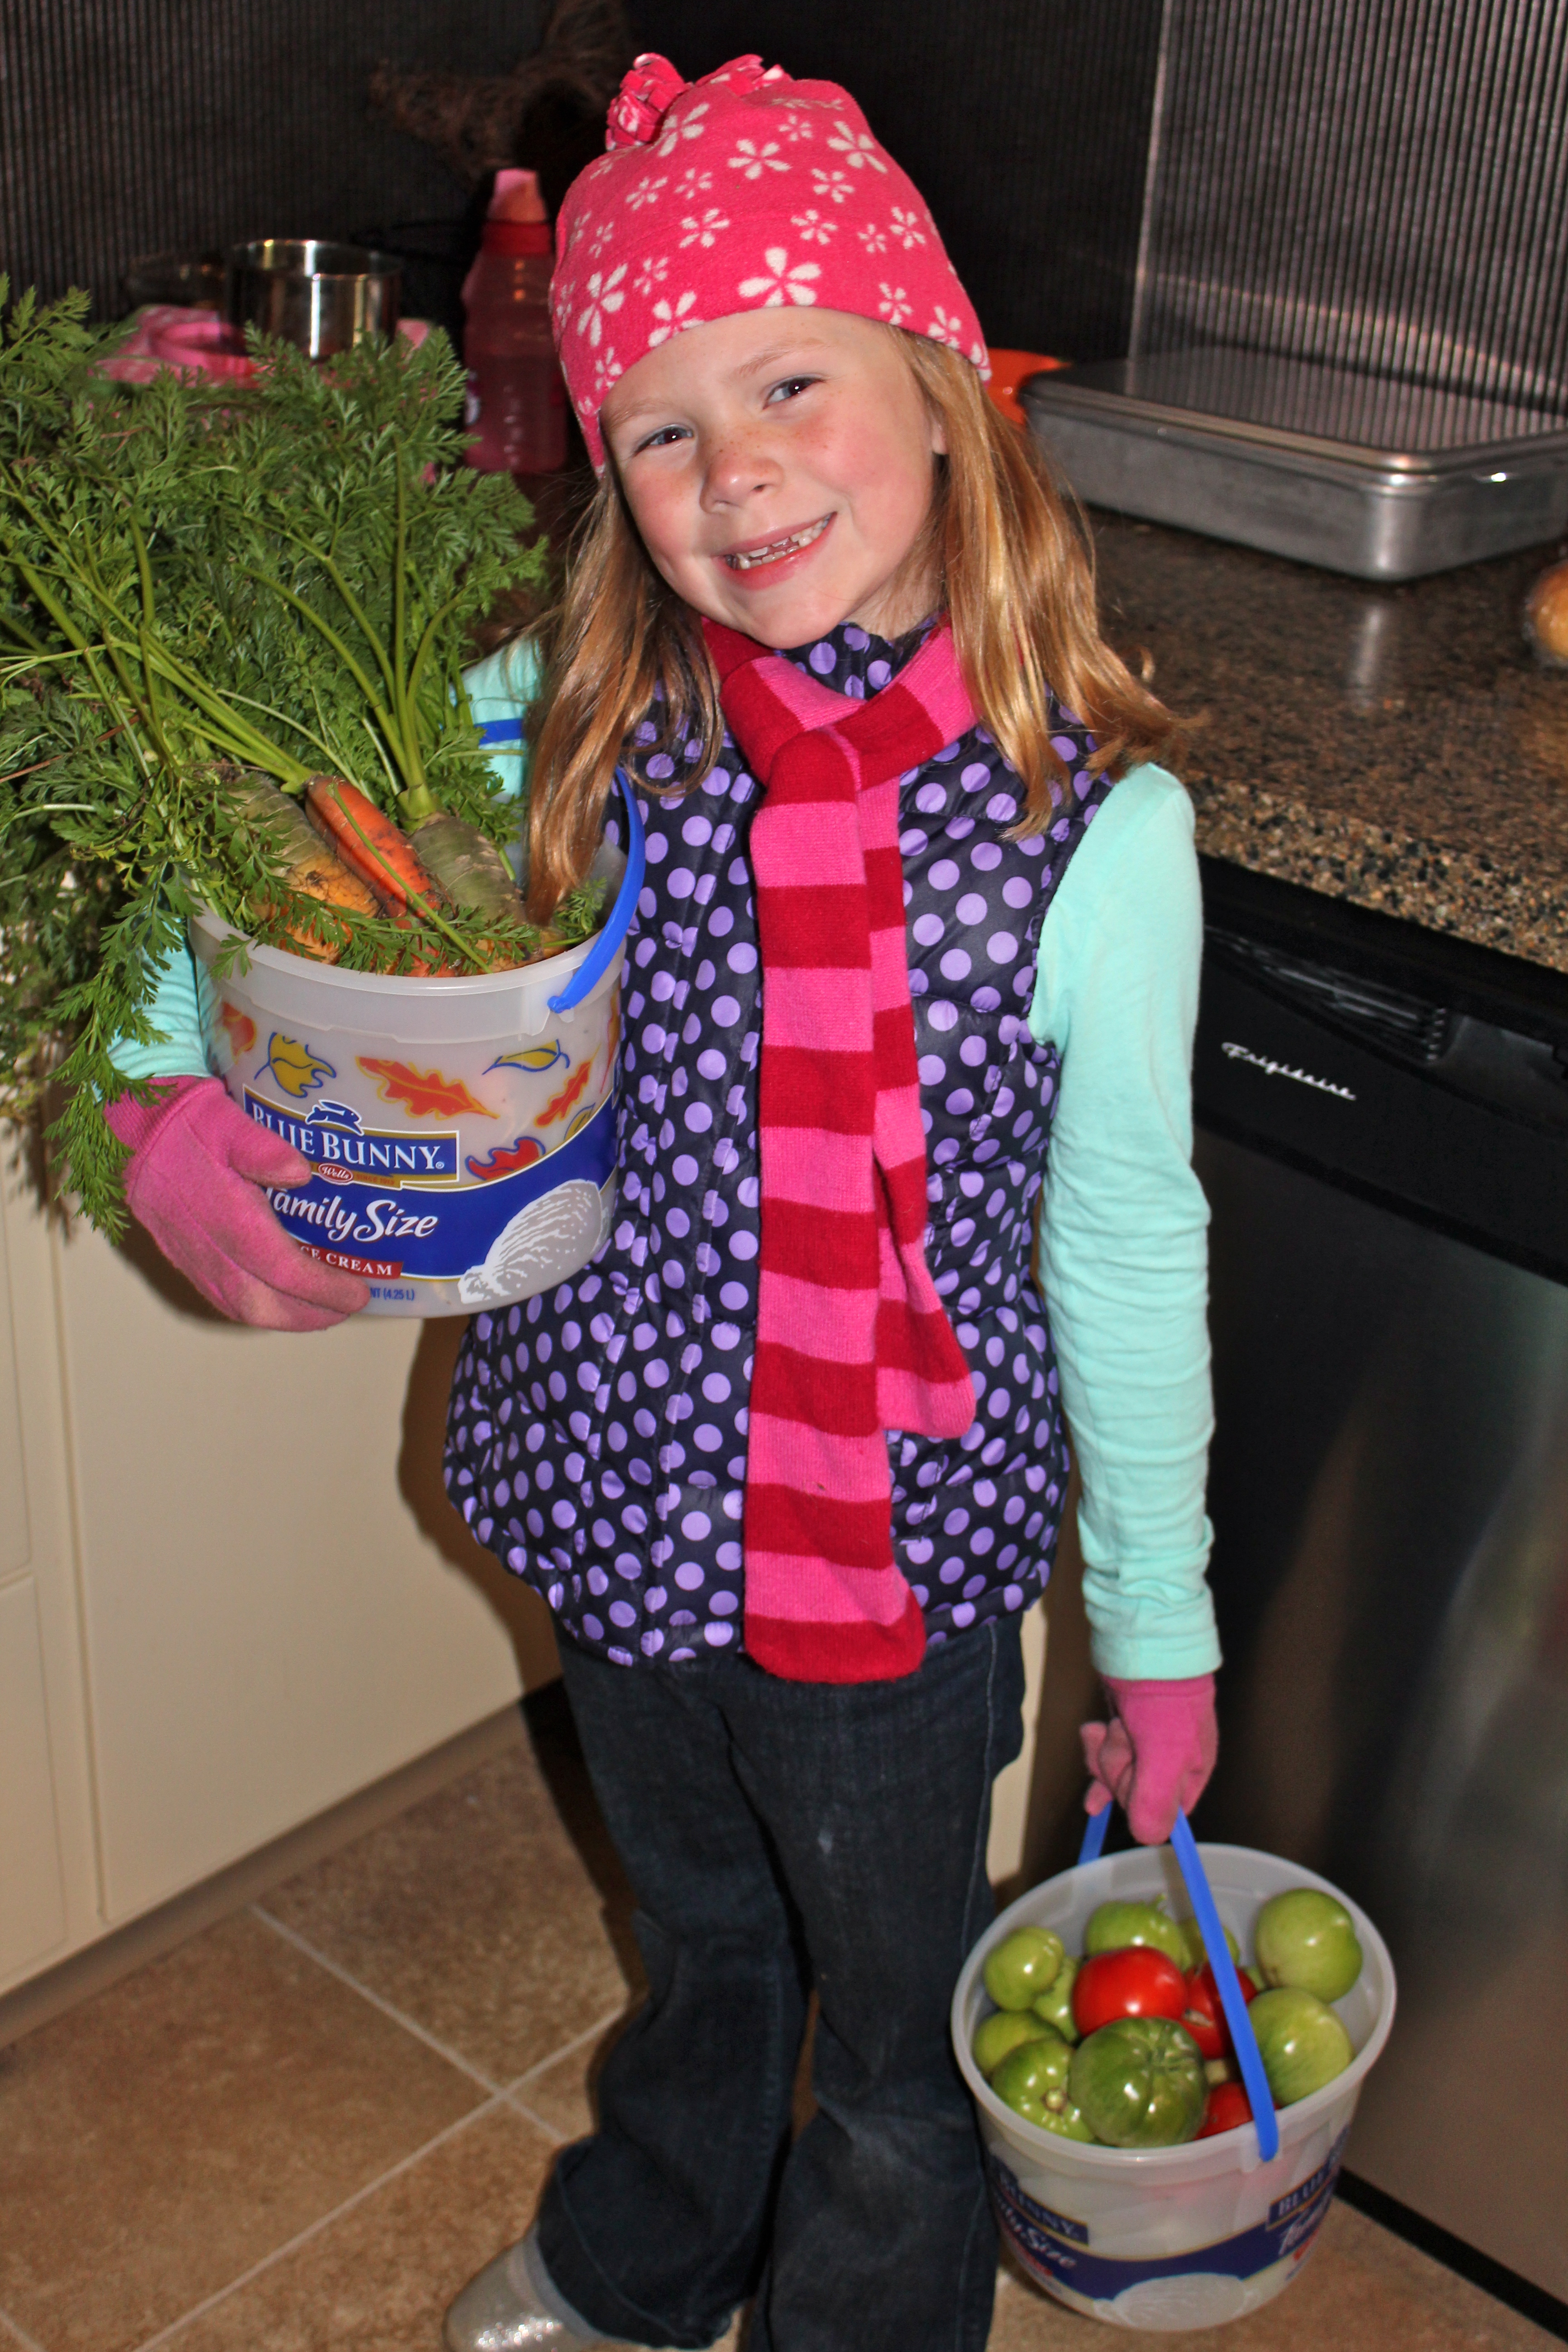
This fall we also put our garden to rest and rescued our last tomato and carrot friends before the first frost hit.
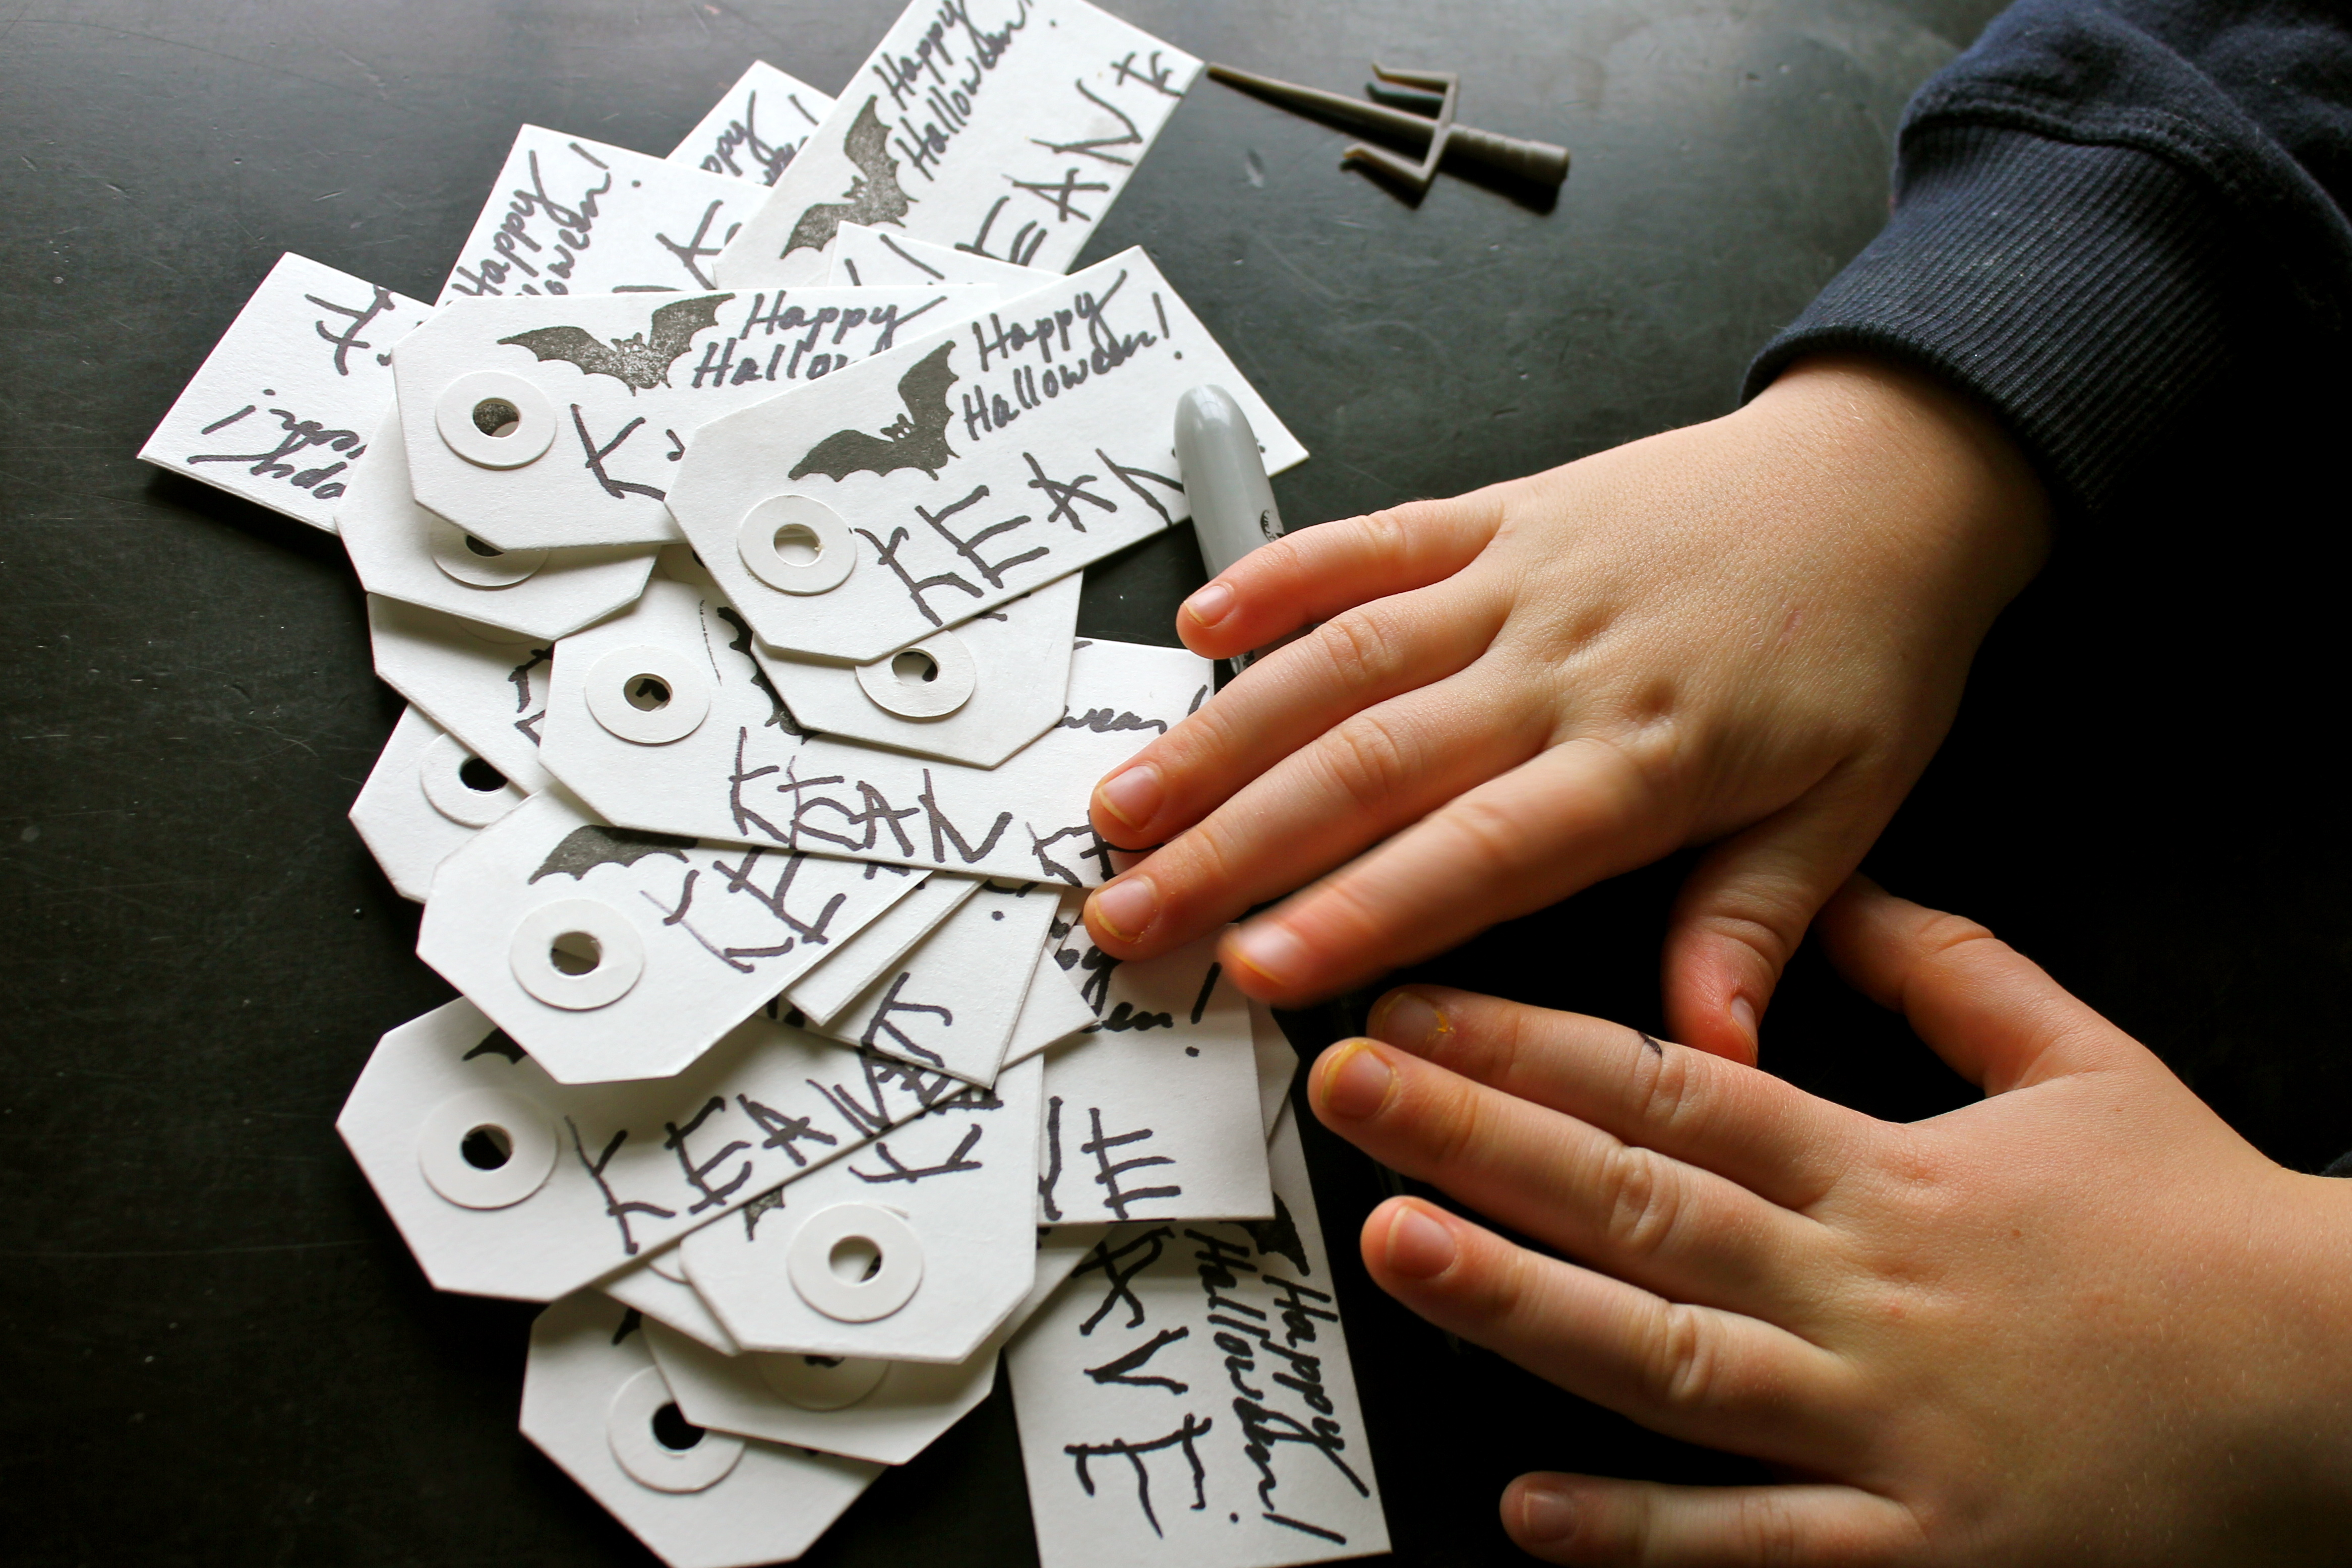
We made treats for our school friends since we don’t get any trick-or-treaters out this way.

And worked our fingers to the bone signing all the tags.
We celebrated Halloween with grace and finery…

…and awesomeness and weaponry!

All and all…we had a great fall!
Stacey
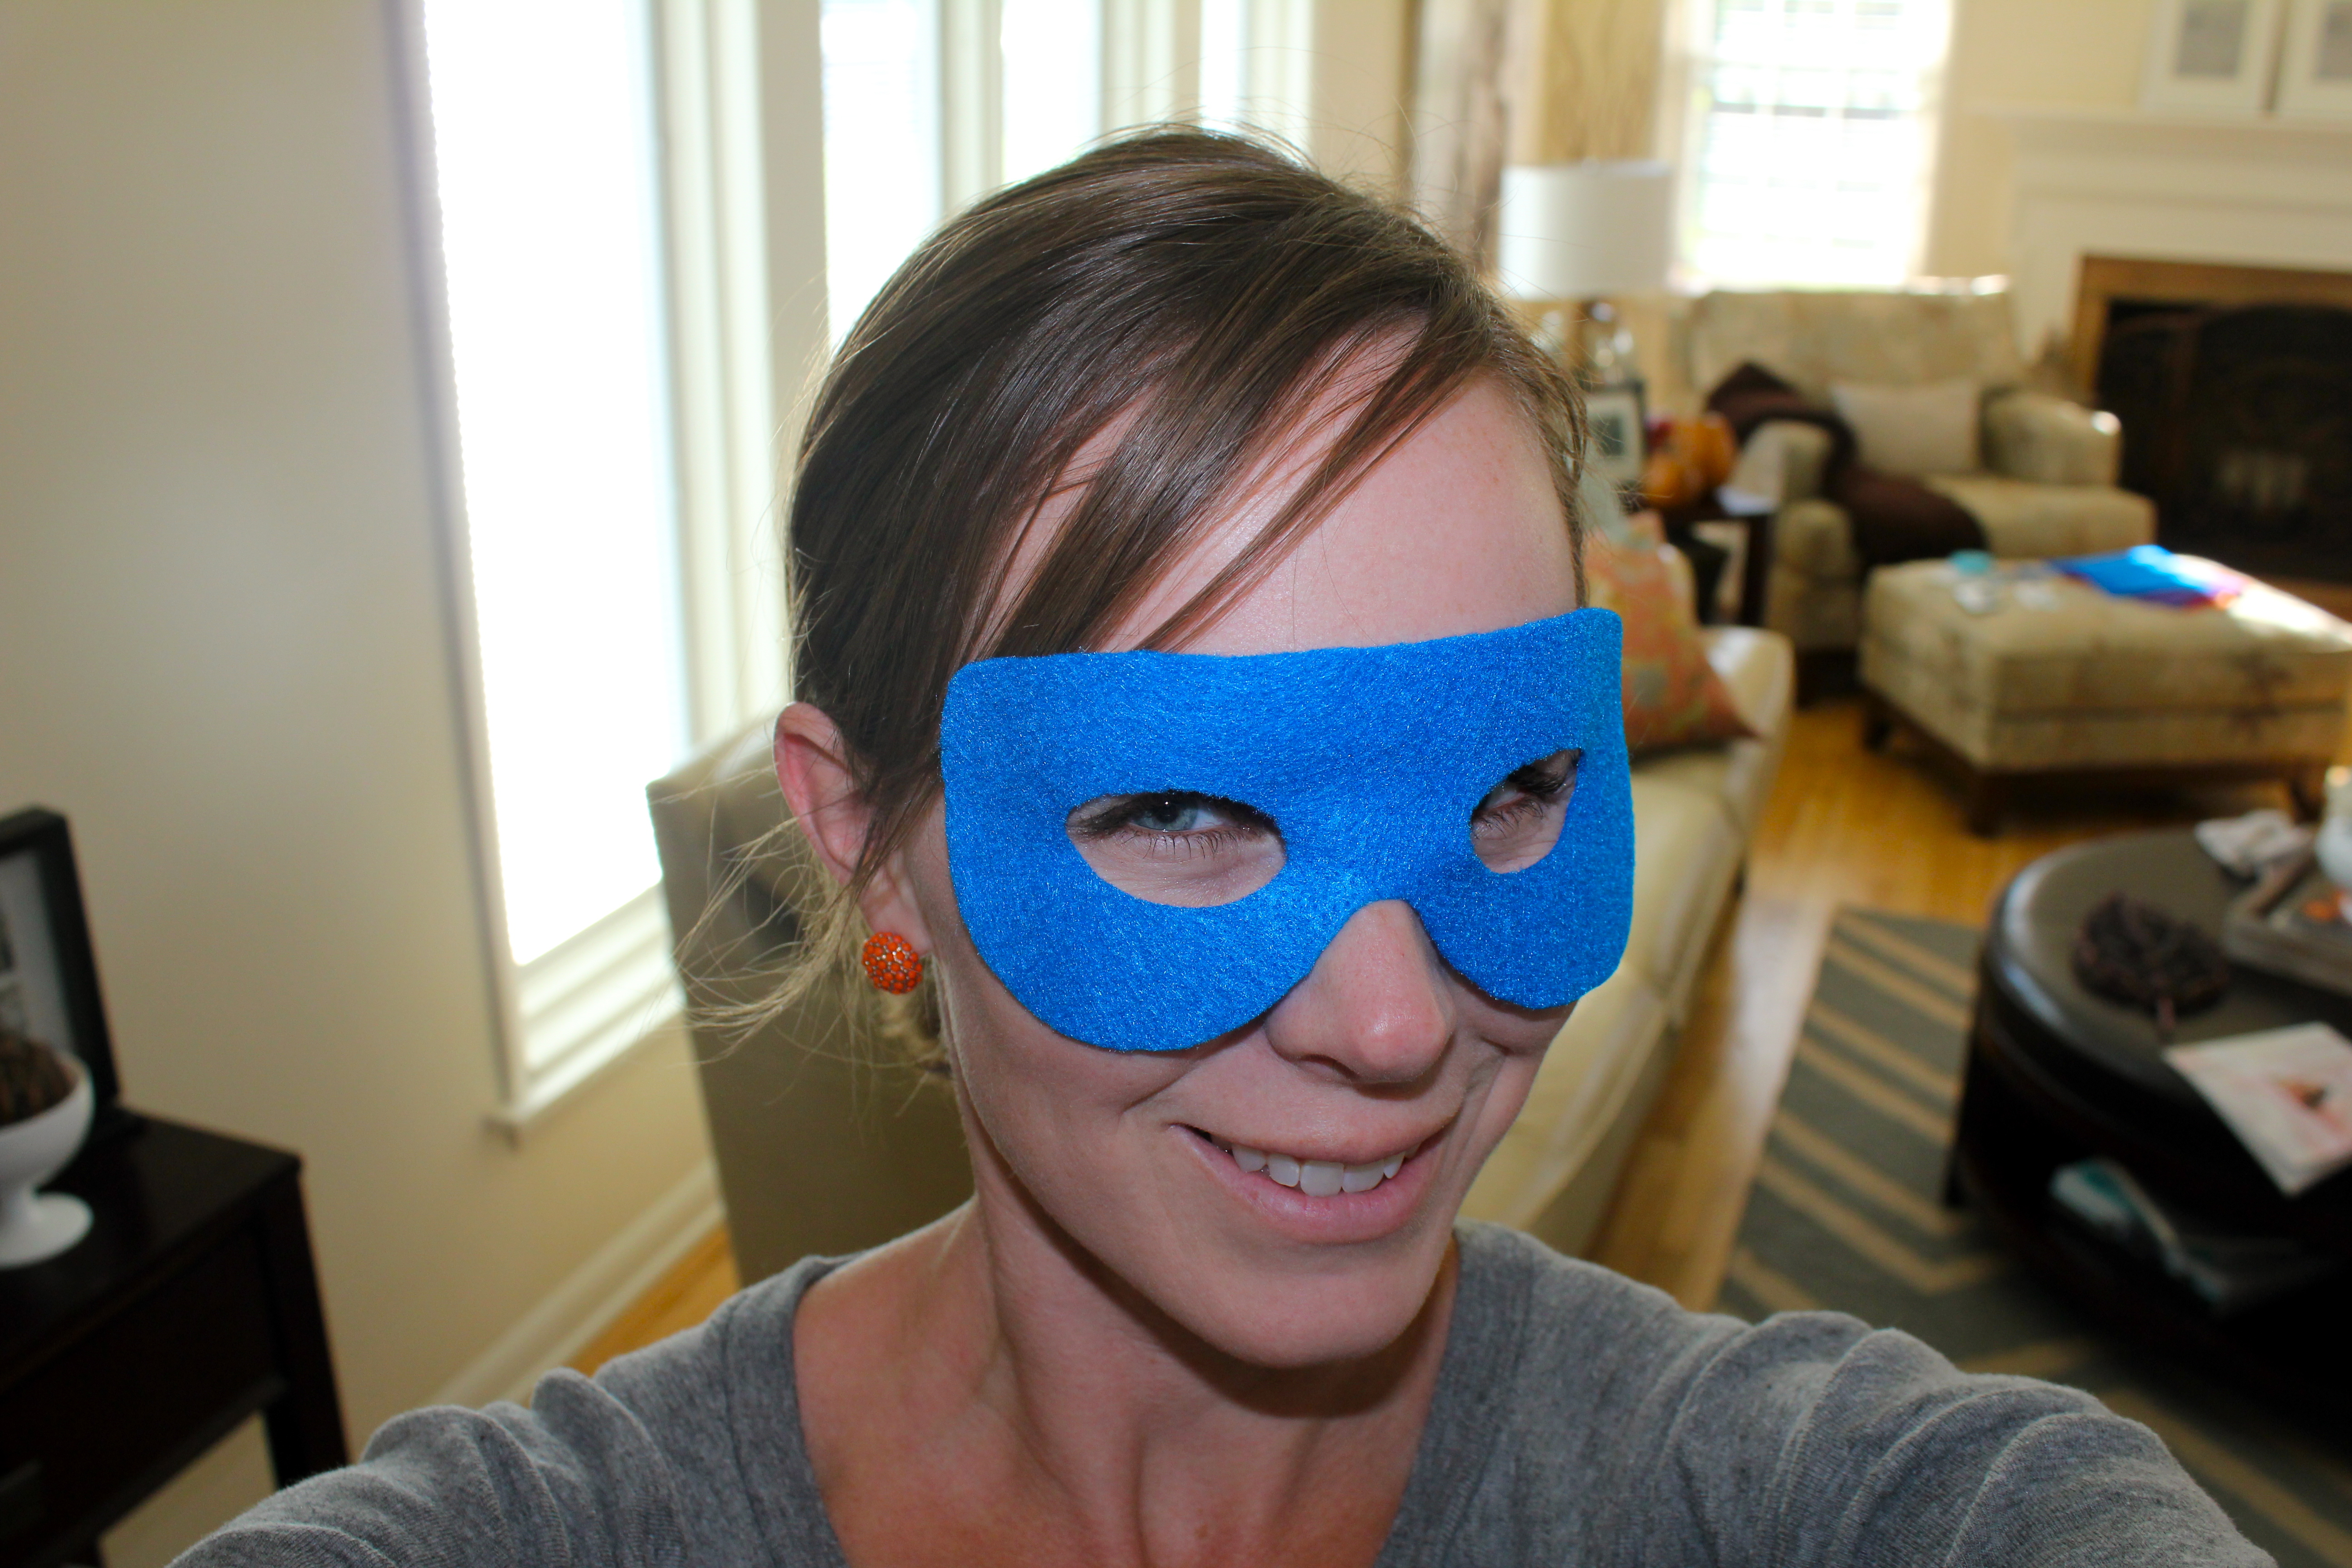
Around these parts life has kept us busy, under the weather, dressing up as superheroes and sporting new red and pink hairdos. You too? Oh good. I was convinced we were the only ones.

Around these parts we have been spending as much time as we can soaking up these last beautiful days before winter hits. I tell my kids, “Trust me. Cold days are coming. You need to enjoy the outdoors now. NOW! In mere days, Iowa will turn on us and we will be reduced to merely remembering what fresh air in our lungs feels like.” (Imagine this last sentence spoken with extreme levels of drama by a woman who in her advanced age is convinced that 50 degrees requires at minimum a parka, scarf and some sort of hat.)
I’ve been saying this for weeks now. They no longer believe me. It is still 80 degrees in mid-October. My children are turning on me much faster than these seasons are changing.

Around these parts we had to teach a quick refresher course on the difference between napkins and your wardrobe. I kid you not when I say that this picture was taken when we were only two meals in for the day. We still had a snack or two and supper to go. Geesh.
Me: “Son, how does your shirt get that gnarly by noon?”
Beaut.two: Looking down at his shirt, “Mom, that’s just a yittle (that’s how he says little) bit of yogurt. I was too busy eating to get a napkin.”
Me: “Can we use a napkin instead each time we eat? Clothes are so not meant for this.”
Beaut.two: While wiping a pointer finger covered in peanut butter on his already soiled T-shirt, “Did you mean now? You probably meant now. I’m getting a napkin.”

Around these parts we are never ones to pass up a stage or an impromptu performance. I am sorry you missed it. It was a spectacular show full of wonder, magic, dance and prose. The birds, squirrels, beetles and I cheered until there was an encore.

And around these parts this is what an encore looks like…leaping…

…and jumping…

…and a very, very interesting final bow.

Around these parts we have begun to slowly prepare for Beaut.two’s birthday party. I have been cutting out Teenage Mutant Ninja Turtle masks and wearing them around. I don’t really wear them per say. What I mean is I am only trying them on to ensure their safety before the sweet precious children come to the party and wear them. The sacrifices a mother must make.
Around these parts we have had some confused moments…

…and some downright silly moments. (If we didn’t laugh…OFTEN…we just might cry.)

Around these parts we have experimented with new and interesting hair styles…

…and have taken up putting bunny ears on brother as he smiles away…blissfully unaware.

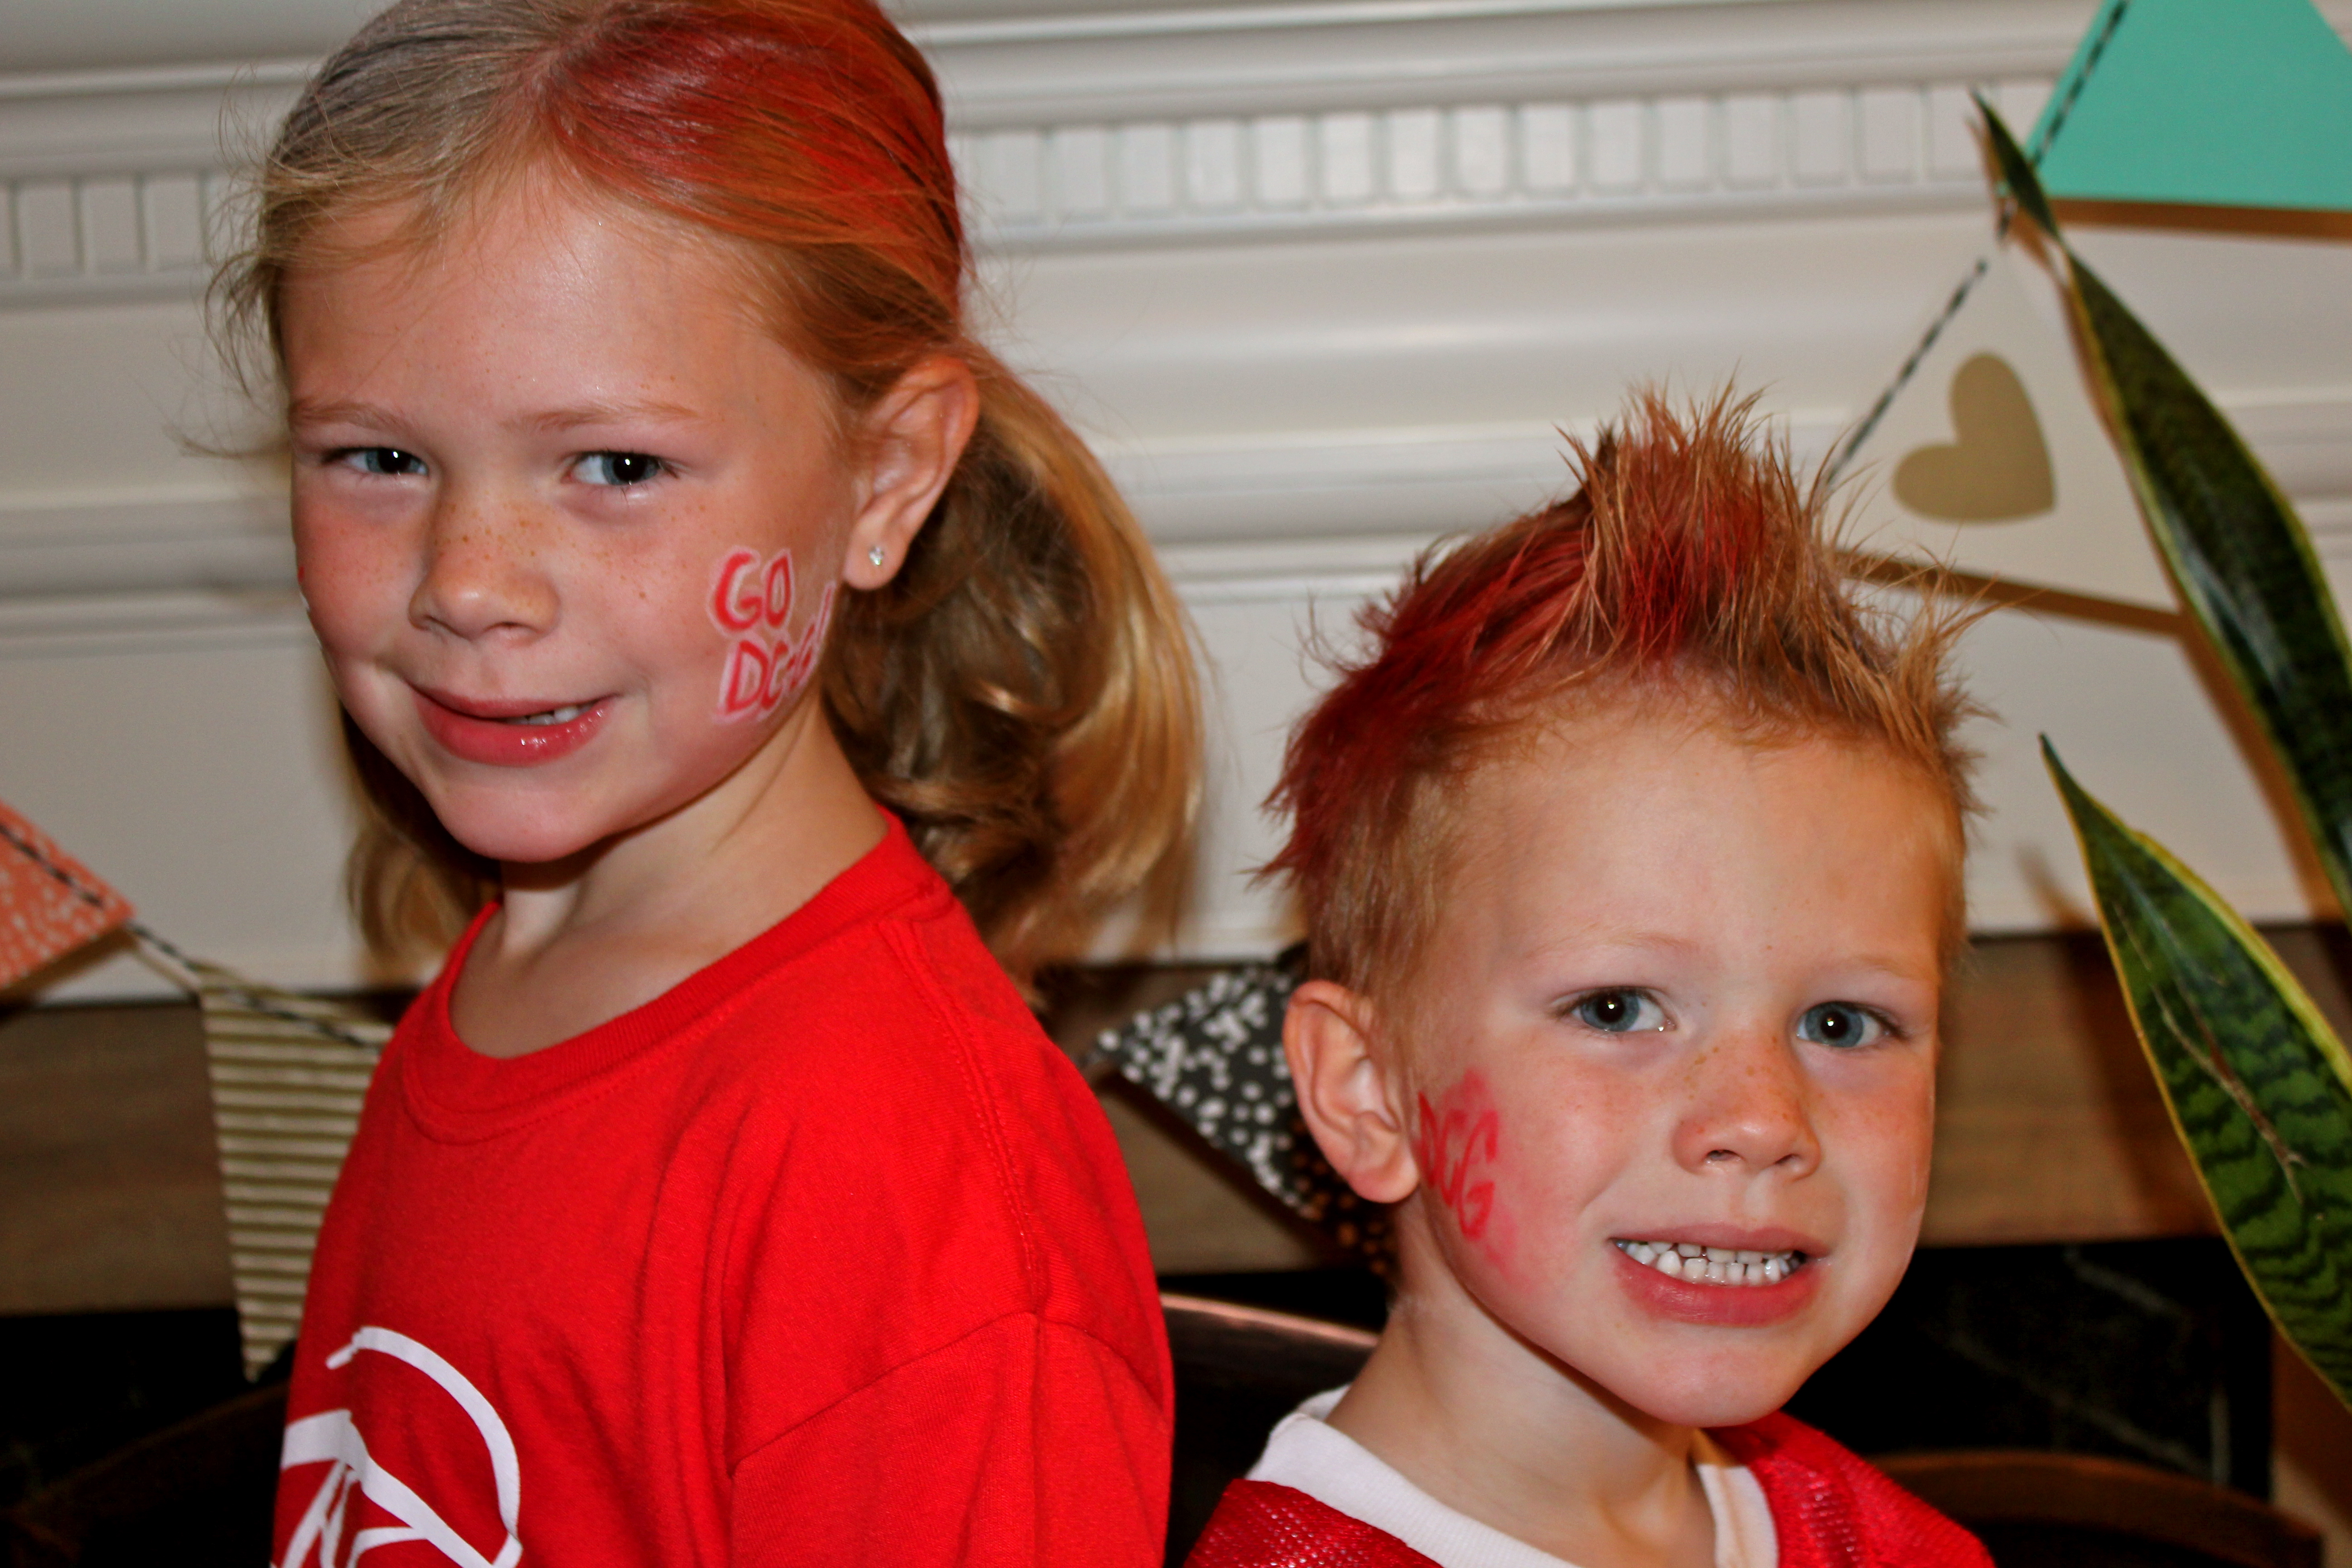
Around these parts we have captured our school spirit…
…and we always find time to catch a nap or two. You know you are good at this whole sleeping gig when you can effectively catch some ZZZs while standing up and keeping your eyes wide open.

And in between it all…around these parts…we have found the time to help save the world.

These poor kids have spent all their free time flying back and forth to Washington lately. No wonder we are all so exhausted.

Around these parts we are grateful, happy, tired, joyful, messy and blessed beyond measure.
Stacey
I know that bugs, insects, spiders and the like give a majority of us the heebie-jeebies. But when you’re a boy, and you’re about to turn four, and you’re favorite place to play is the dirt pile in the backyard…well…bugs are not only awesome…they get an invitation to your birthday party.
Welcome to our bug-themed birthday bash! Come on in and try not to swat at anything that is buzzing. Oh, and you may just want to cover yourself in a light mist of Off! before joining us for the party play-by-play.

First up…the invitations. For this celebration we decided to go with a more classic, retro, scientific route in the design of the birthday invitations. And by we…I totally mean me. Beaut.two could care less about his invitations and what they look like. His main birthday planning concerns:
- Will there be cake?
- Can I eat the cake?
- Did you invite my friends and family to the party?
- Will aforementioned friends and family come to my party bearing gifts?
For those of you who do care more about invitation-type things, I found these free clip art images of bugs and their scientific names online and just printed them on the front of folded, craft paper cards I bought at Michaels. Note: I would love to include the link to the images but I can’t remember where I found them. Please forgive me. The party was last December and I forget where I put my phone at least 2.3 times per day so I can’t possibly hope to recall an obscure web site address. Thanks for understanding.

And inside? All the buggy birthday party details.

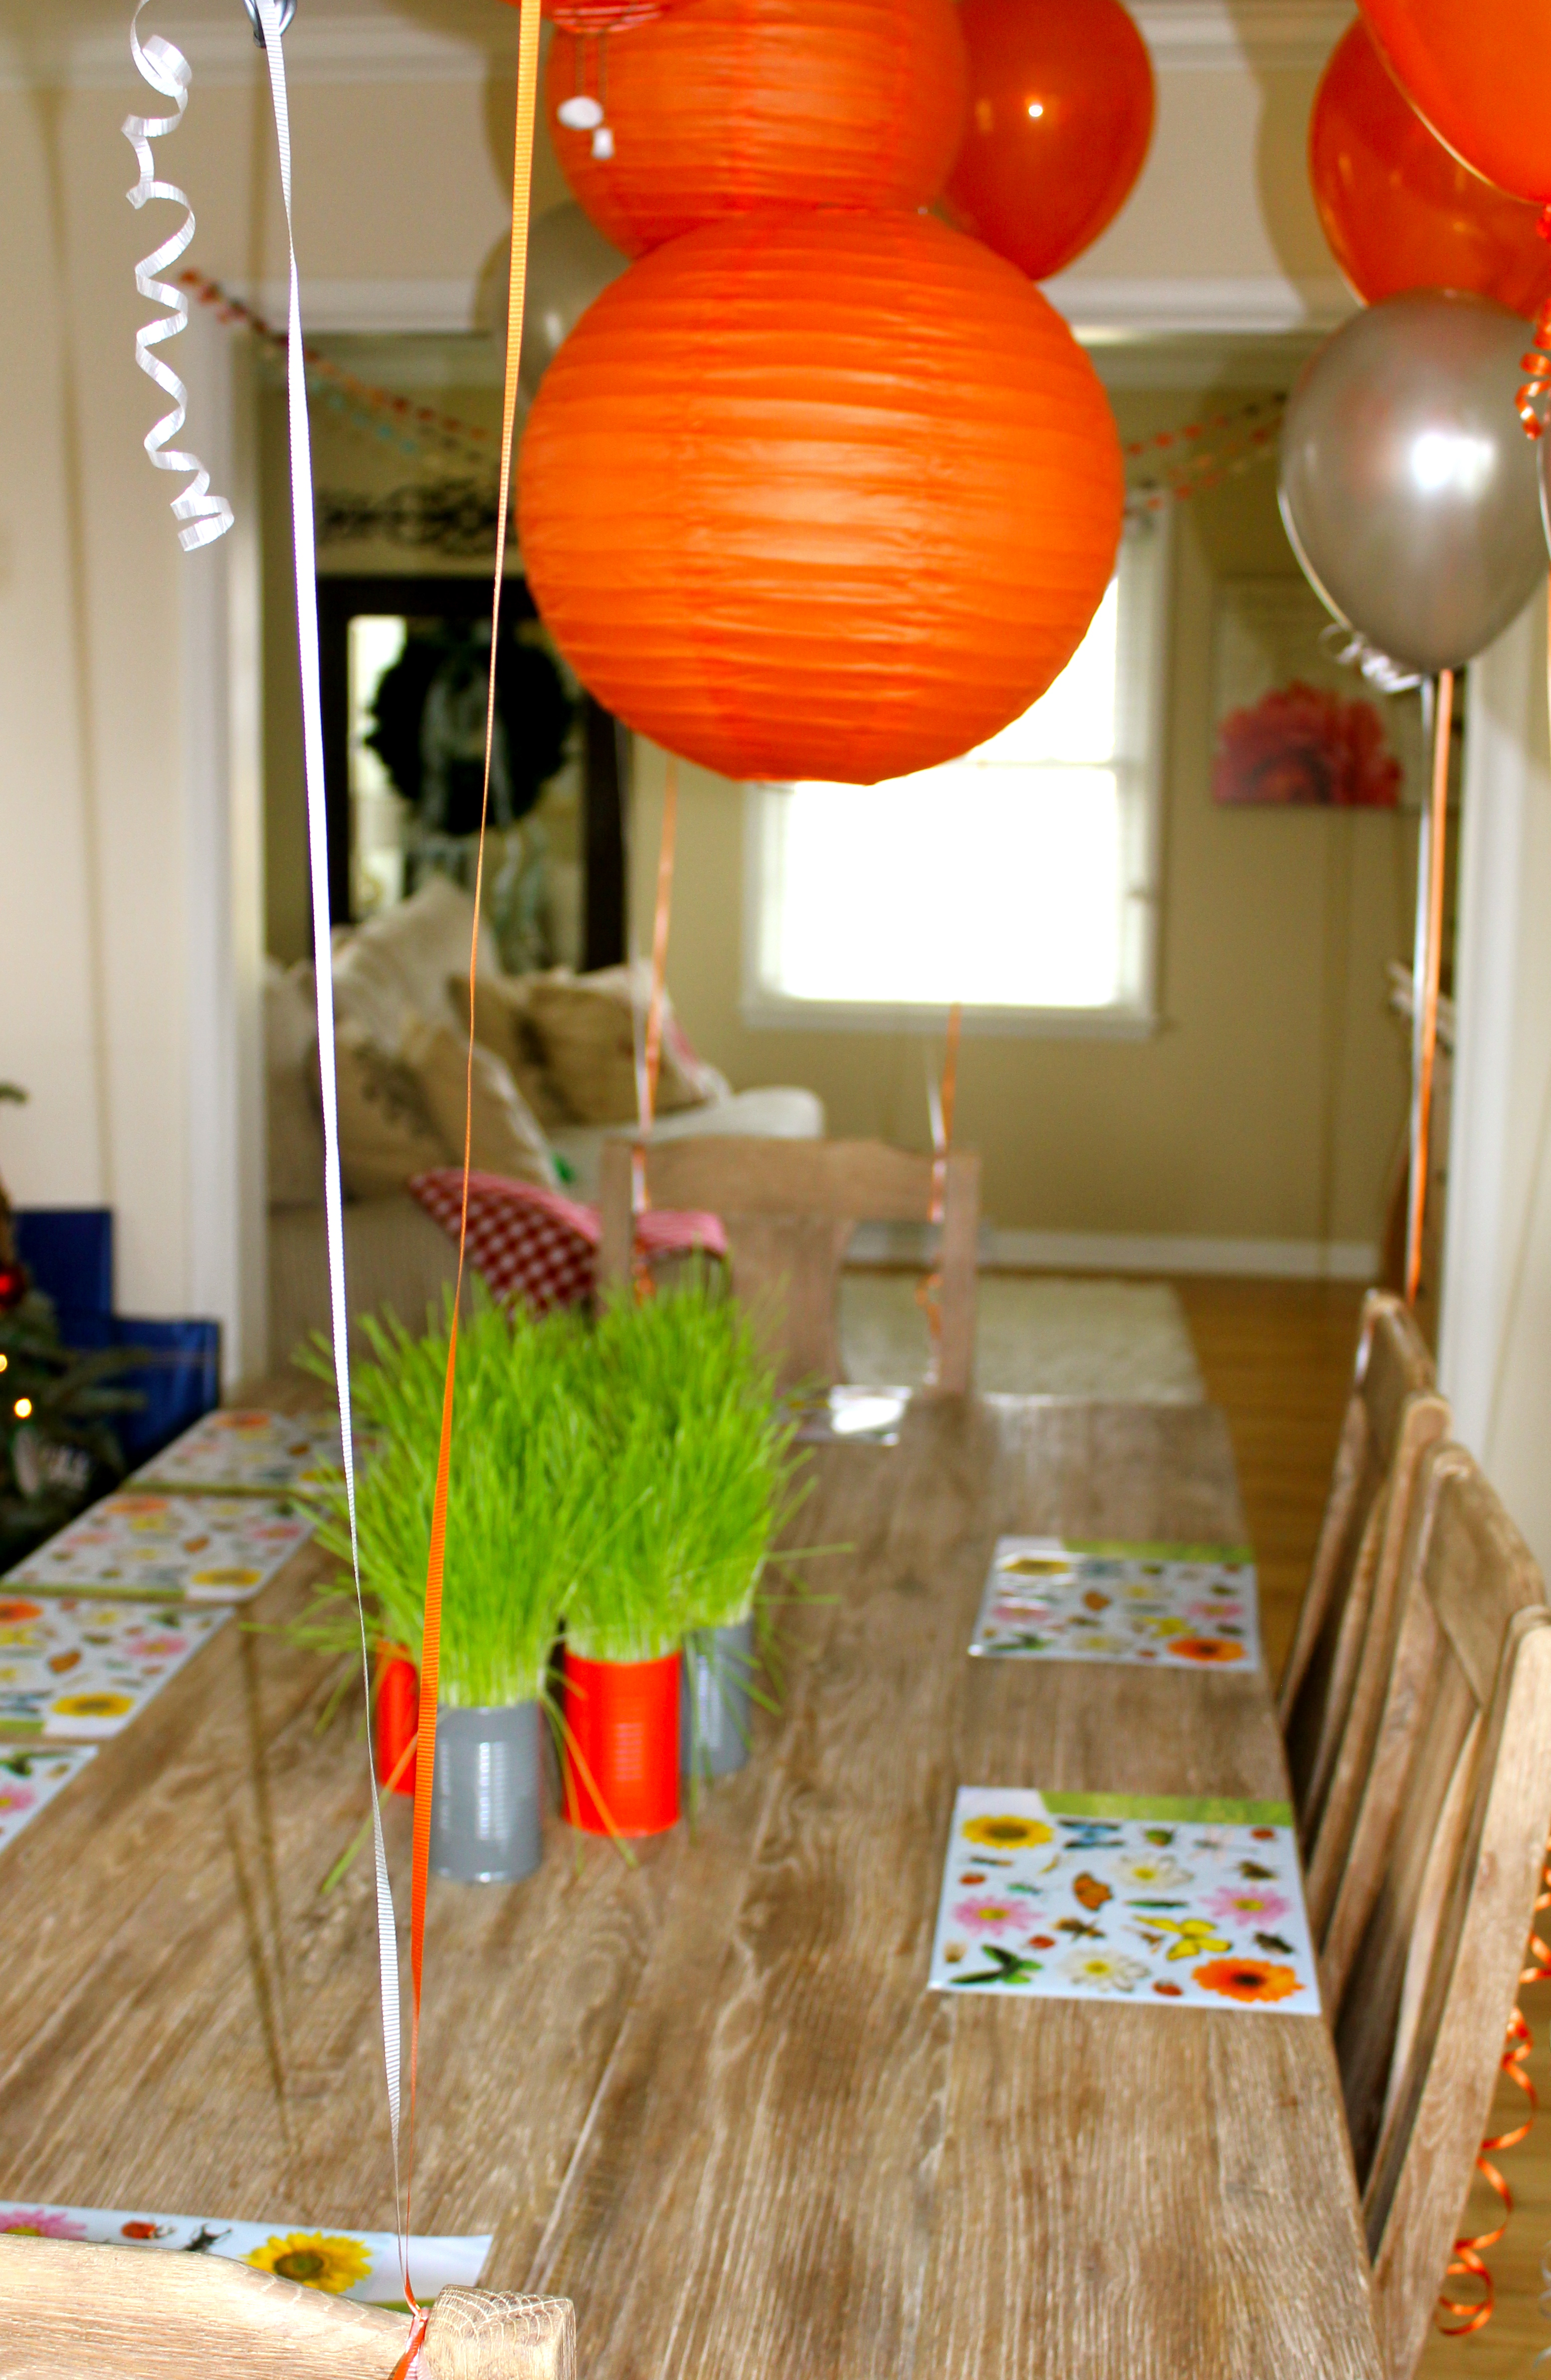
When my son and I finally landed on a bug-themed partay, my mind got busy planning the decor. When I think bugs, I think outdoors. And when I think outdoors, I think pretty green grass. And when I think pretty green grass, I think middle of December!?! Wait, that does not at all sound right.
You may have noticed by now that our bug party decor is mixed with a fair amount of Christmas trees, evergreens and other Christmas fun. That is just going to happen when you have a child born in mid-December. Last year we had cowboys and Christmas trees. This year? Crickets and Christmas. Never a dull moment around these parts I tell ya.

In order to make the grass centerpiece I had envisioned, I first needed to figure out how to make lush, green grass grow in the middle of winter. And before I could grow said grass, I needed to find something affordable and readily available to grow the grass in. And for that I looked no farther than my trusty pantry.
Me standing with Beaut.two in front of our open pantry: “Honey, we are going to need to use some of these cans for your birthday party.”
Beaut.two: “We are going to decorate my party with soup? That’s weird.”
Me: “What?! No, honey. We need to eat the fruit, vegetables and soup in these cans so we can use them as planters when empty.”
Beaut.two: “All I heard was eating. Now that’s a party planning task I can get fully behind.”

After eating the contents (I fear I will NEVER be able to look at mandarin oranges the same ever again.), I washed and dried the cans. I then primed and spray painted all ten of these babies.

First I primed the cans and waited for them to dry.
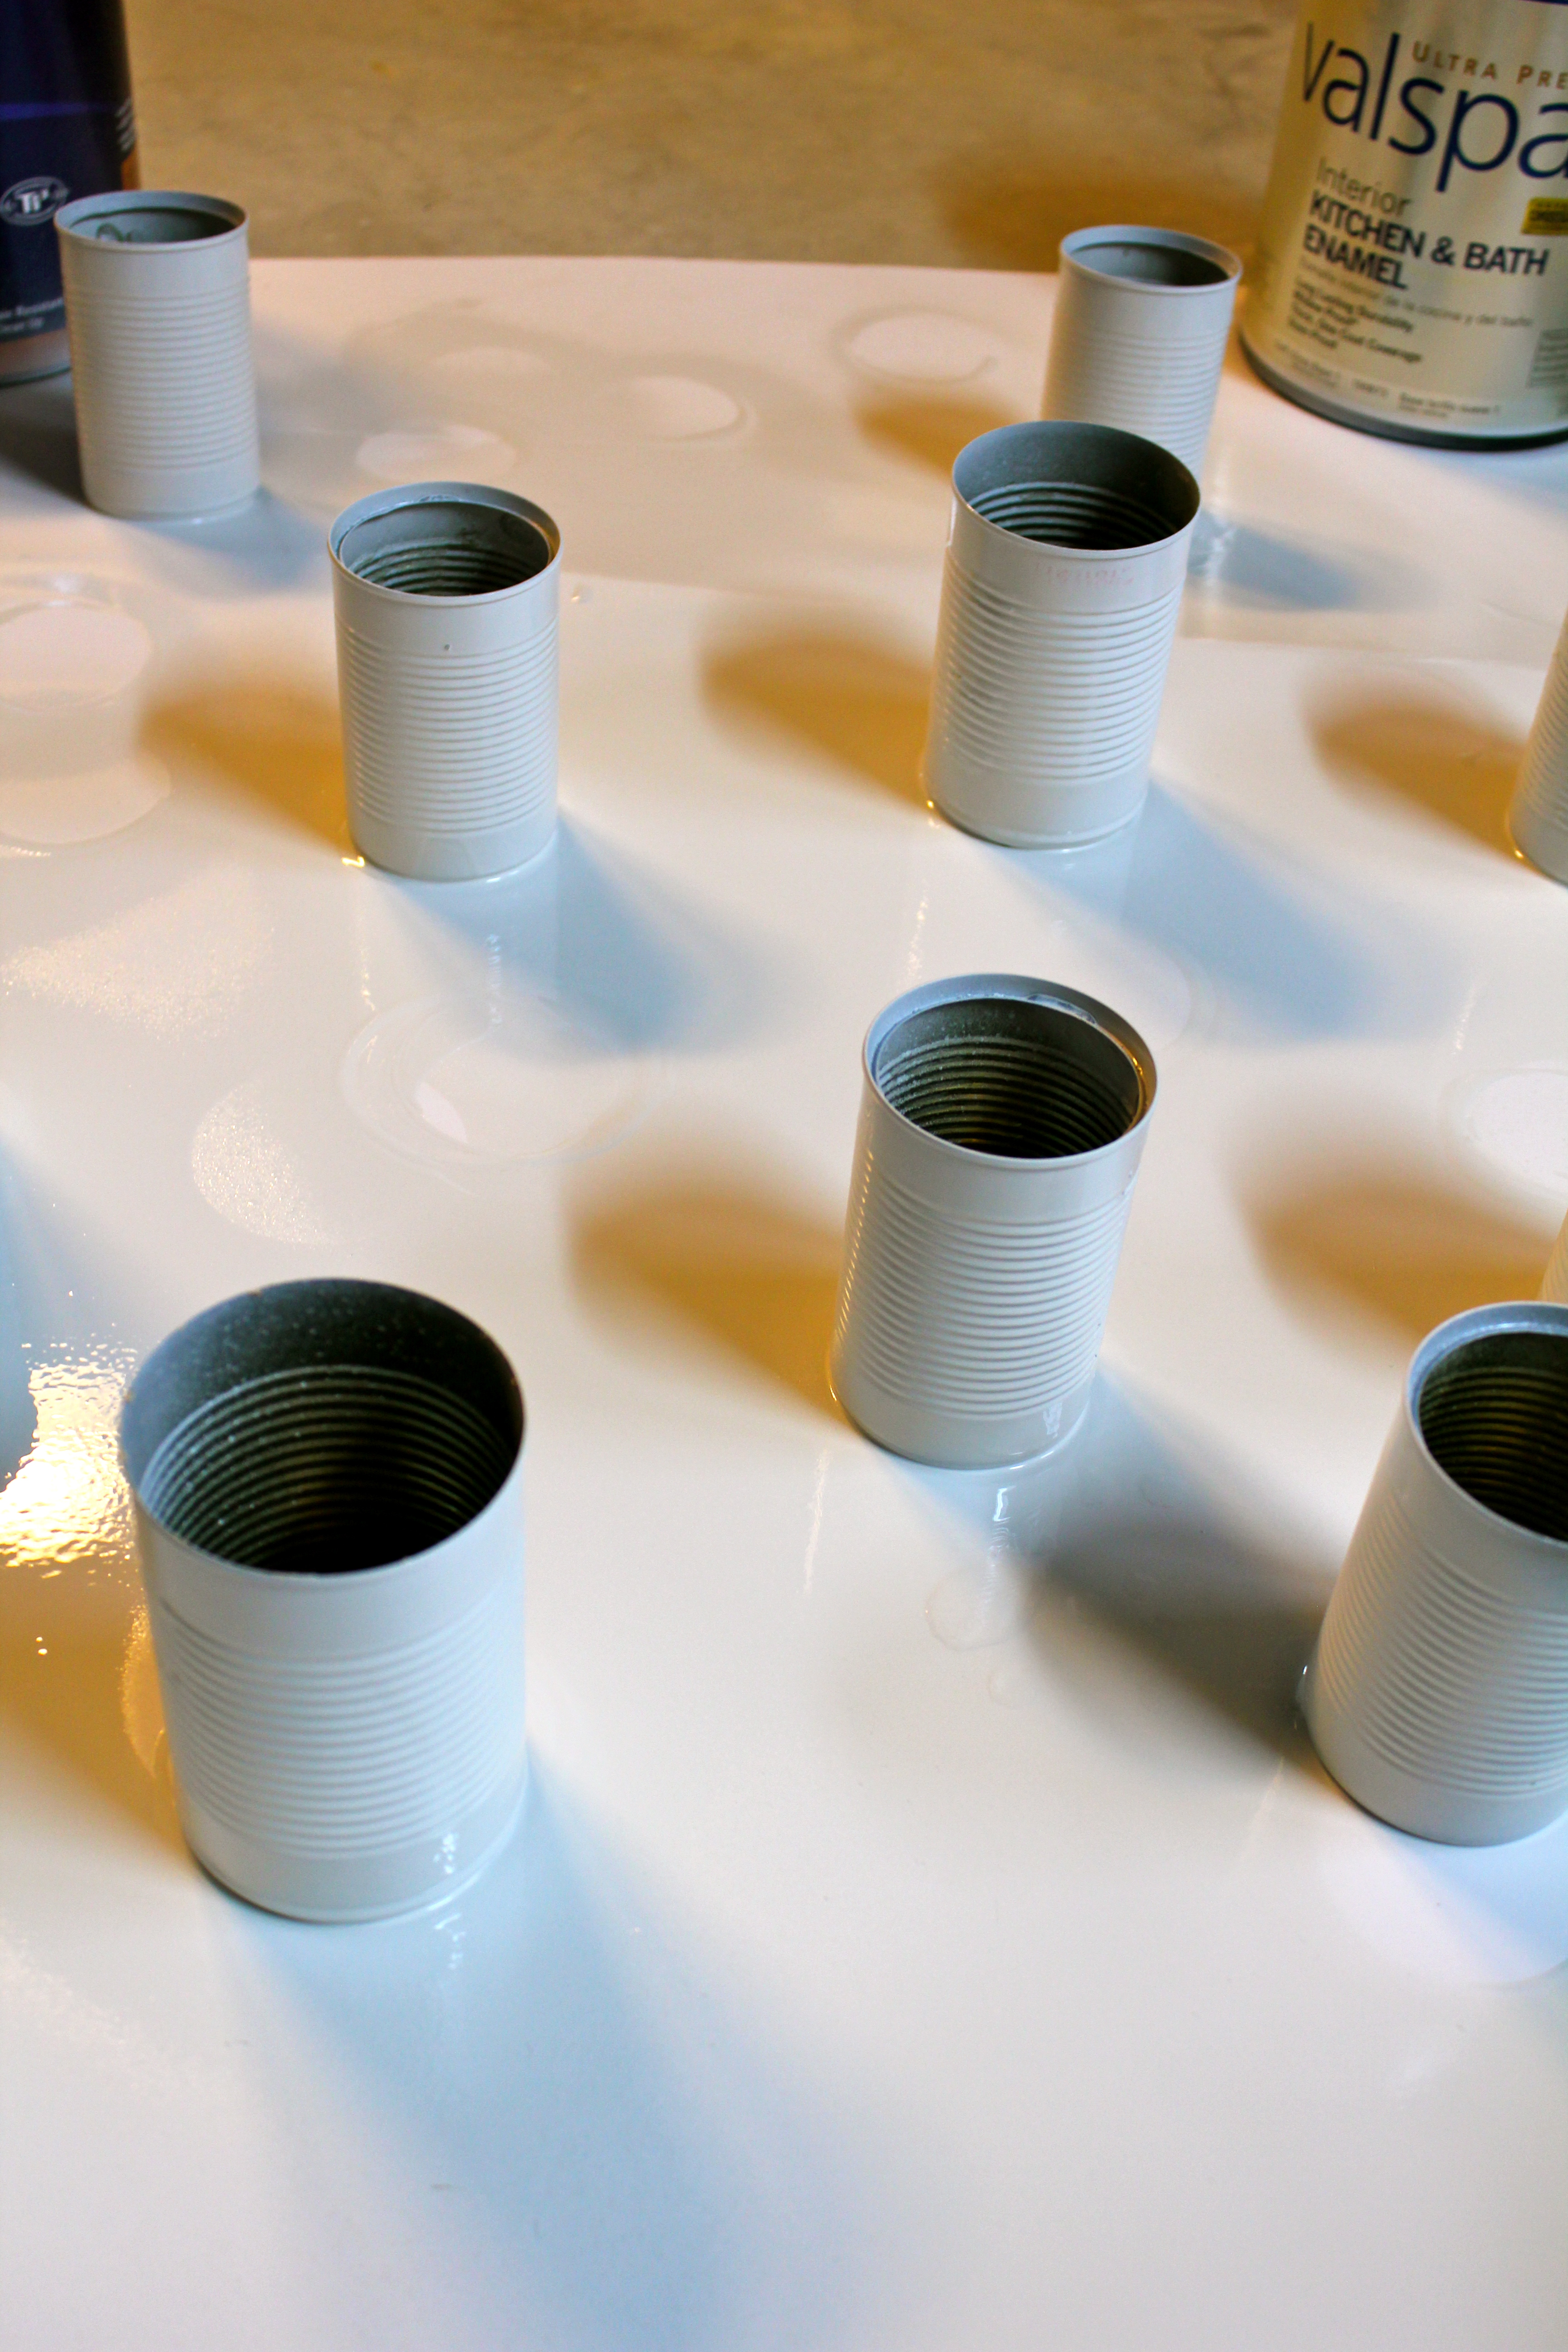
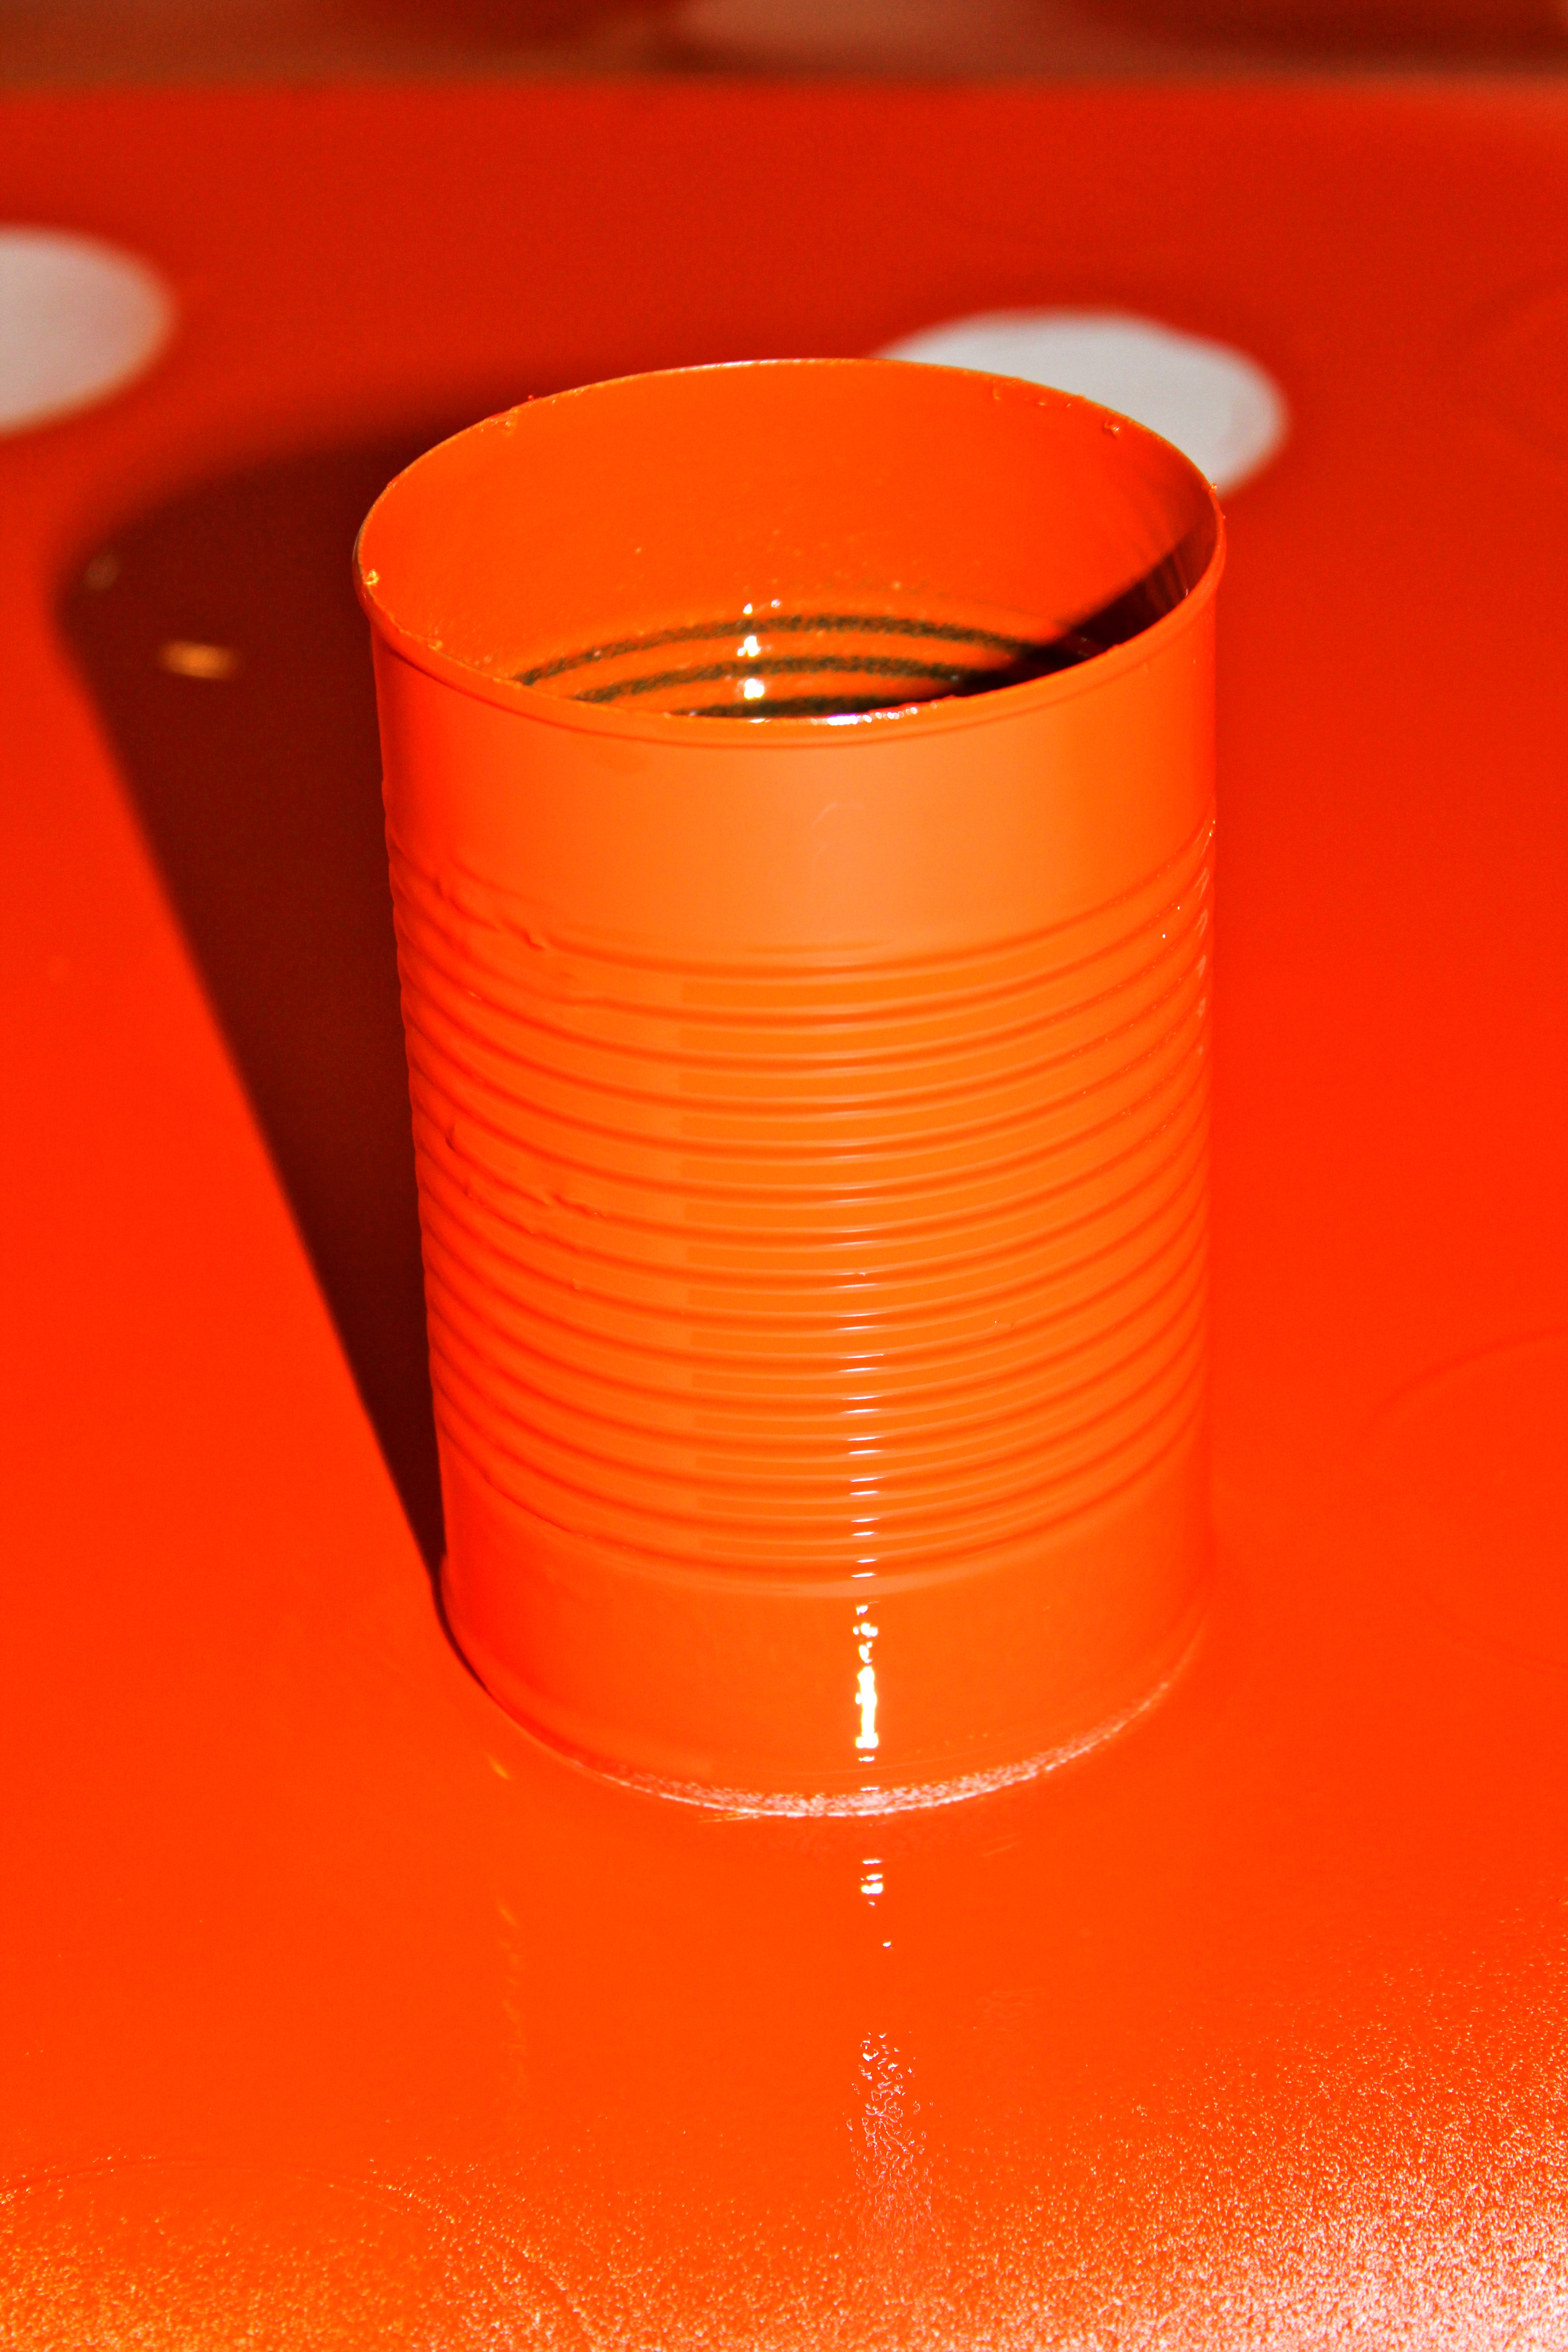
Then I used Rust-Oleum spray paint in Fire Orange on half the cans.
And Rust-Oleum’s Granite for the rest. It took two light coats to adequately cover our containers.

With the containers ready, now it was time to put my green thumb to the test and grow us some wheat grass. In hindsight I am really glad this worked out. I had never grown wheat grass before and I had no party centerpiece back-up plan. No centerpiece back-up plan? I am constantly living on the edge I tell ya!
After a bit of searching online, I learned that red wheat berries are the seeds used to grow wheat grass. With my newfound seed knowledge, I traveled to the bulk foods section of my trusty natural foods store and for $1.39 lb I had all the seeds I needed. Note: I bought a little more than a pound but didn’t even need half of that for this project. A little bit of red wheat berry goes a long way.

A close up of the seeds and the small, but stubborn spot of orange spray paint still on my palm. I wash my hands…frequently…I promise.

We put some Miracle-Gro potting mix in first…

…then put a layer of seeds…

…and finished by layering more potting soil on top. If you enlist the help of littles, you may or may not have an oops moment or six.
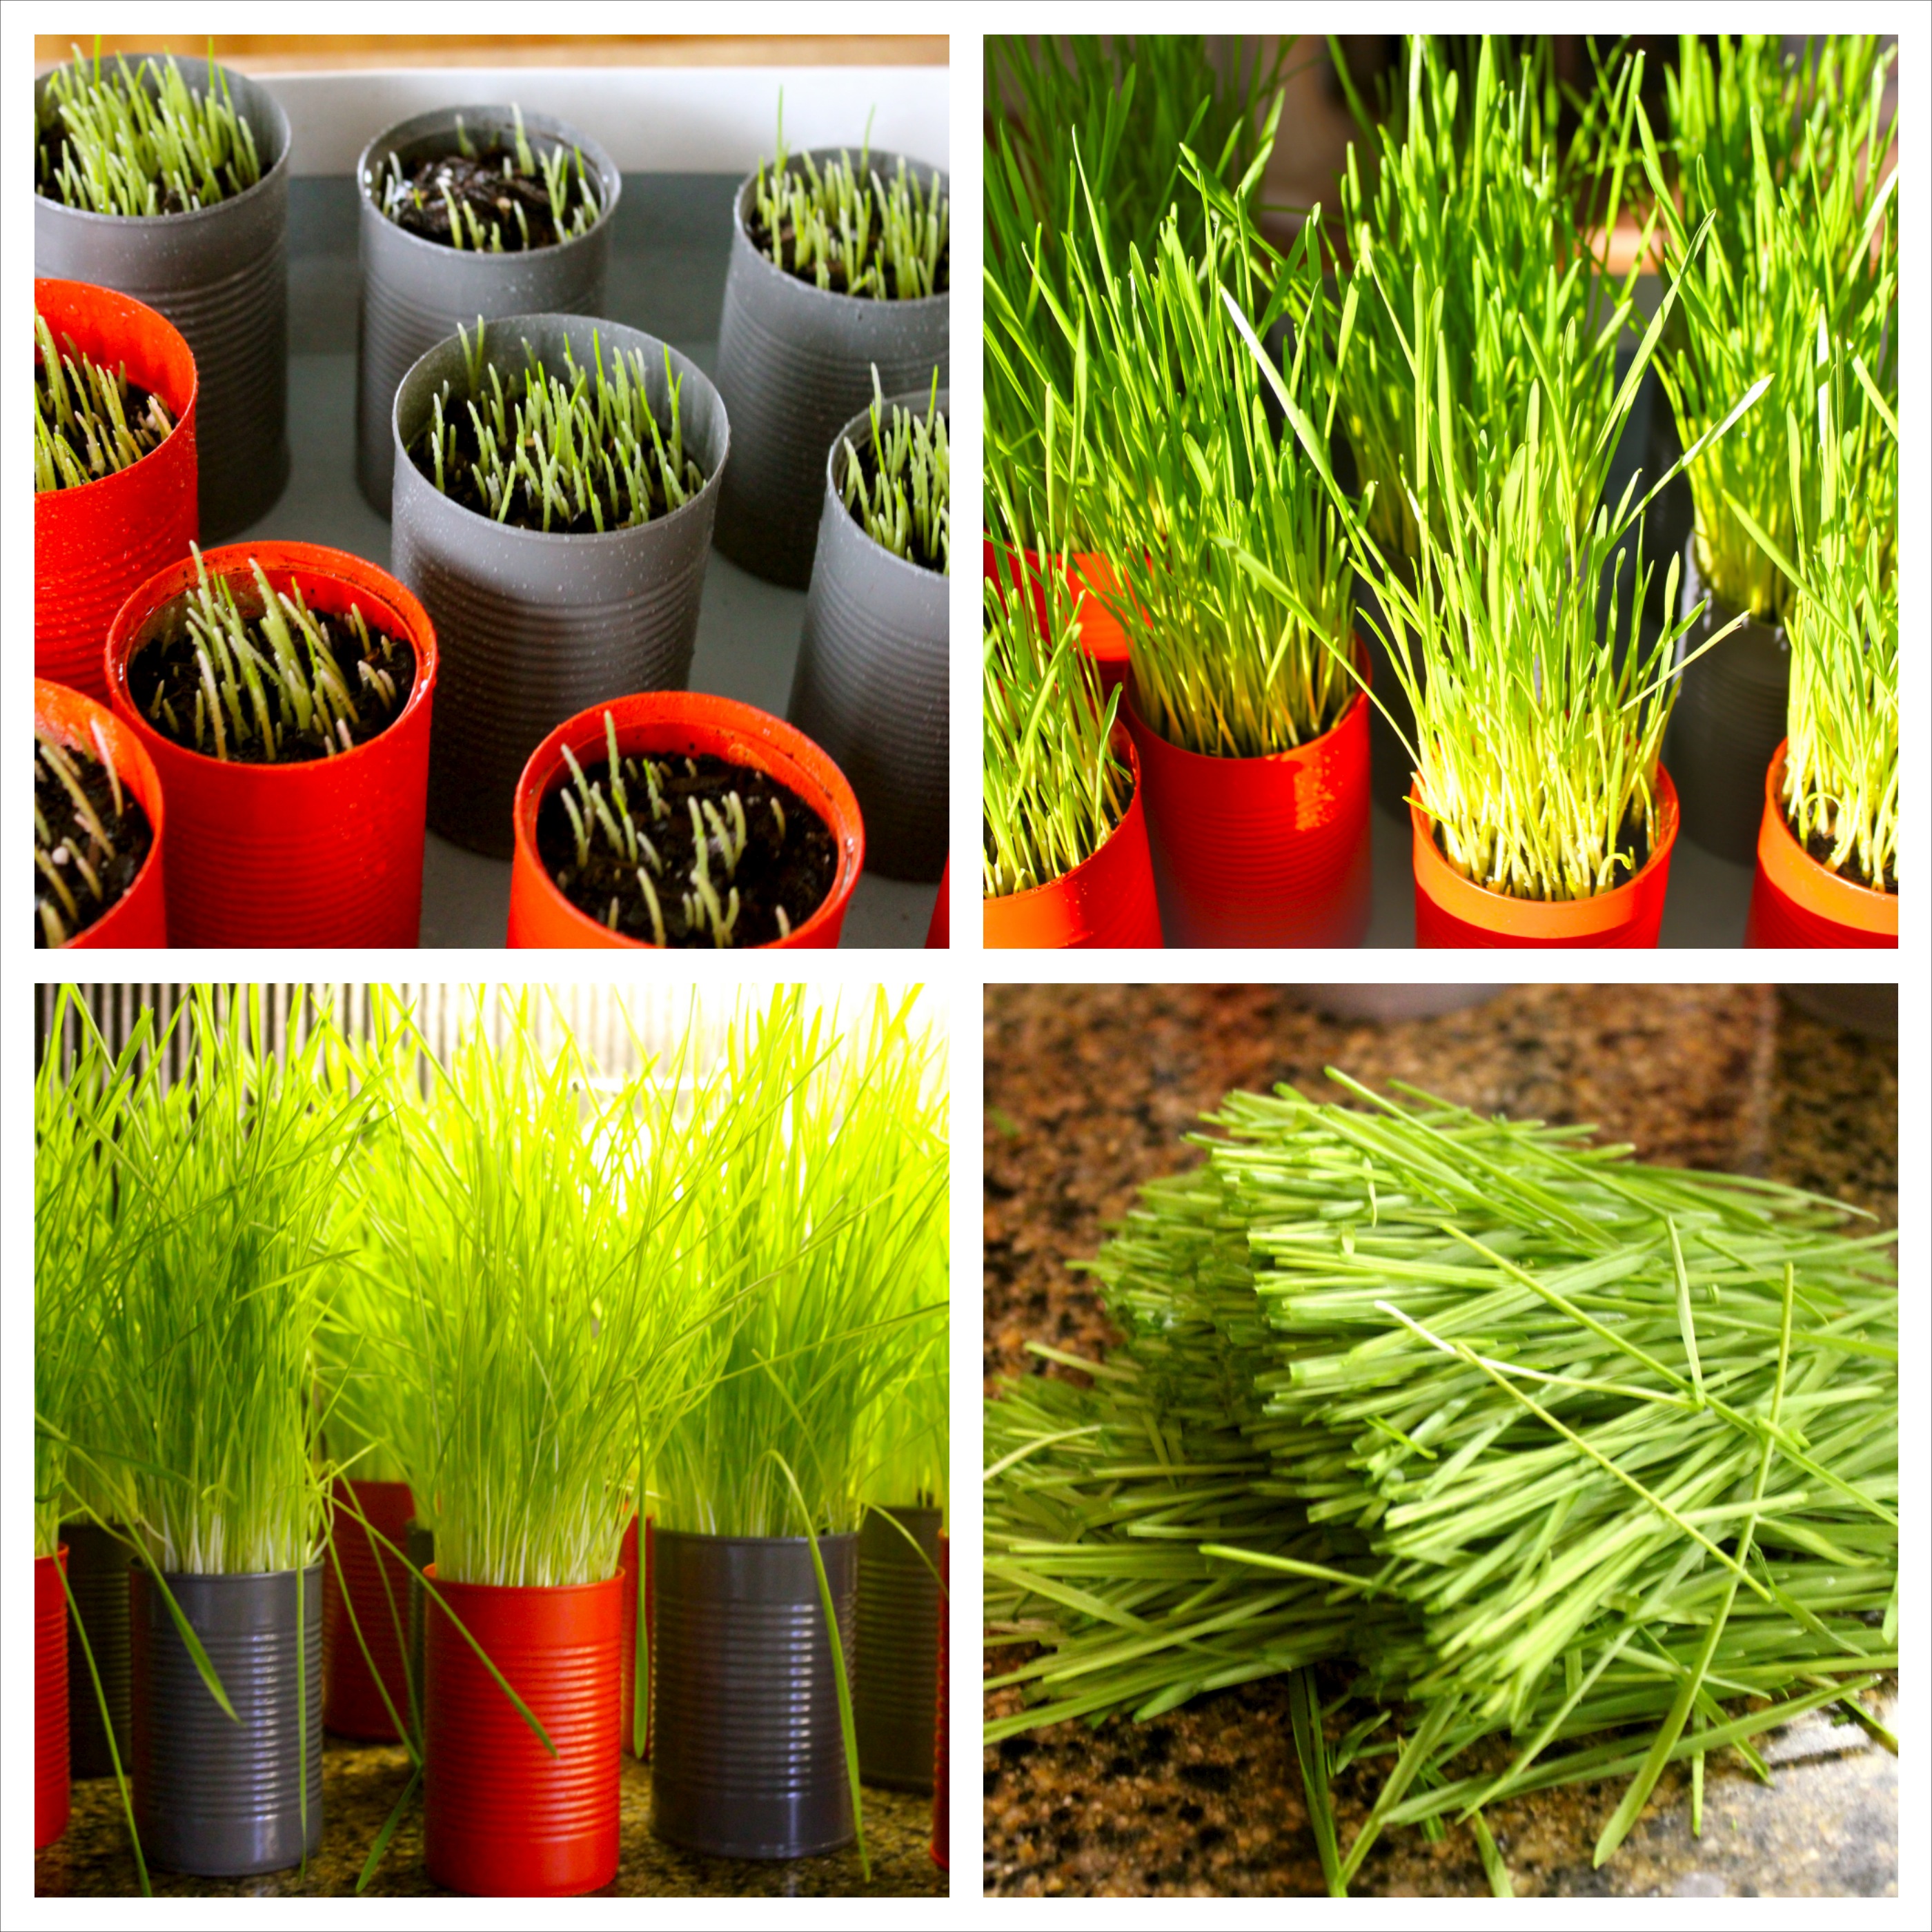
In case you are wondering how many seeds to plant, we filled the entire circumference of the container with seeds. And it gave us the lush, thick grass we were after.

Then with a spray bottle we misted these puppies, and talked to them about world events, and made sure they had access to light and affordable healthcare. And then we repeated this process 3 to 5 times a day until they started growing.

And then the magic started to happen…sprouting! Growing and more growing followed. So much growing that by Day 8, our healthy and happy centerpiece needed a haircut. That is a sentence I never thought I would write in my lifetime.
A break-down of the growth:
- Top Left Photo: Day 4
- Top Right Photo: Day 7
- Bottom Left Photo: Day 8
- Bottom Right Photo: Haircut! There is nothing like the smell of fresh cut grass in the middle of winter. I cannot guarantee that it won’t give you cabin fever right then and there on the spot. You’ve been warned.
To round out the party decor, we hung orange paper lanterns…
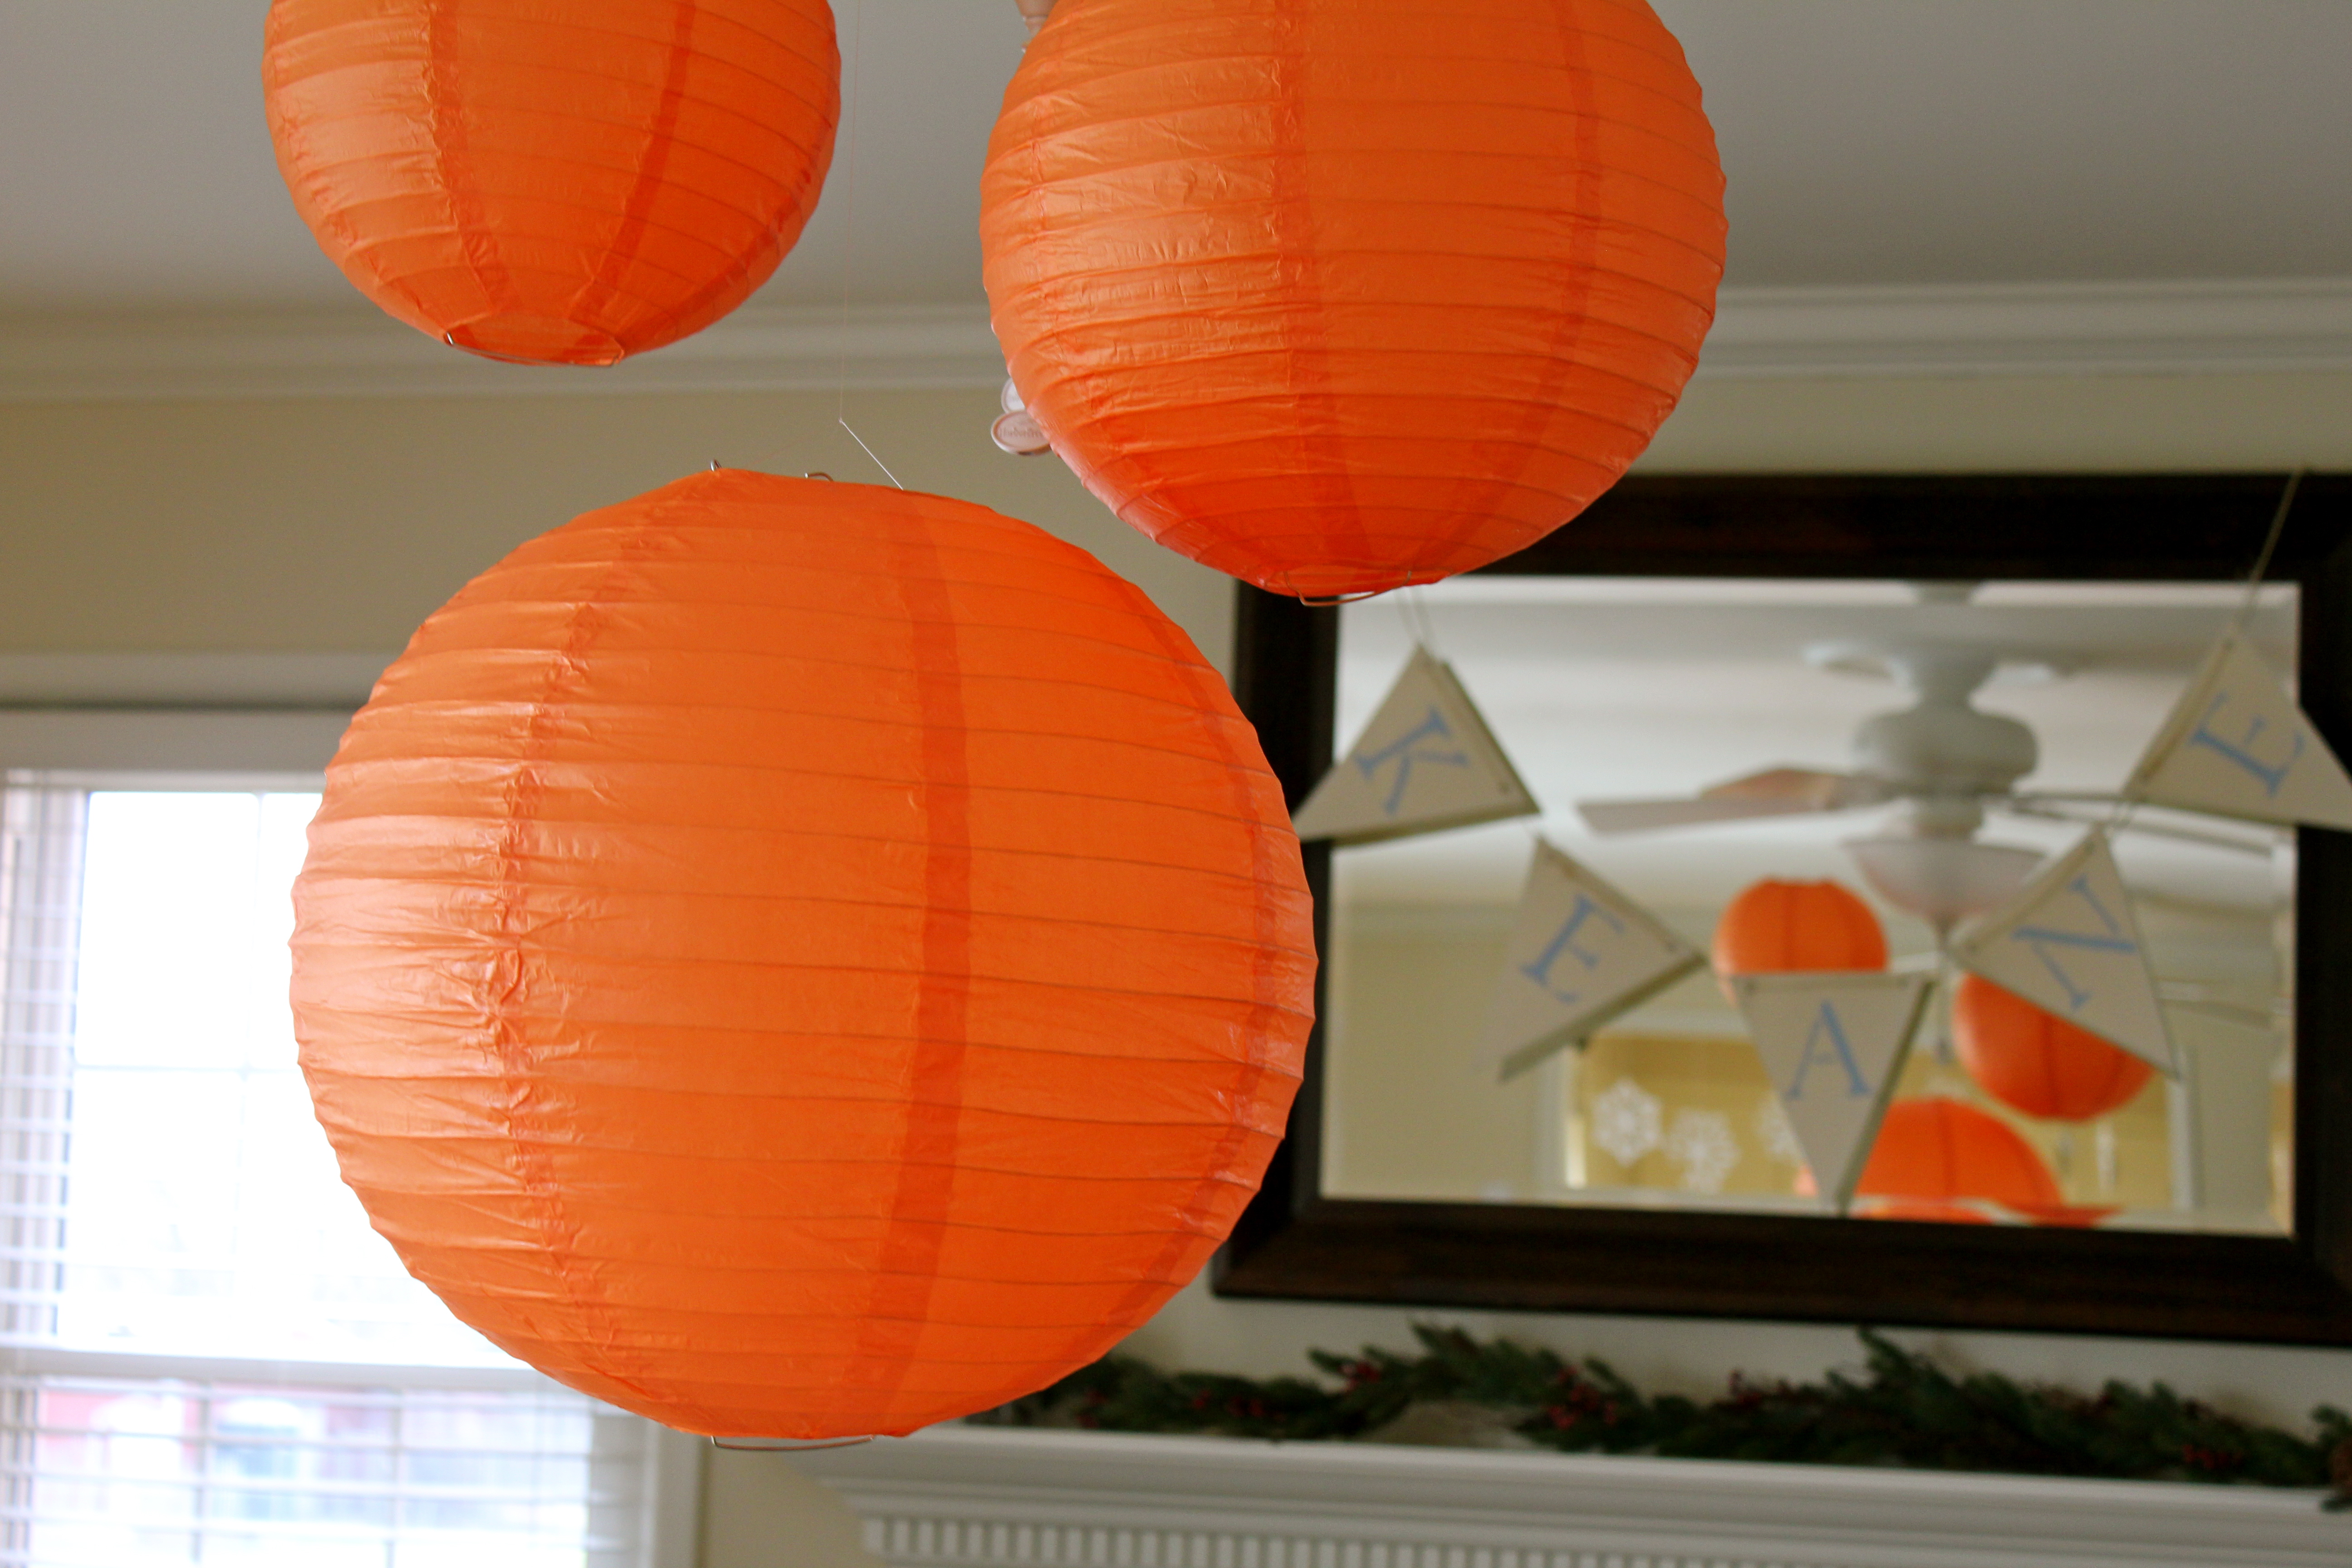
…and a canvas banner that I had stenciled the birthday boy’s name on to and strung with jute rope.

Beaut.one, feeling inspired by the birthday banner, made one of her own for her brother. I absolutely love it and Beaut.two loved it and we now have photographic evidence that they do truly love and like to celebrate one another. There are days when I really wonder, but this little piece of crafting brilliance gives me hope.

Each pint-sized party attendee had a buggy sticker activity sheet at their seat. I ordered these from Oriental Trading (Yes! I remembered something!) and the kids had fun putting together their sticker scenes.
As you can imagine, the girls finished scenes contained a fair amount of flowers and butterflies. The boys? Not so much.

What would a bug birthday party be without a bug hunt? It was at this point in the party when I was wishing my dear, sweet child had been born in June. A bug hunt outdoors would have been preferred by all but you do what you have to do. We hid over 250 bugs in our home and let the littles loose finding them.
I am happy to report that not one ceramic animal or lamp or picture frame was harmed in the bug hunt frenzy. And I was only still finding a random hidden bug here or there until about Easter. Success!!!

The kids’ favor bags doubled as bug hunt collection bags. I am positive their parents were thrilled when I announced that all found insects and bugs during the hunt were theirs to take home! Positive.
The favor bags also included magnifying glasses, bug tattoos and stickers, gummy tarantulas and other creepy, crawly fun.

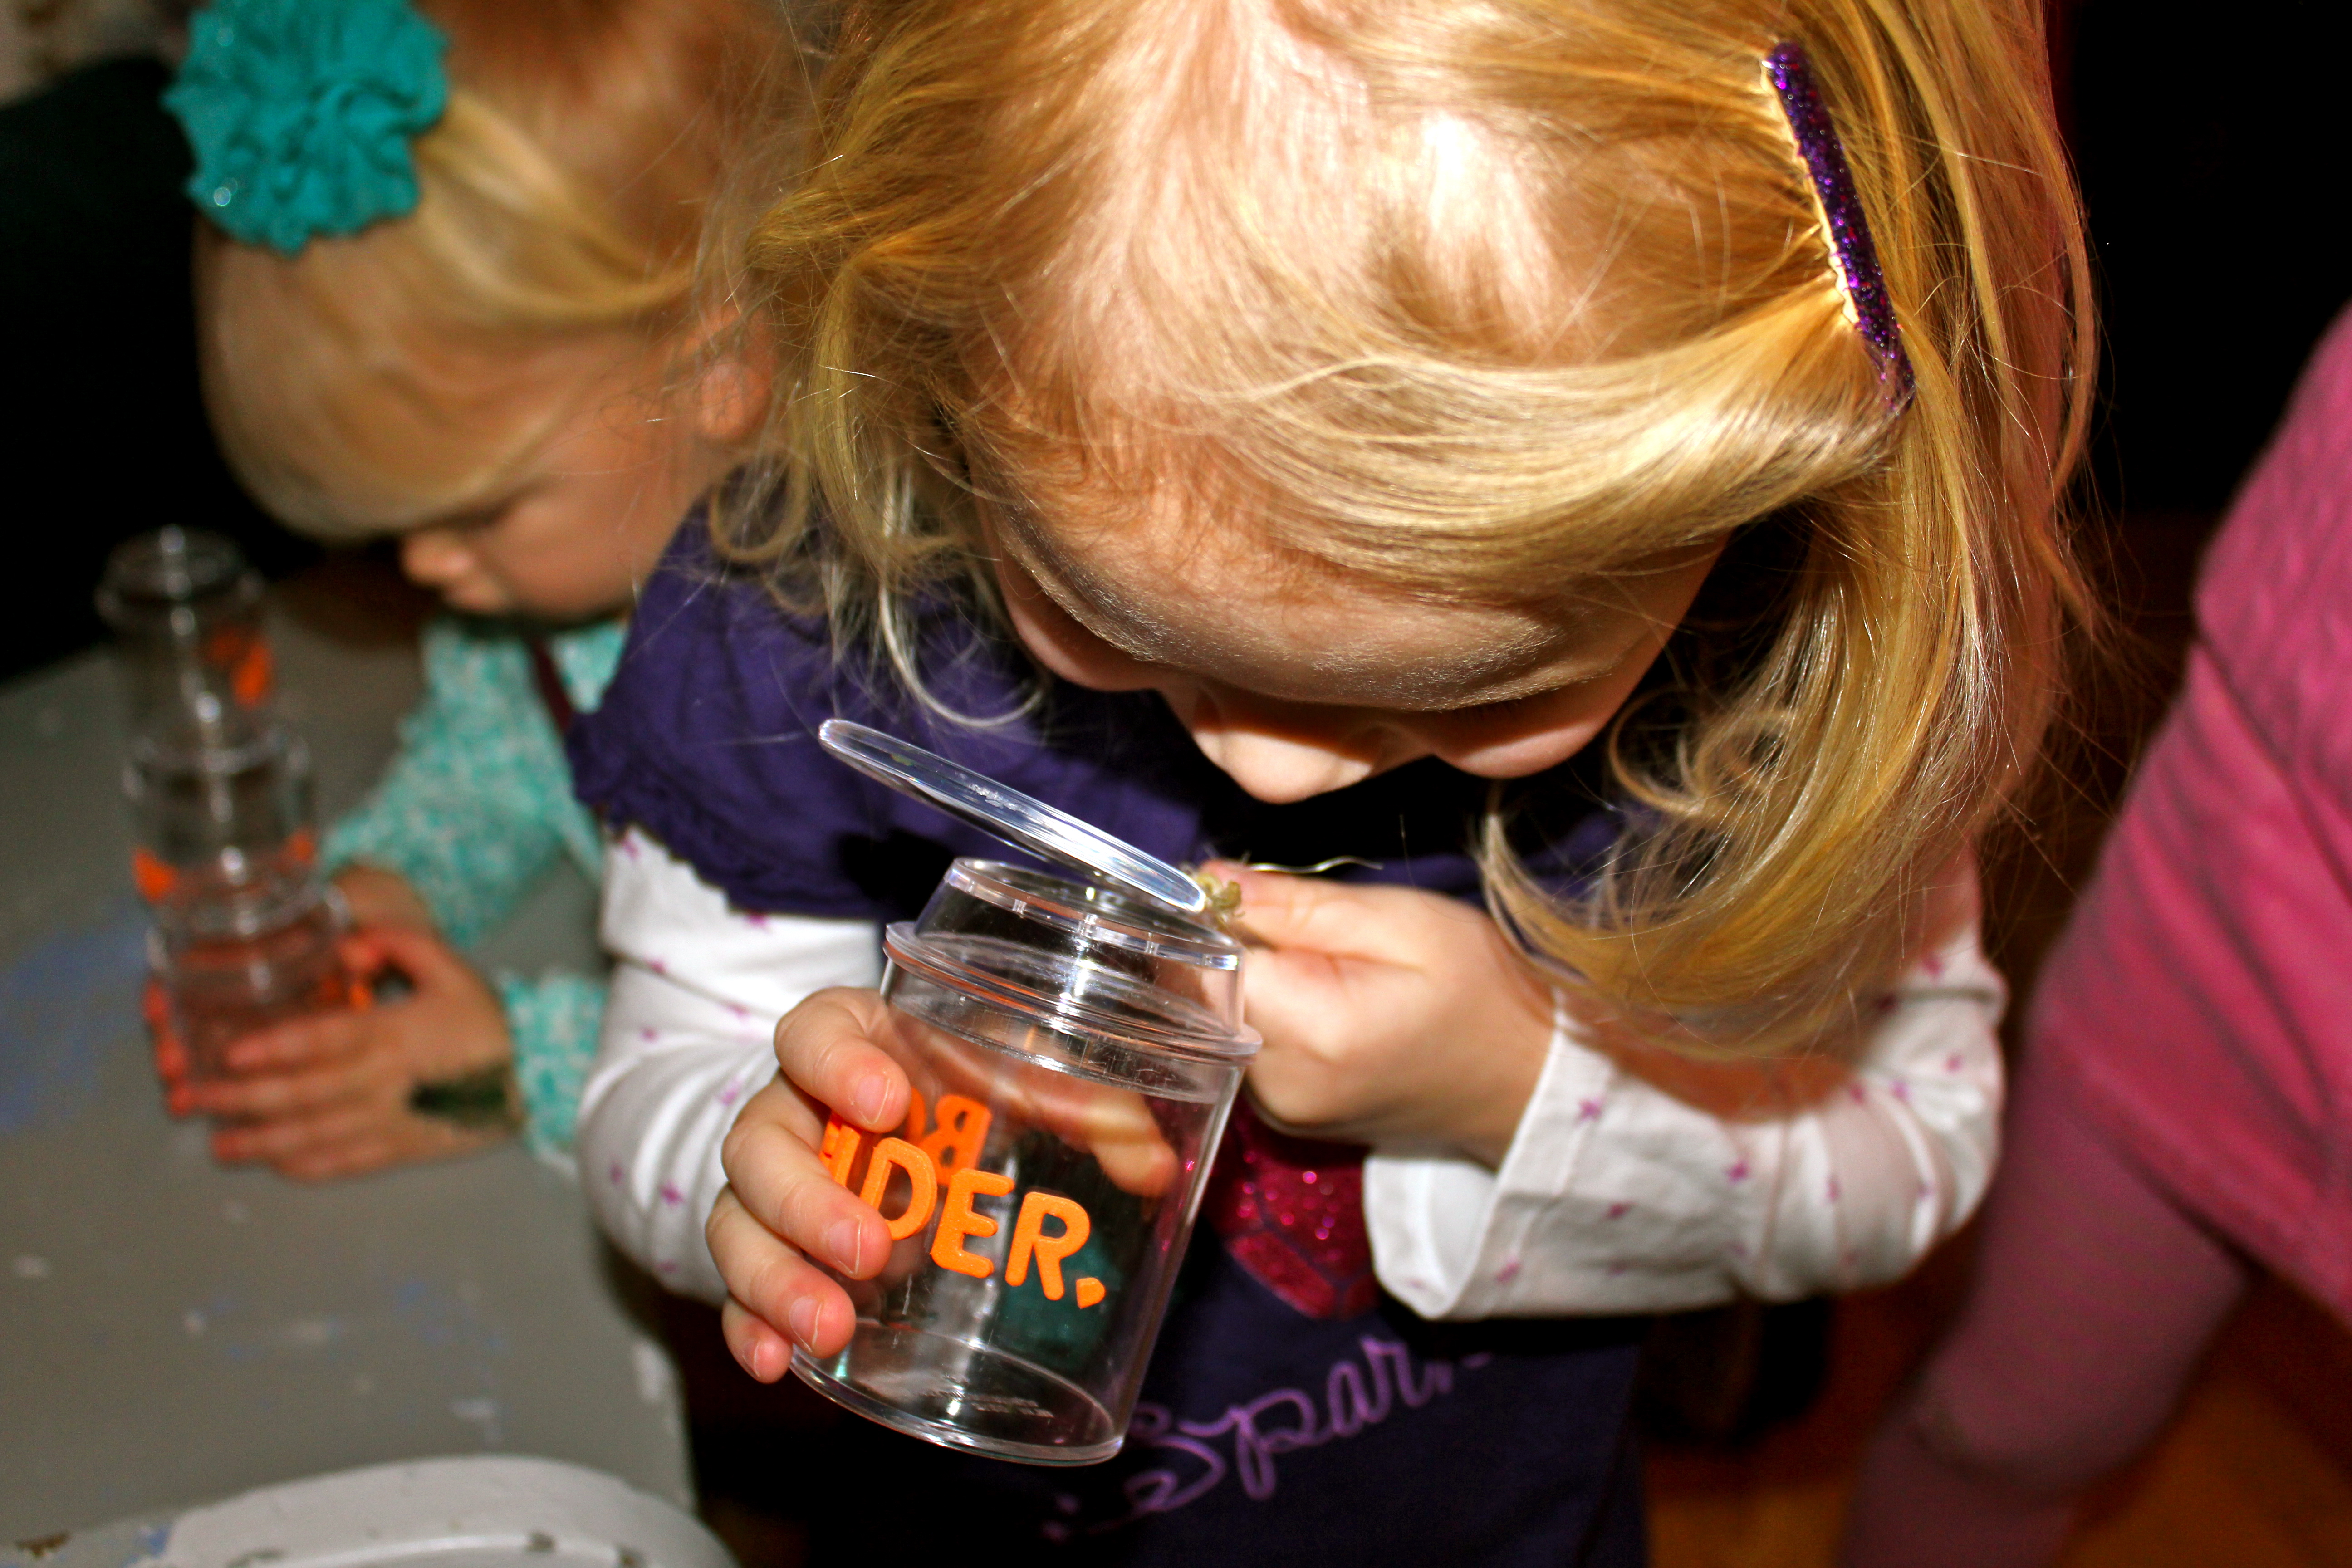
By special request from the birthday boy himself, we had real bugs join us for his BIG day.

We placed the…um…specimens in these clear, plastic viewing containers. The tops of the containers contained a magnifying glass so the kids could see the bugs up close and personal. (Containers were also purchased from Oriental Trading.)

We had spiders and beetles and crickets…oh my! A majority of the bugs were procured from our local pet store and at least one (Mr. Spider) from our basement…yikes!!! The bugs from our pet store ended up being free too when my husband happened to mention that we just needed one of each for our party. They sell things like crickets in bulk so reptiles of all stripes get their supper and I am quite sure they did not have a way to ring up one solo cricket. So free it was!
They gave us that gross looking worm too. I won’t gross you out further by telling you that this worm was carnivorous and that we had to be sure it didn’t eat the cricket and beetle it shared a plastic baggy with all the way home. I just won’t. I like you all too much.

The bugs were a HIT with the kiddos and none escaped so I considered that party success!
It feels really wrong to move from bugs to food, but stick with me! I hear bugs are a great source of protein.
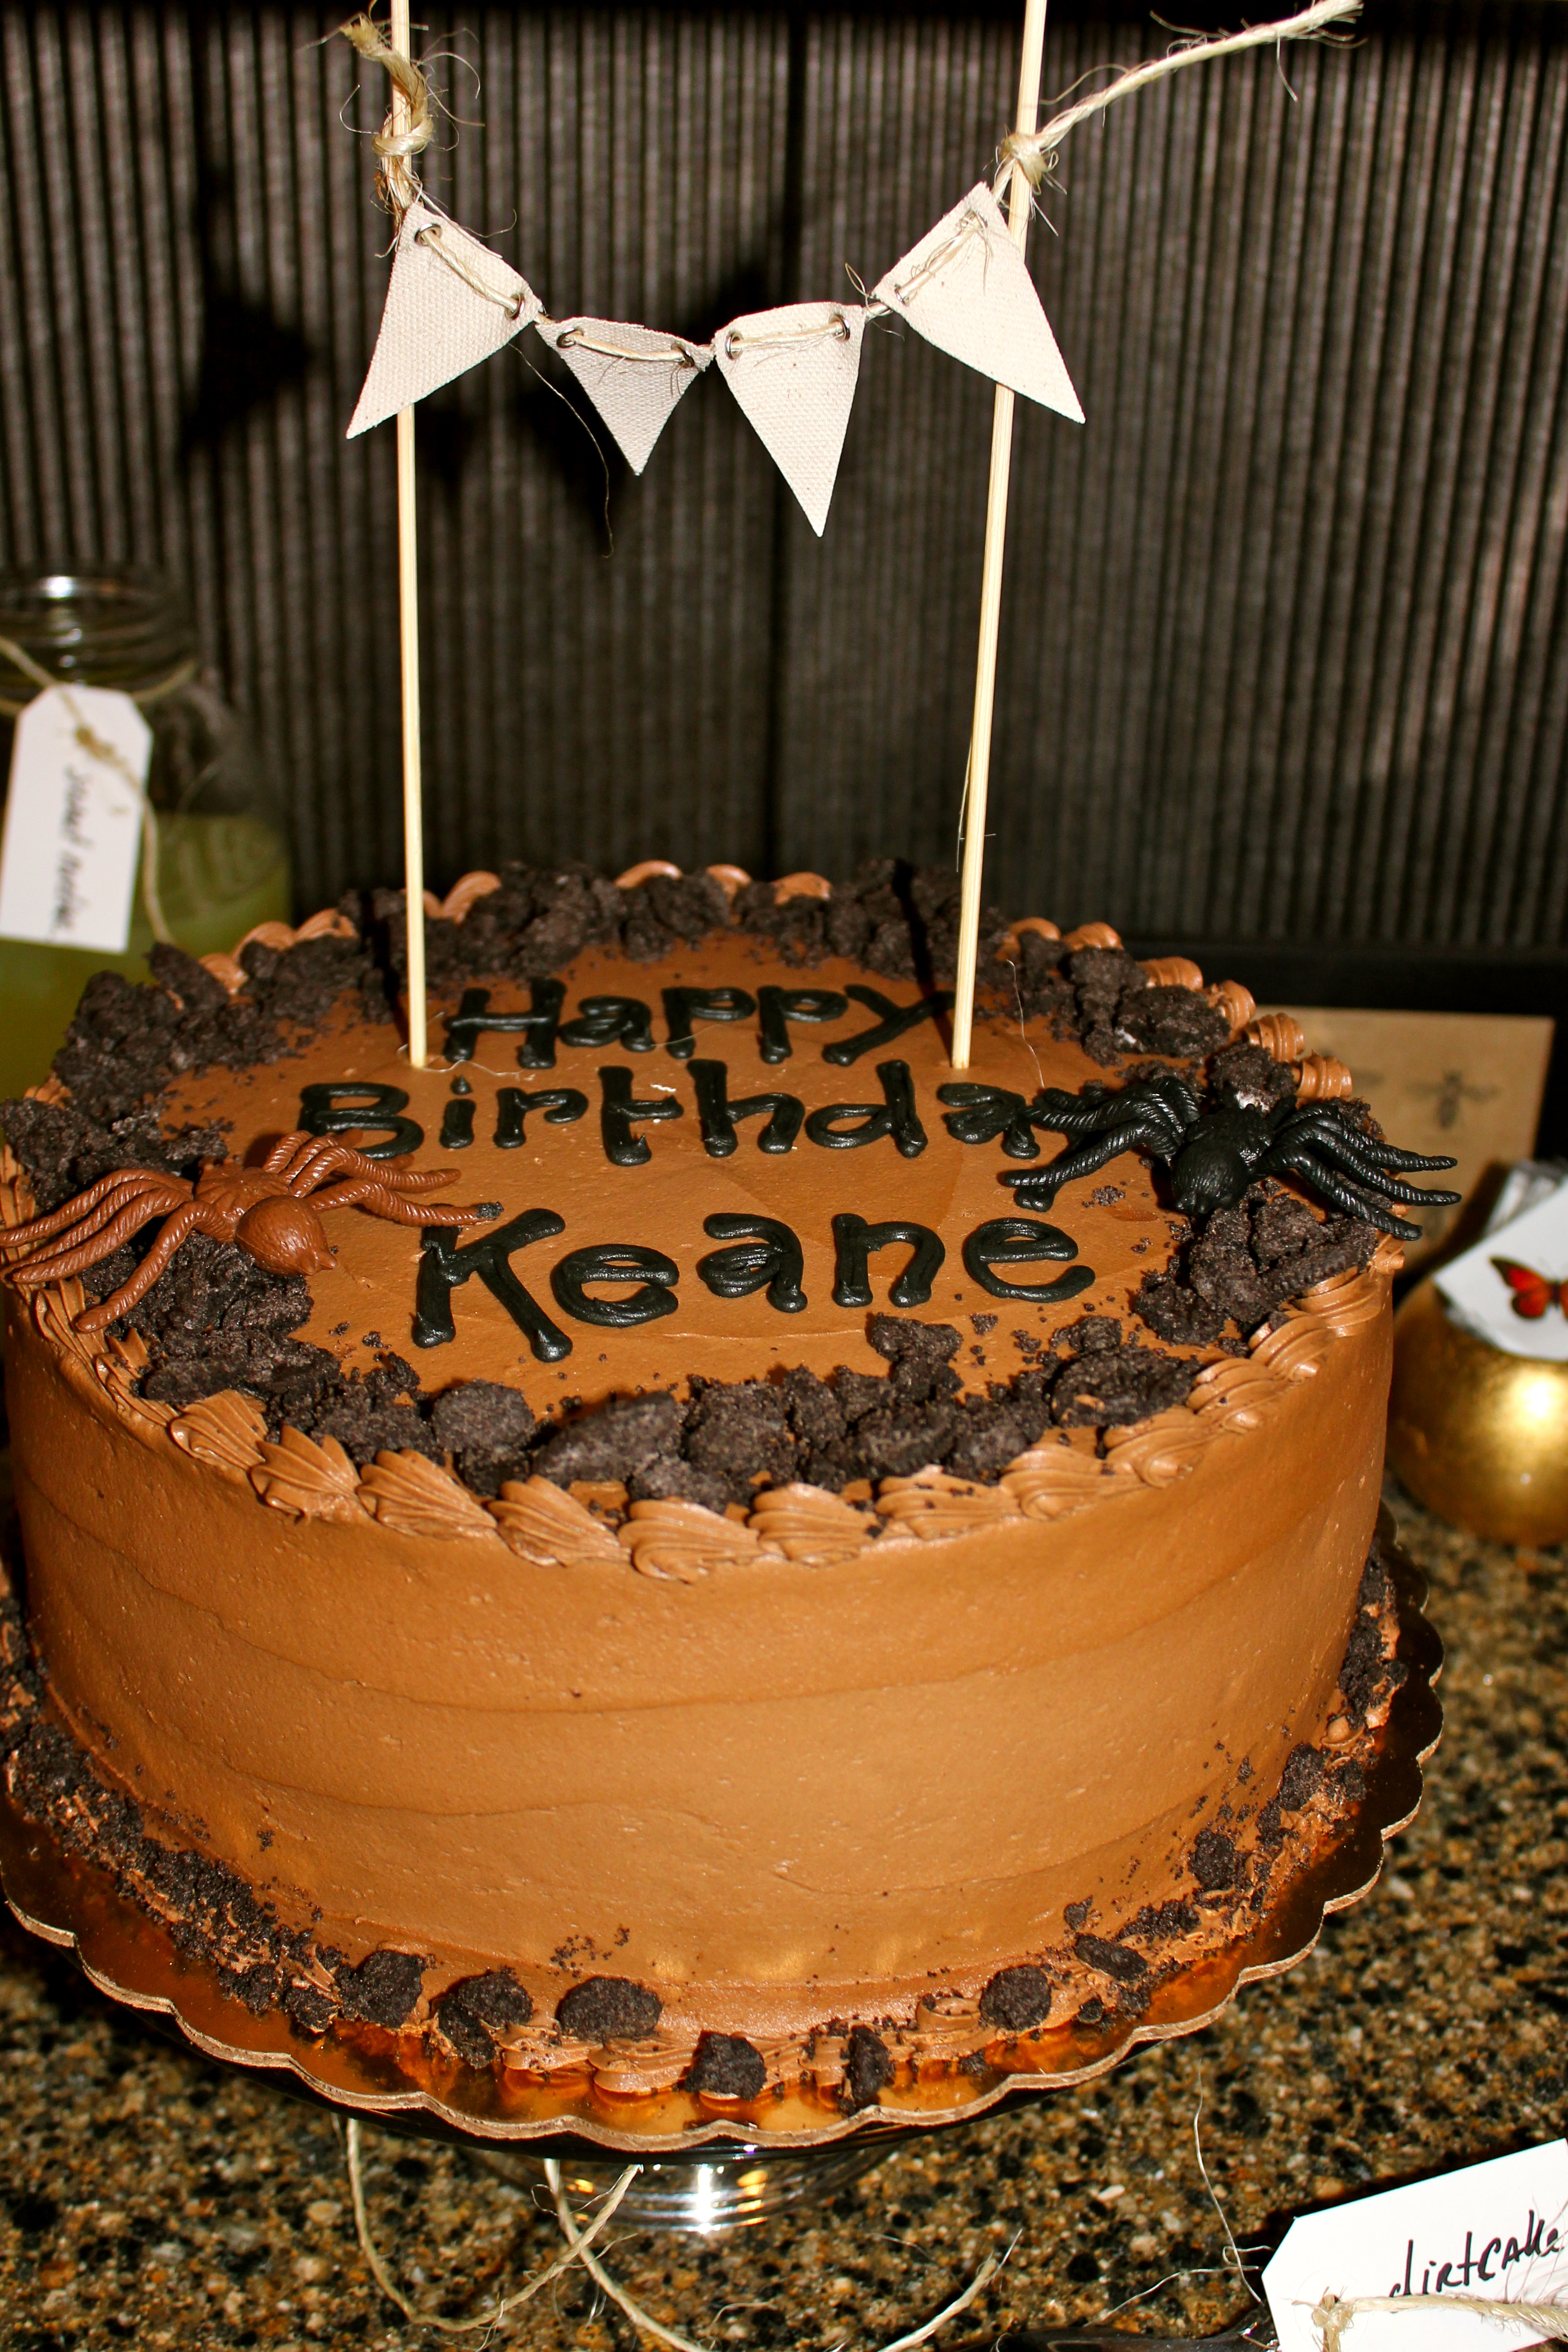
We had a ‘dirt’ birthday cake for this outdoor-inspired affair. A chocolate cake topped with piles of dirt (Oreo cookies) and some (thankfully) fake spiders was blissfully delicious.
We also noshed on Wasp-amole (homemade guacamole) and of course ants on a log.

To wash it all down? Sweet nectar…also known as simple lemonade.
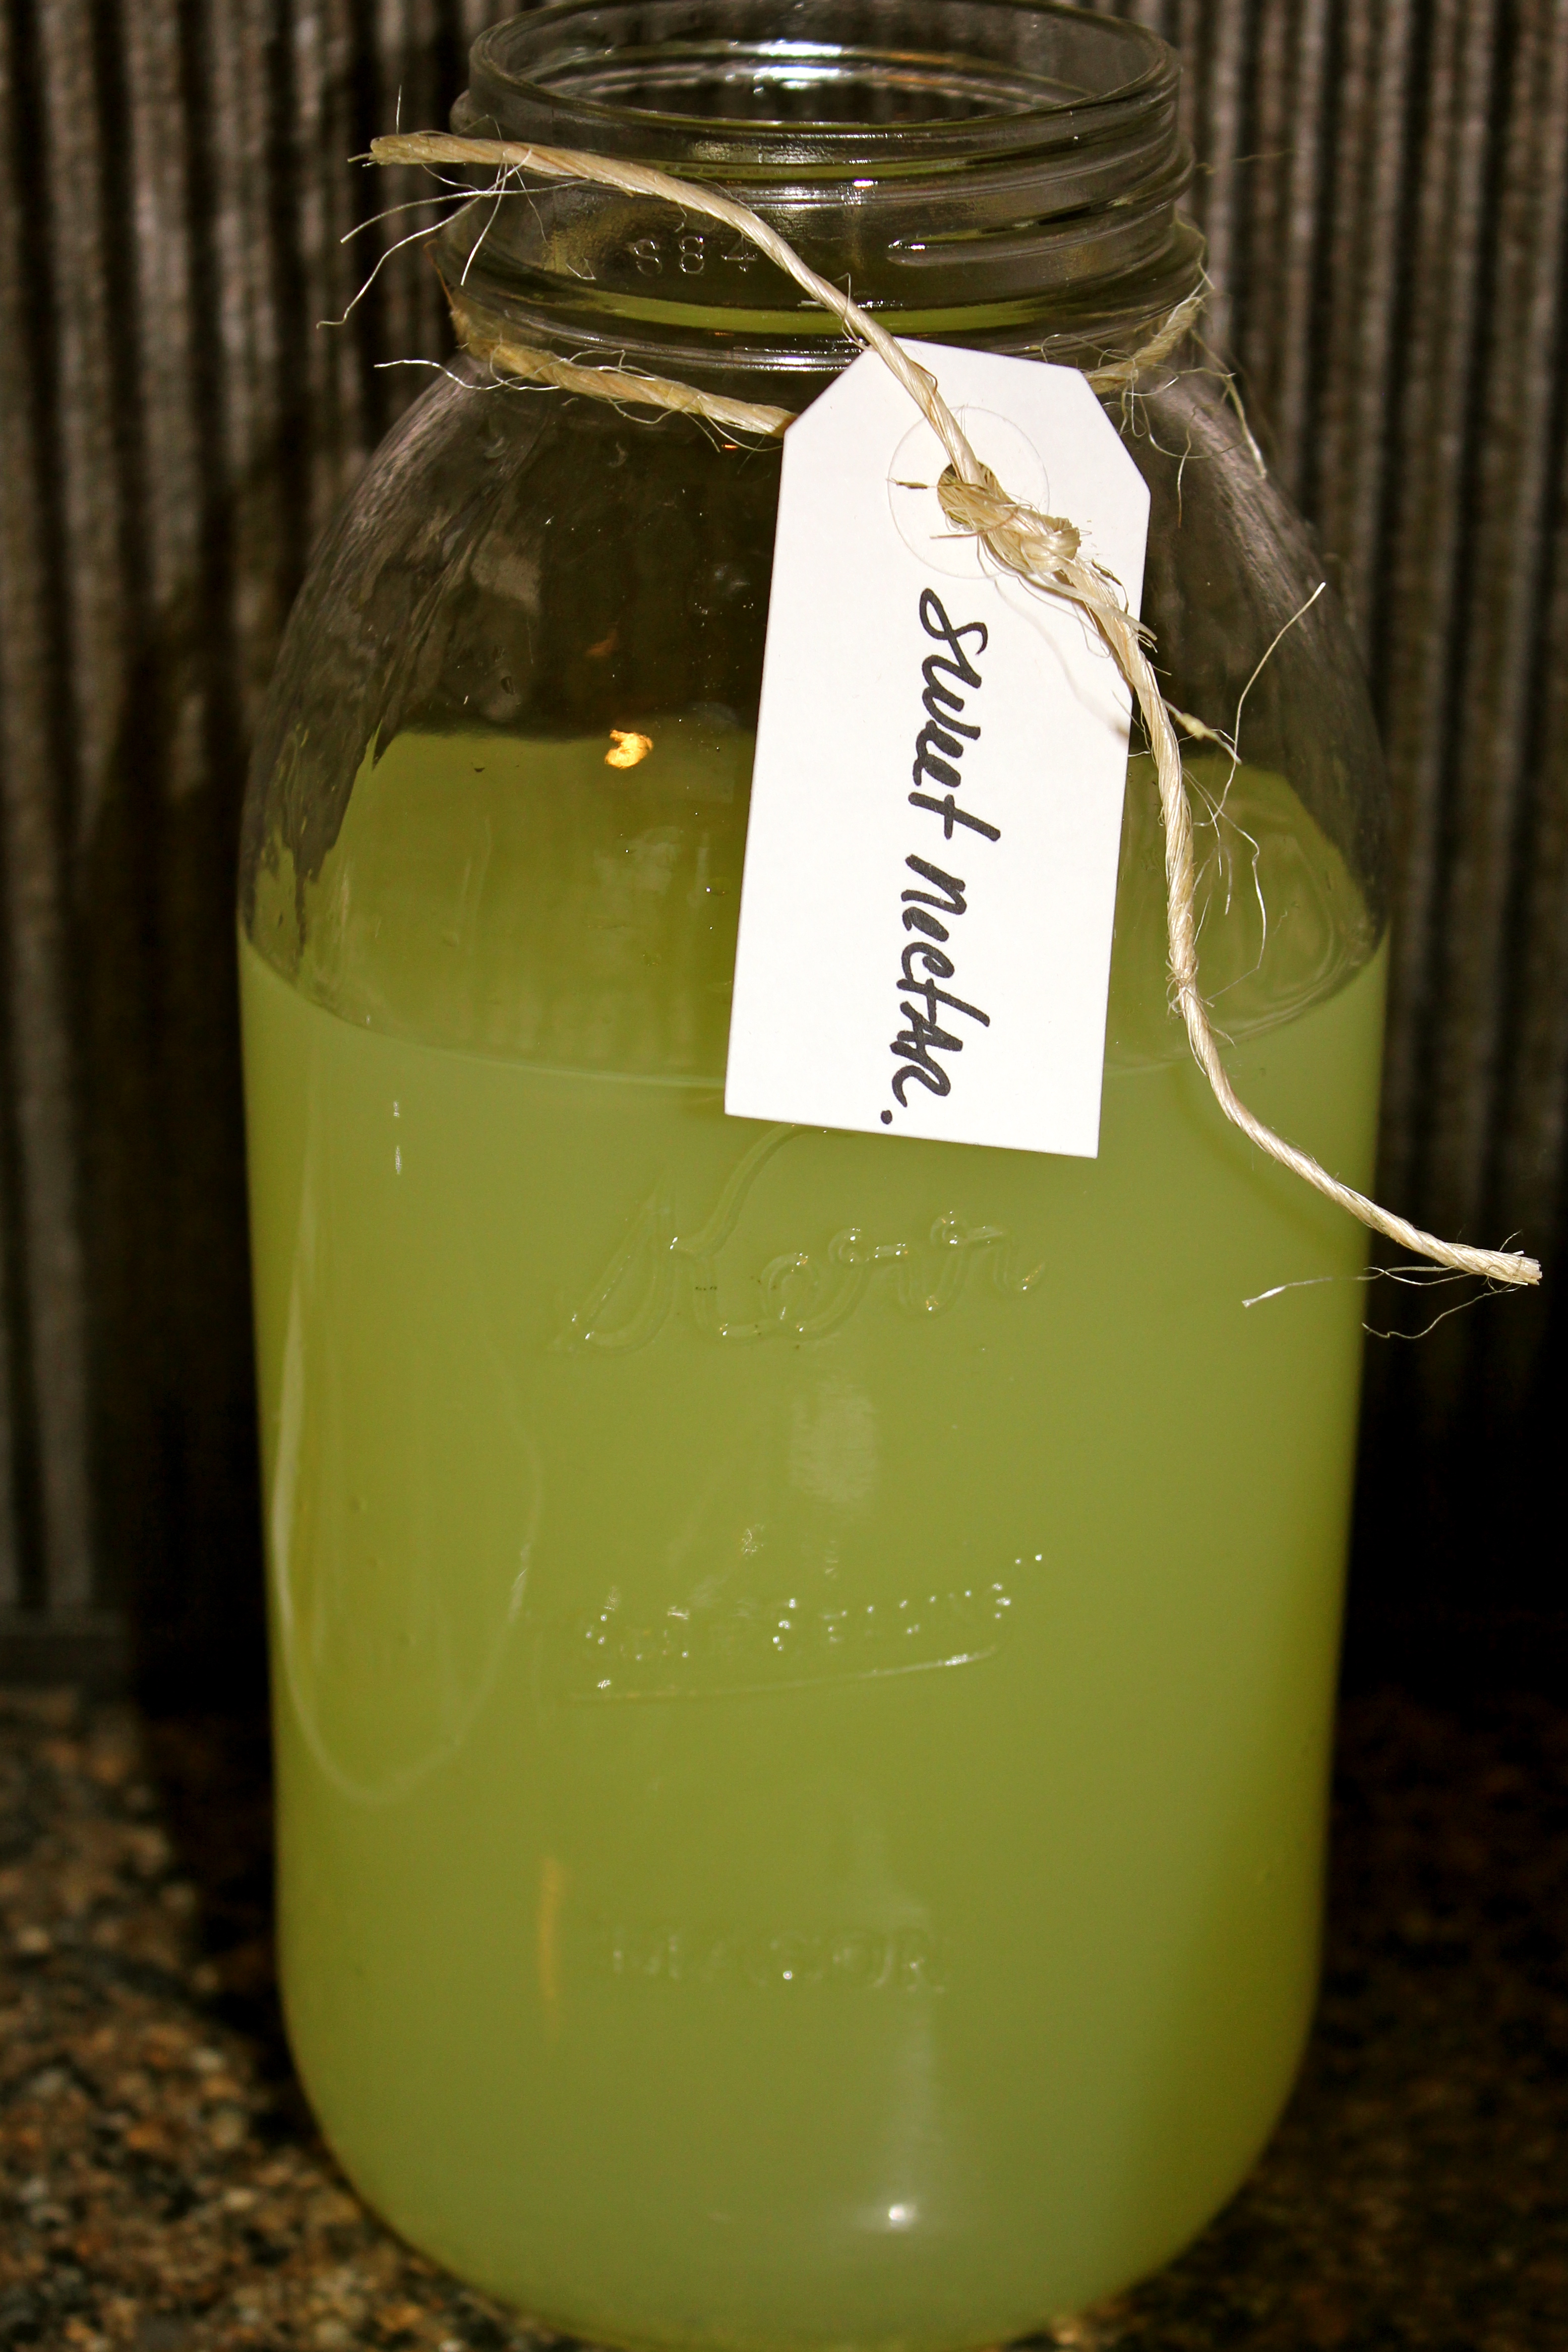
The birthday boy had no problem sucking down that sweet nectar and getting his fill of all the other sweet treats too. He comes by his sweet tooth teeth quite naturally. It wasn’t my fault. I was very pregnant and his sister had brought home a Halloween candy haul and I was very pregnant and hungry and exercised no self control whatsoever. OK, so maybe it was a teeny, tiny bit my fault.
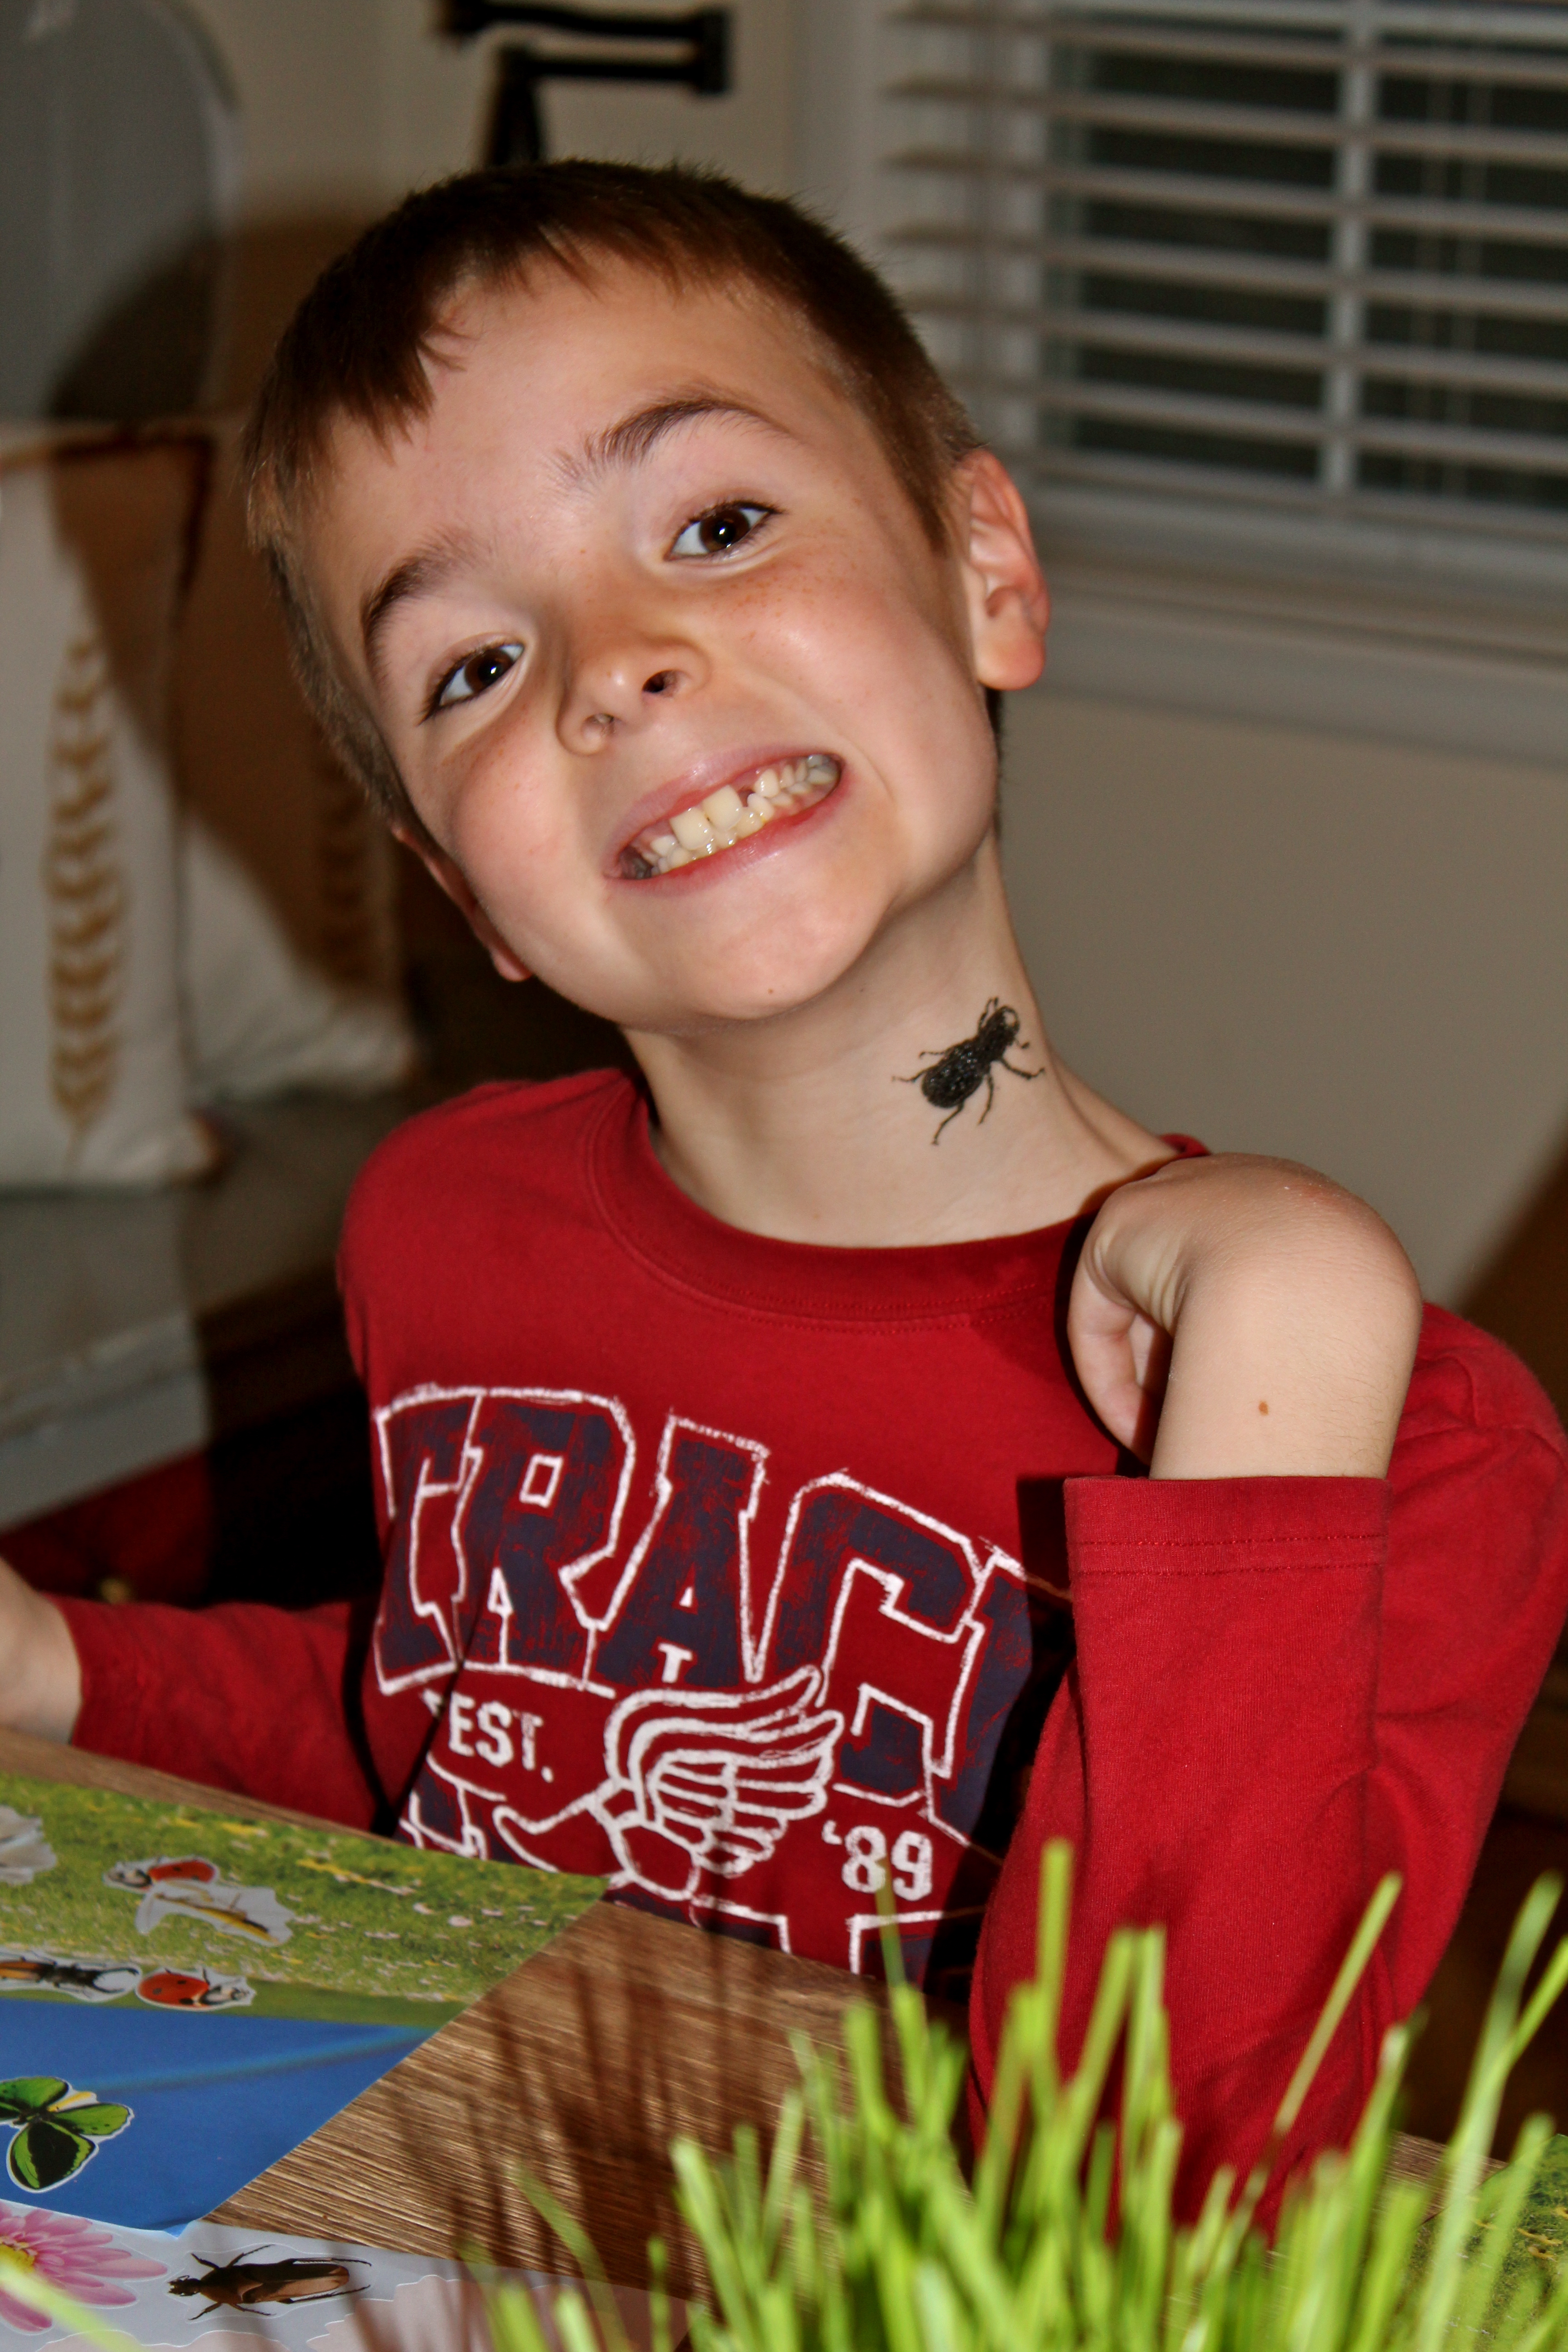
Oh…I almost forgot the bug and insect tattoos. How can one possibly forget these when they were such a hit with the party guests!?

Large, colorful bug tattoo on each cheek? Check!

How about the neck? Check! Check! (His parents had to leave the party early to celebrate their anniversary and this my friends is what happens when you leave your dear ones alone with me and temporary tattoos!)
The party guests all decked out in tattoos and hopped up on sugar. Parents! You’re welcome. 🙂

On a more serious note, I can’t believe what a grown-up, amazing young man my sweet son is growing up to become. We couldn’t be more proud. We love you buggy! (That is actually one of his nicknames. No pun intended.)

And one last thing…a little preview of what this year’s totally awesome party theme is going to be. And I promise…no live turtles!

Happy Friday everyone! I hope you get the chance to celebrate someone or something this weekend!
Stacey
I heart fall. Without a doubt, my favorite season. Cooler days, football games, sweaters, excuses to snuggle, back to school excitement for me (distraction-free errand running…woo hoo!) and the kids (they do love school!) and trips to the apple orchard all contribute to the love.

I am beyond excited to head back to our local fall must-stop, Center Grove Orchard. I mean, who doesn’t dream of racing around in an adult-size-pedal-tractor leaving those you love literally in the dust? Prior to experiencing these, I had spent my entire motherhood just sitting back and watching my littles race around in vehicles of all types: Barbie Jeeps, pedal tractors, John Deere Gators, too many Little Tikes thingys to mention and let’s not forget the entire Radio Flyer catalog that has taken up residence in my garage! But no more mere spectating for this lady! No more!

And if you really want to dominate on the track as long as your racing heart desires, swim in the corn pool until you have taken on a dusty glow and ride down the BIG slide over and over without ever waiting your turn, we recommend heading to this local treasure on a week night. They are open until 7 pm and when we ventured there on a late Tuesday afternoon last year, we pretty much had the run of the place to ourselves until close!

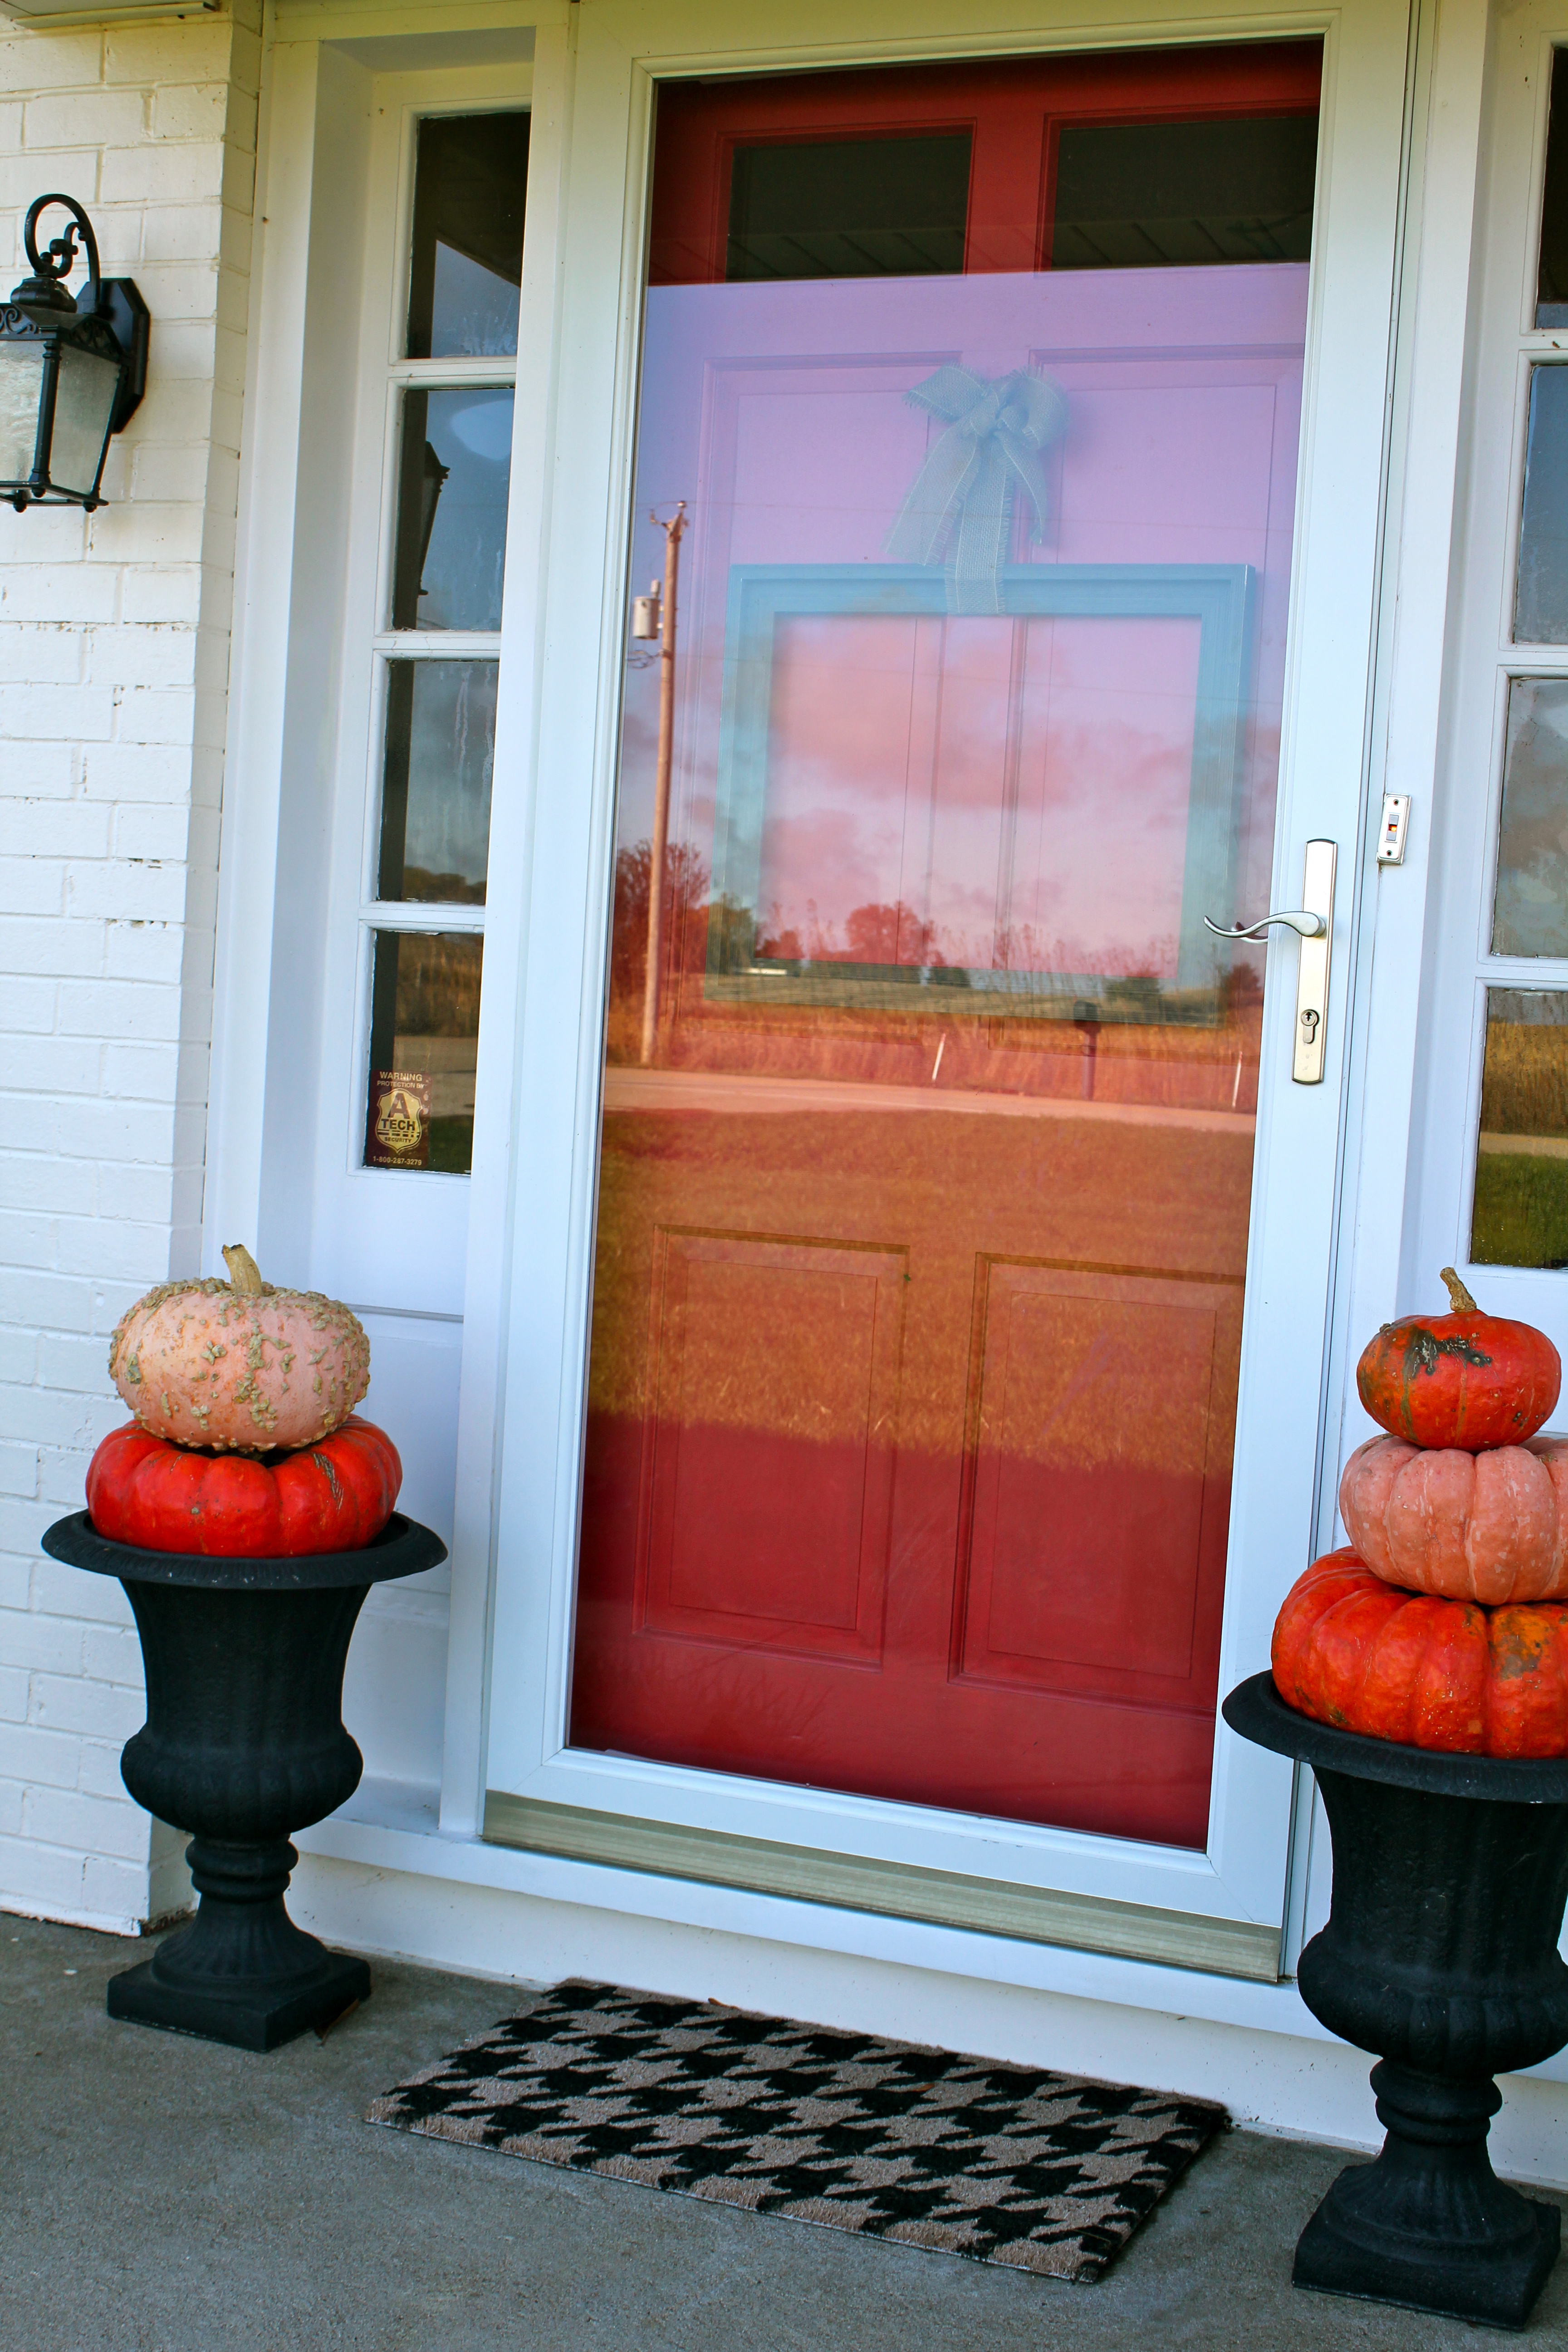
Other things I am hearting this fall: this houndstooth welcome mat that has found a new home under our red front door. I picked this one up at our local Target for $12.99. (Photo is sans door because I couldn’t get a good shot of just the door and the mat without also capturing my dead flowers in their pots (We are in a serious drought and they gave up the good fight!) and the dirt/dried grass that have been captured by numerous spider webs surrounding our front steps. Can I blame the drought and extreme heat on that too? Thanks for listening.

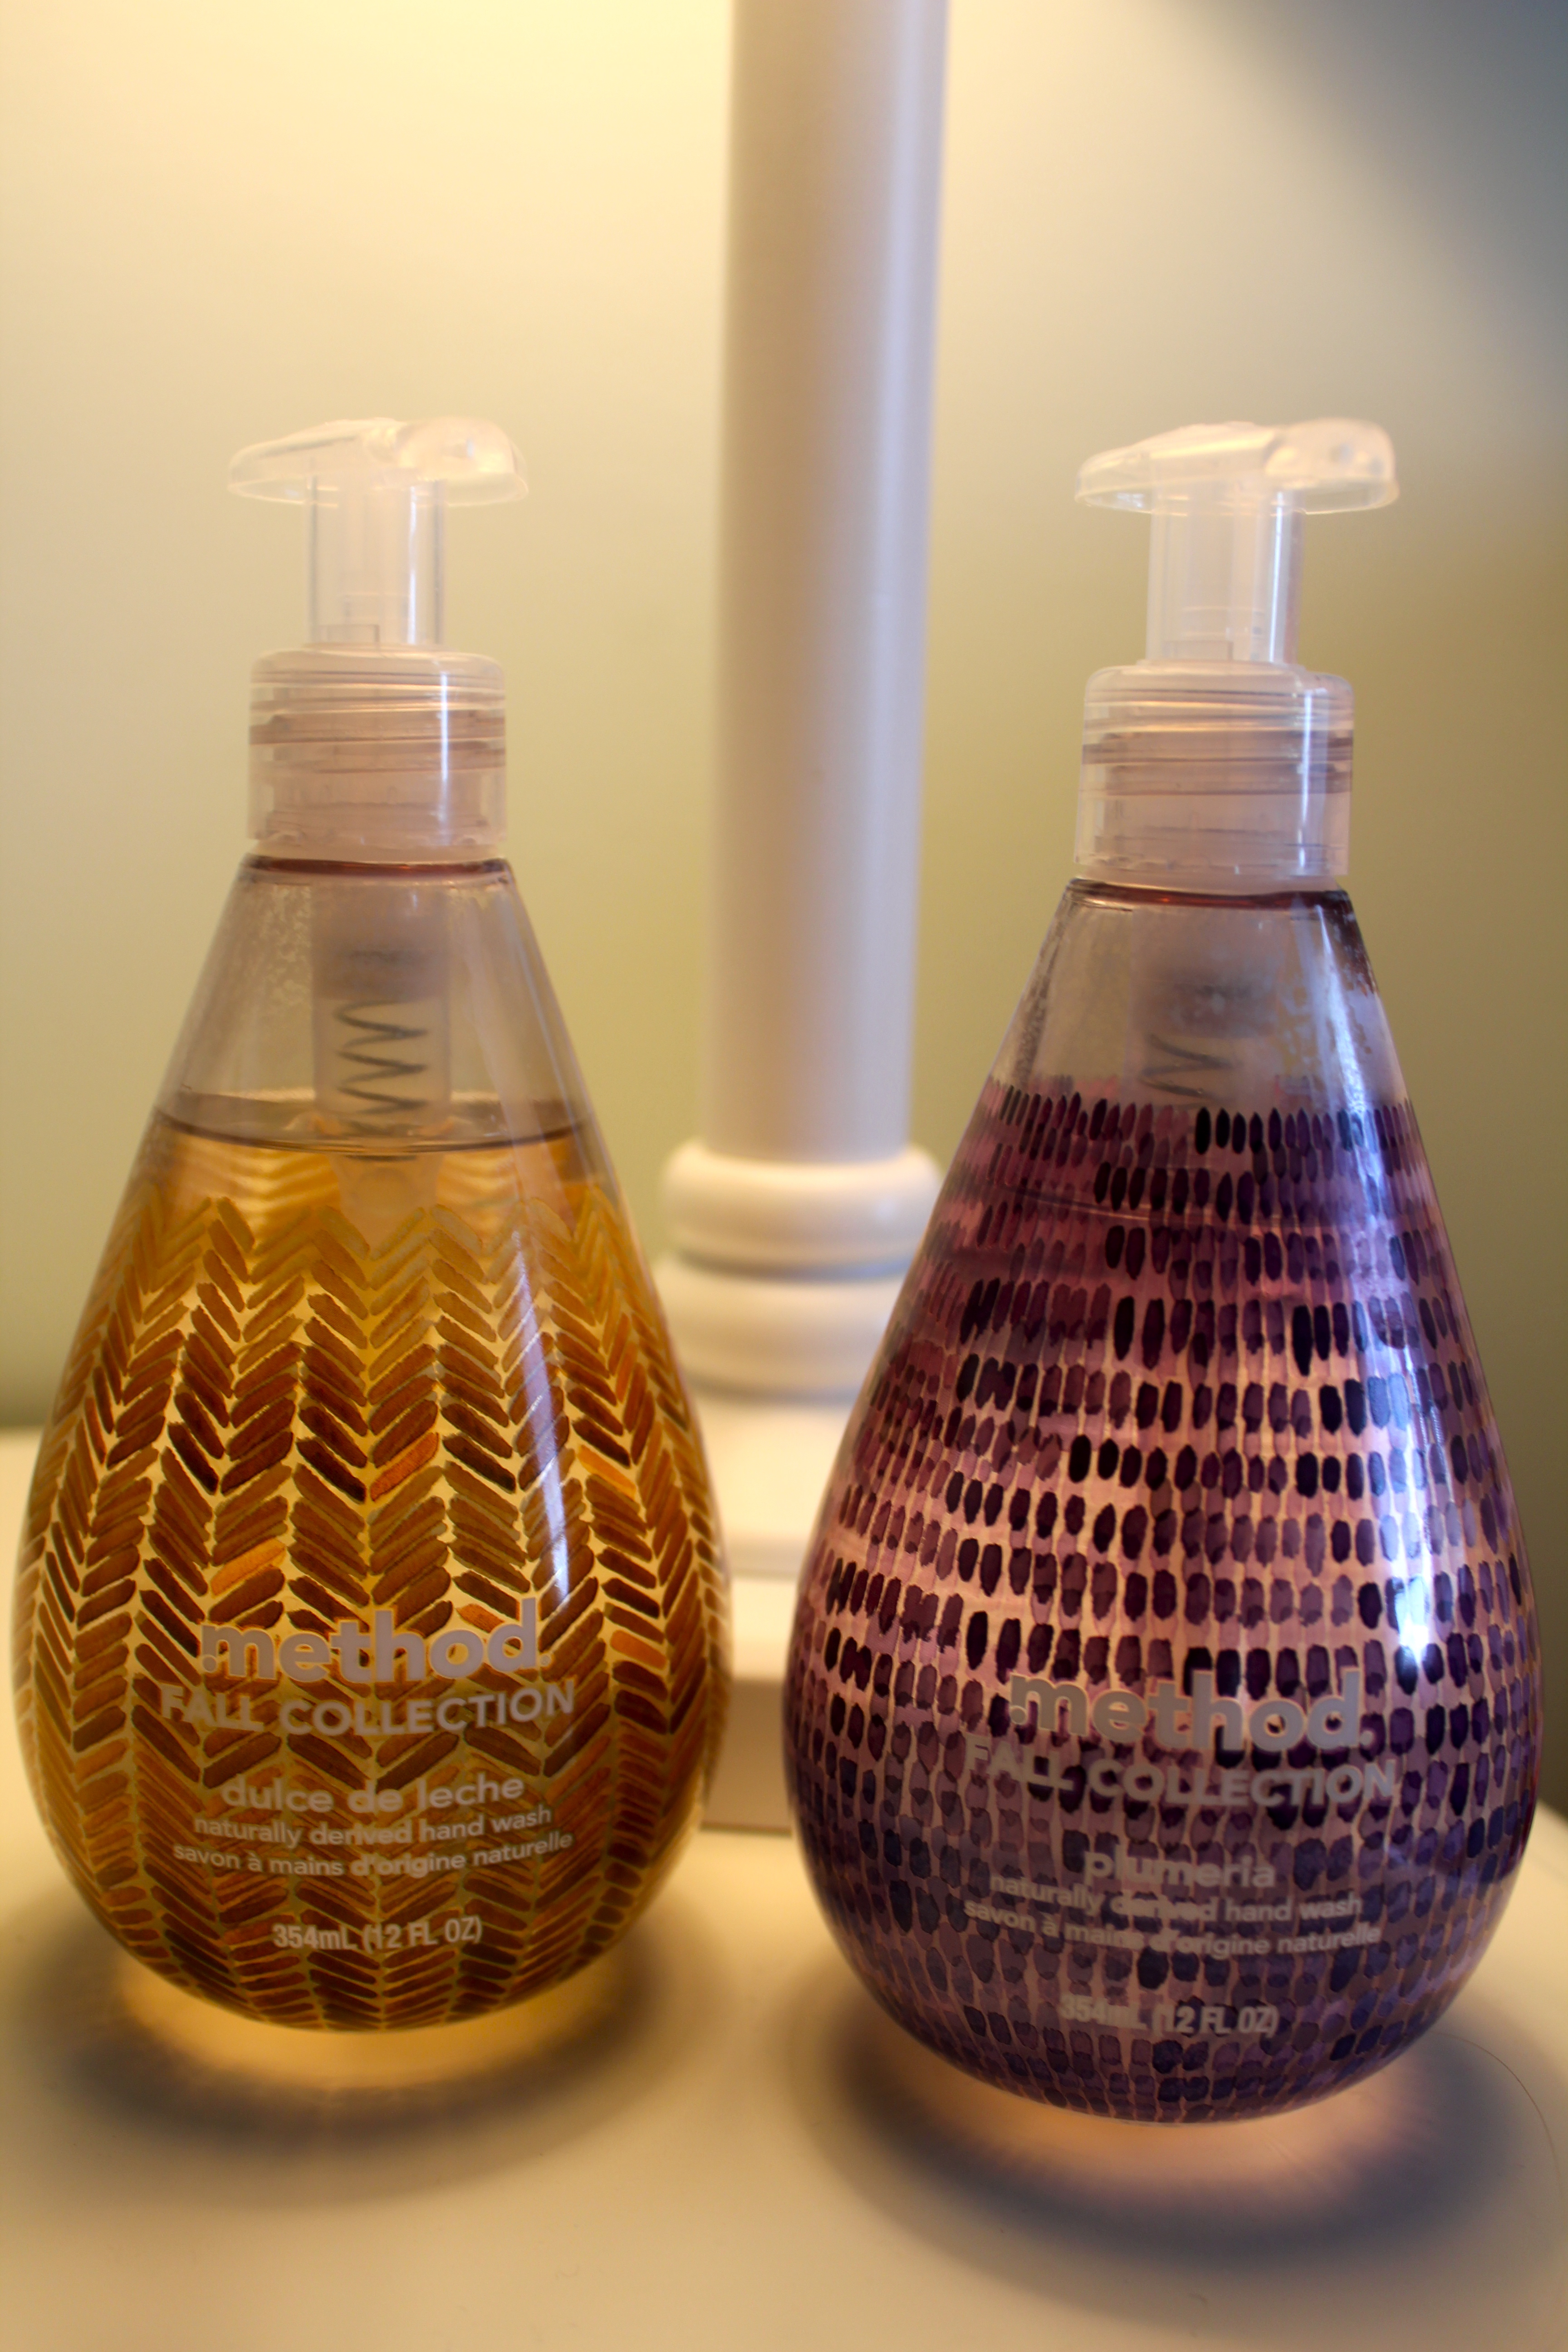
Another Target find? Yes, indeed-y. I picked up these two method Fall Collection soaps for the kids bathroom for $2.99 each. They both smell divine but I am a particular fan of the dulce de leche. I blame my sweet tooth teeth.
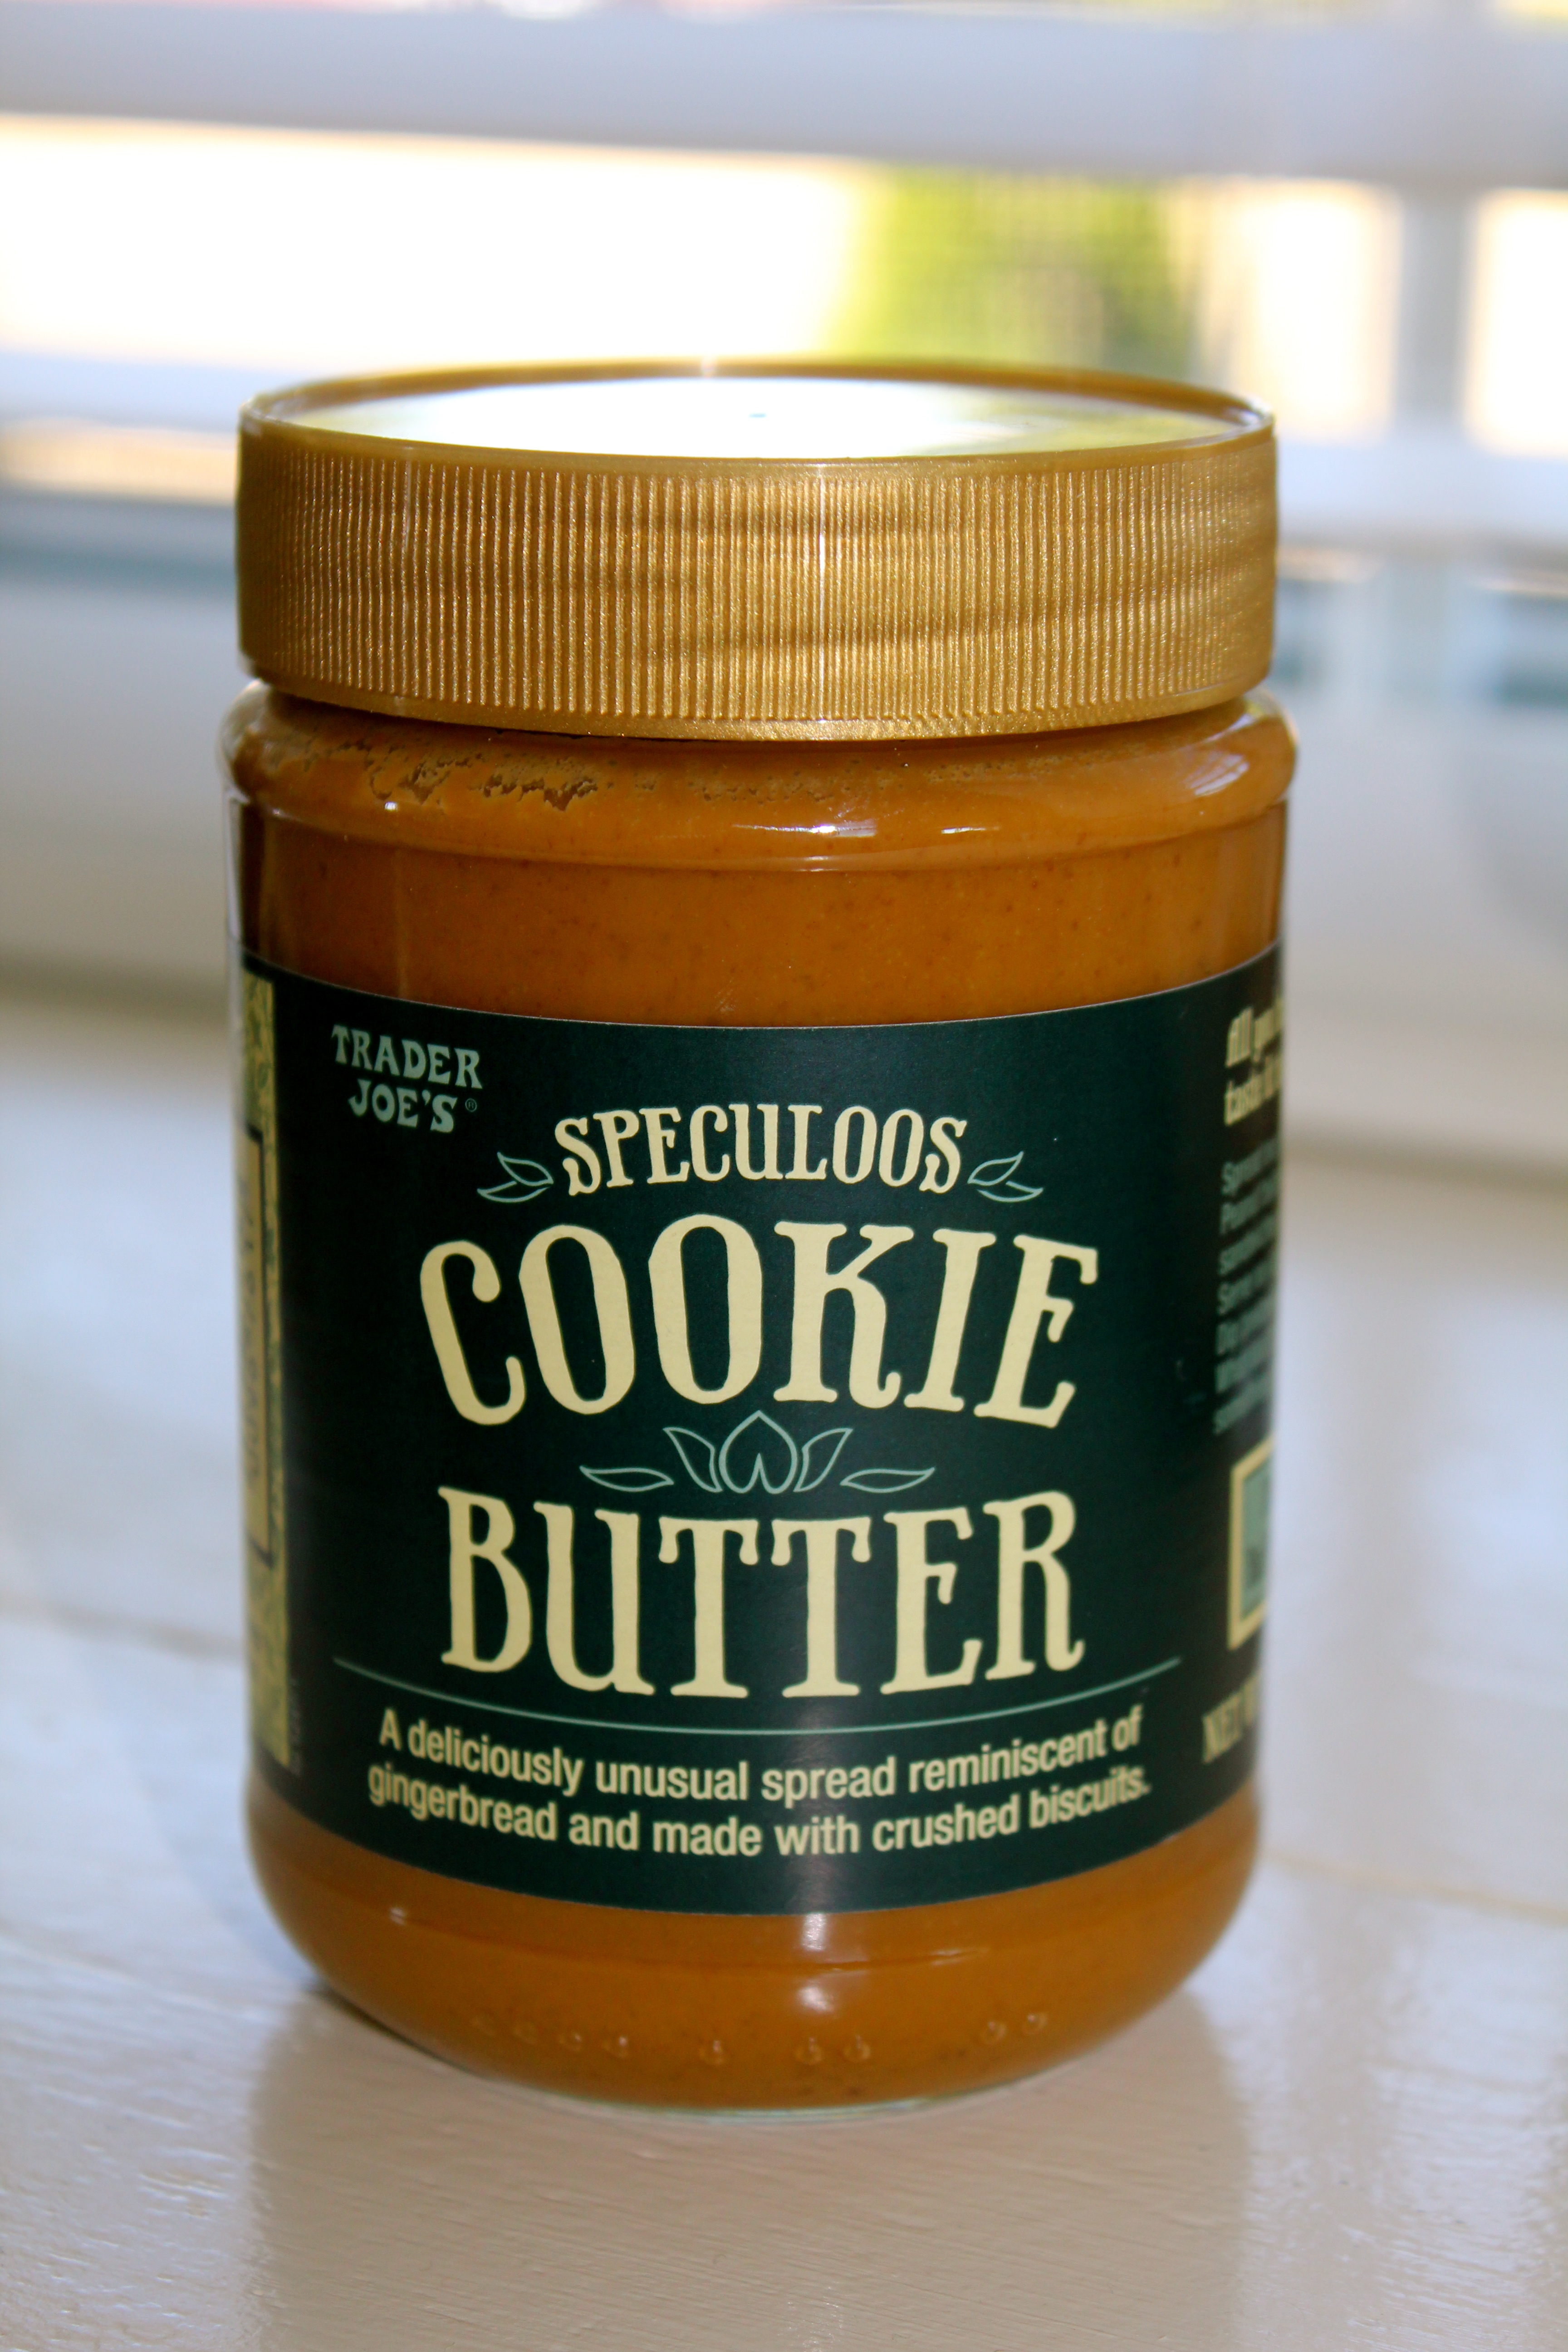
Speaking of sweet…the greatest spread to have EVER been created, packaged and sold for under $4.00 is Trader Joe’s Speculoos Cookie Butter. Ever since Beau saw a woman in our local Trader Joe’s search for, find and then possessively grab a jar of this sweet stuff like it was her job, it has been a staple in our home. It truly is a delicious spread that we have enjoyed for all the seasons but if you haven’t tried it yet…fall is the time! I spread mine on a whole wheat bagel for an easy breakfast. I have also been known to put a spoonful of this heaven-in-a-jar in my morning coffee.
Another fall trend I can get squarely behind: the selfie! I mean it is so popular it now has an official definition in both the Oxford and Urban Dictionaries. The selfie side of me is so glad my husband has long arms and took two semesters of college-level photography…so glad!

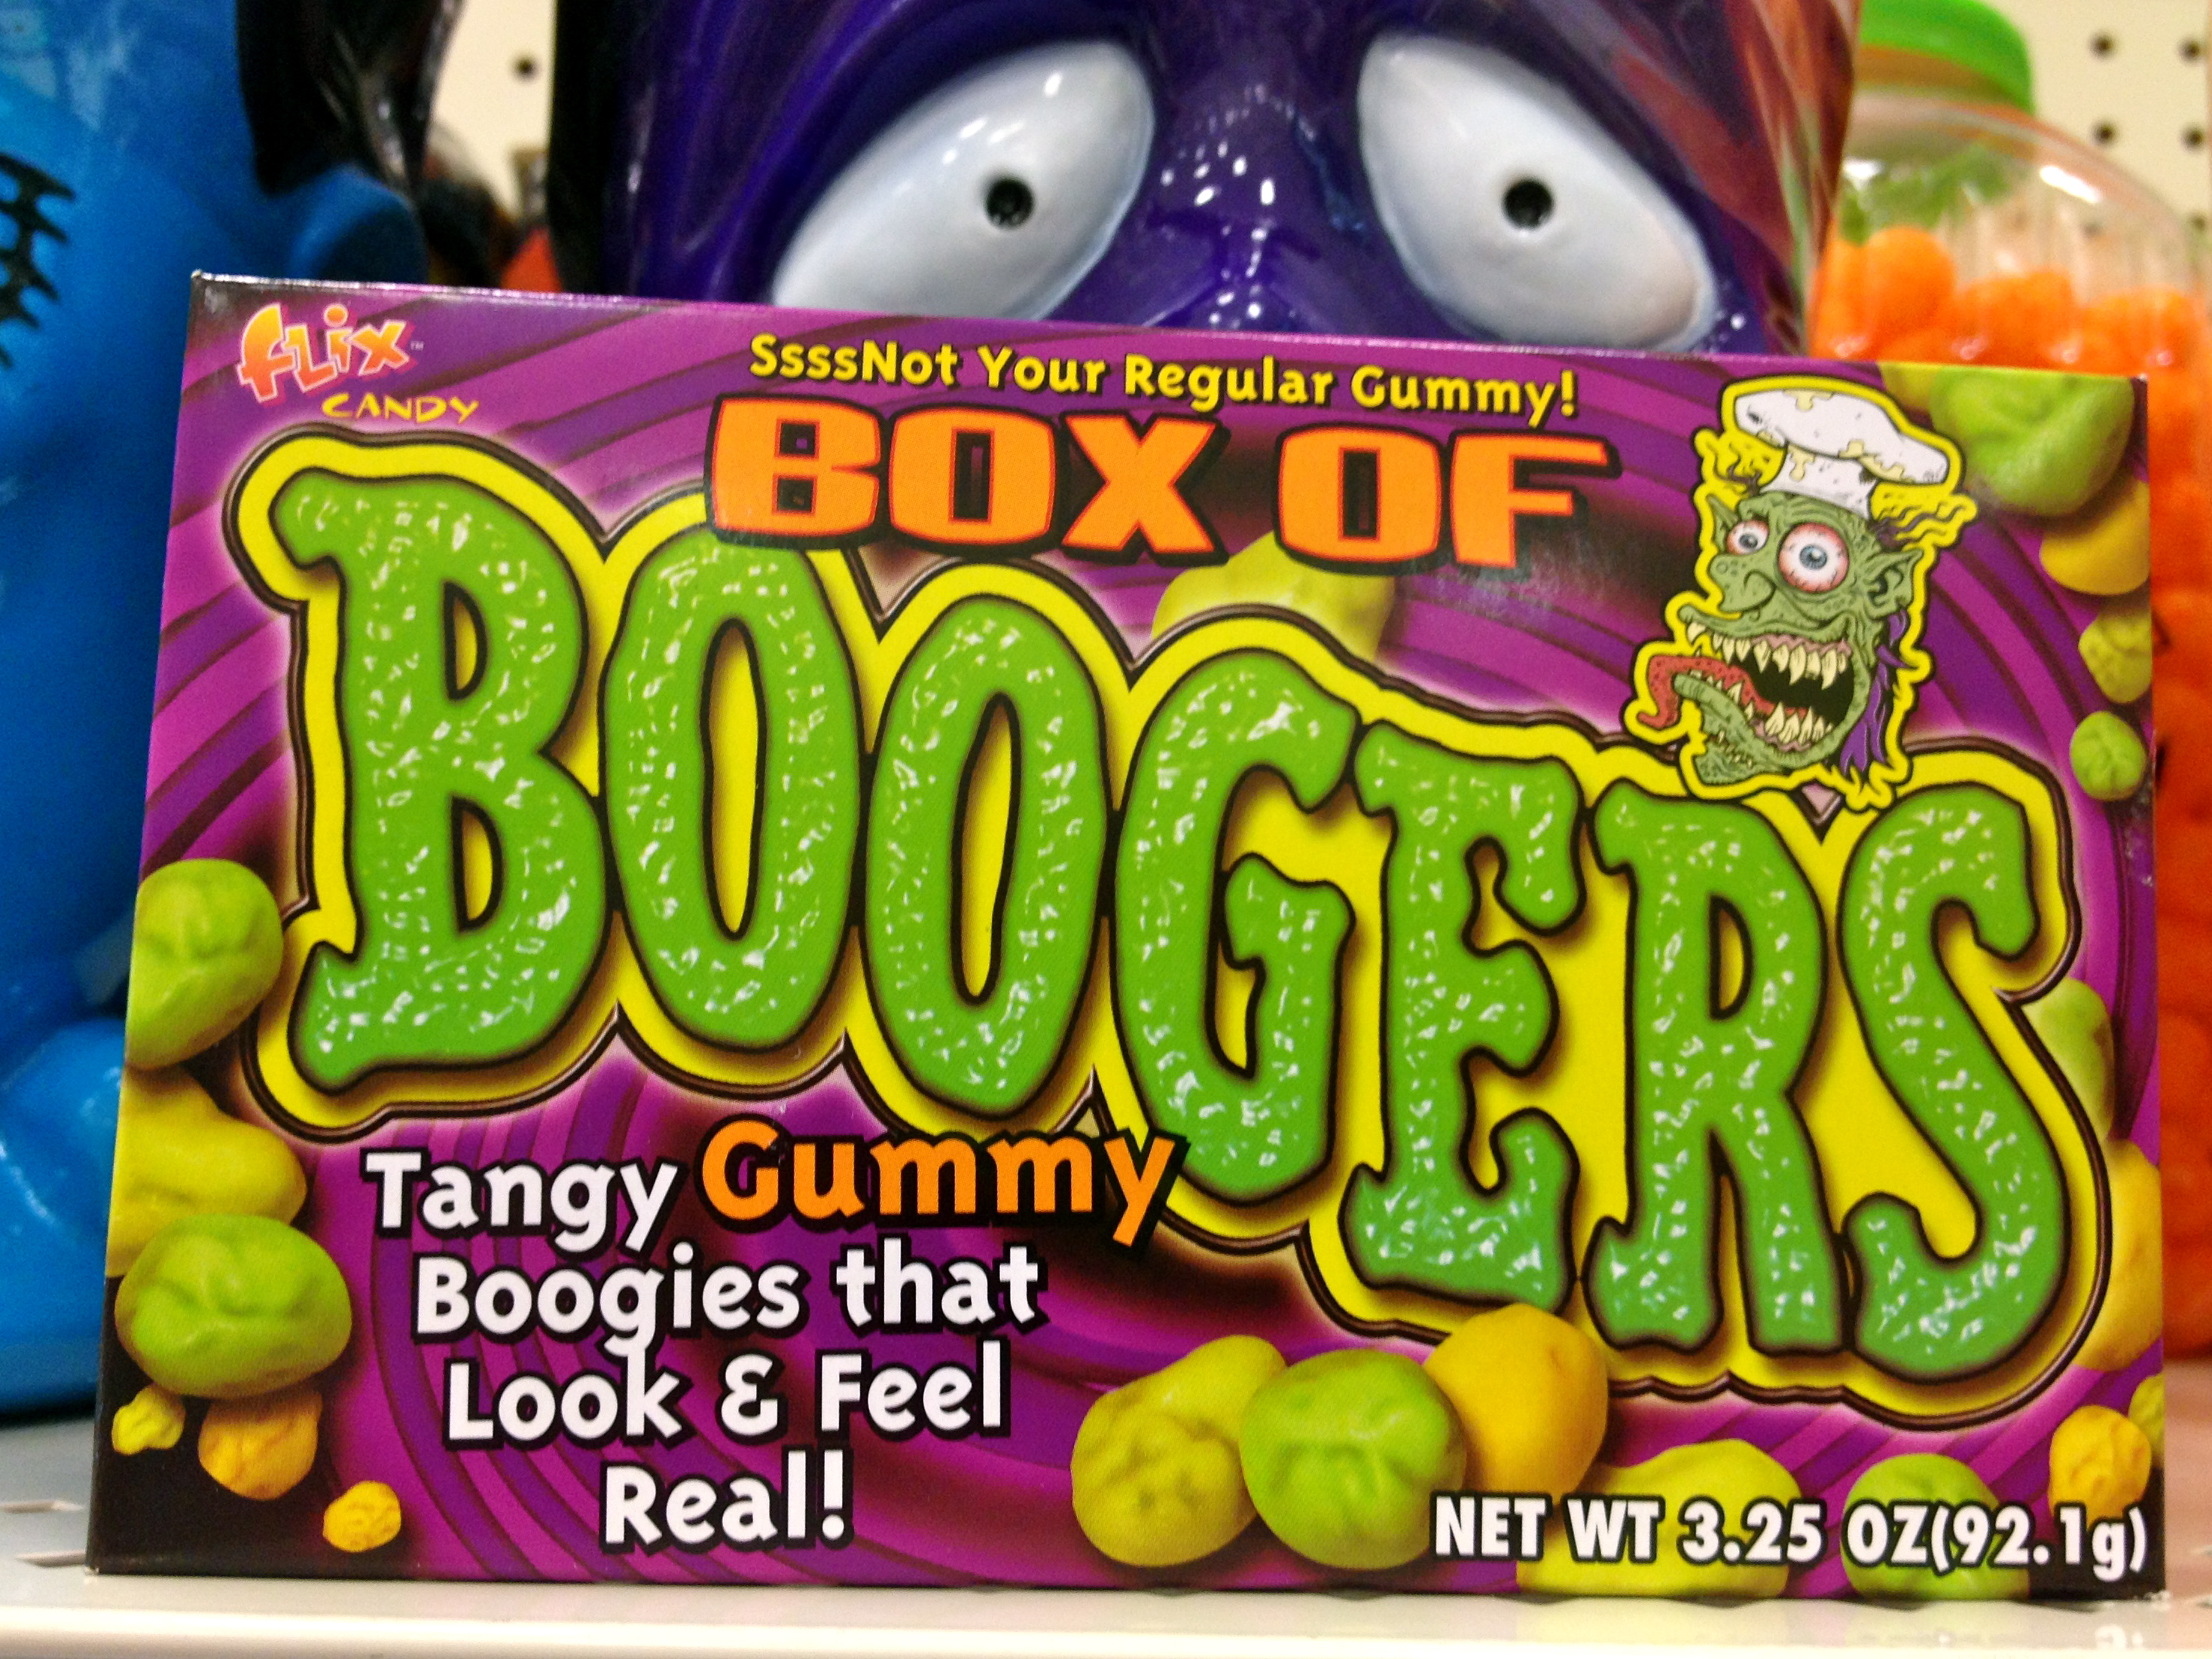
In the category of things I’m NOT exactly hearting this fall: these! They actually sell these…at stores…as food! Why, oh why? Note to self: Add Box of Boogies to my list of things I don’t understand. It will join fat-free chips and Monday mornings.
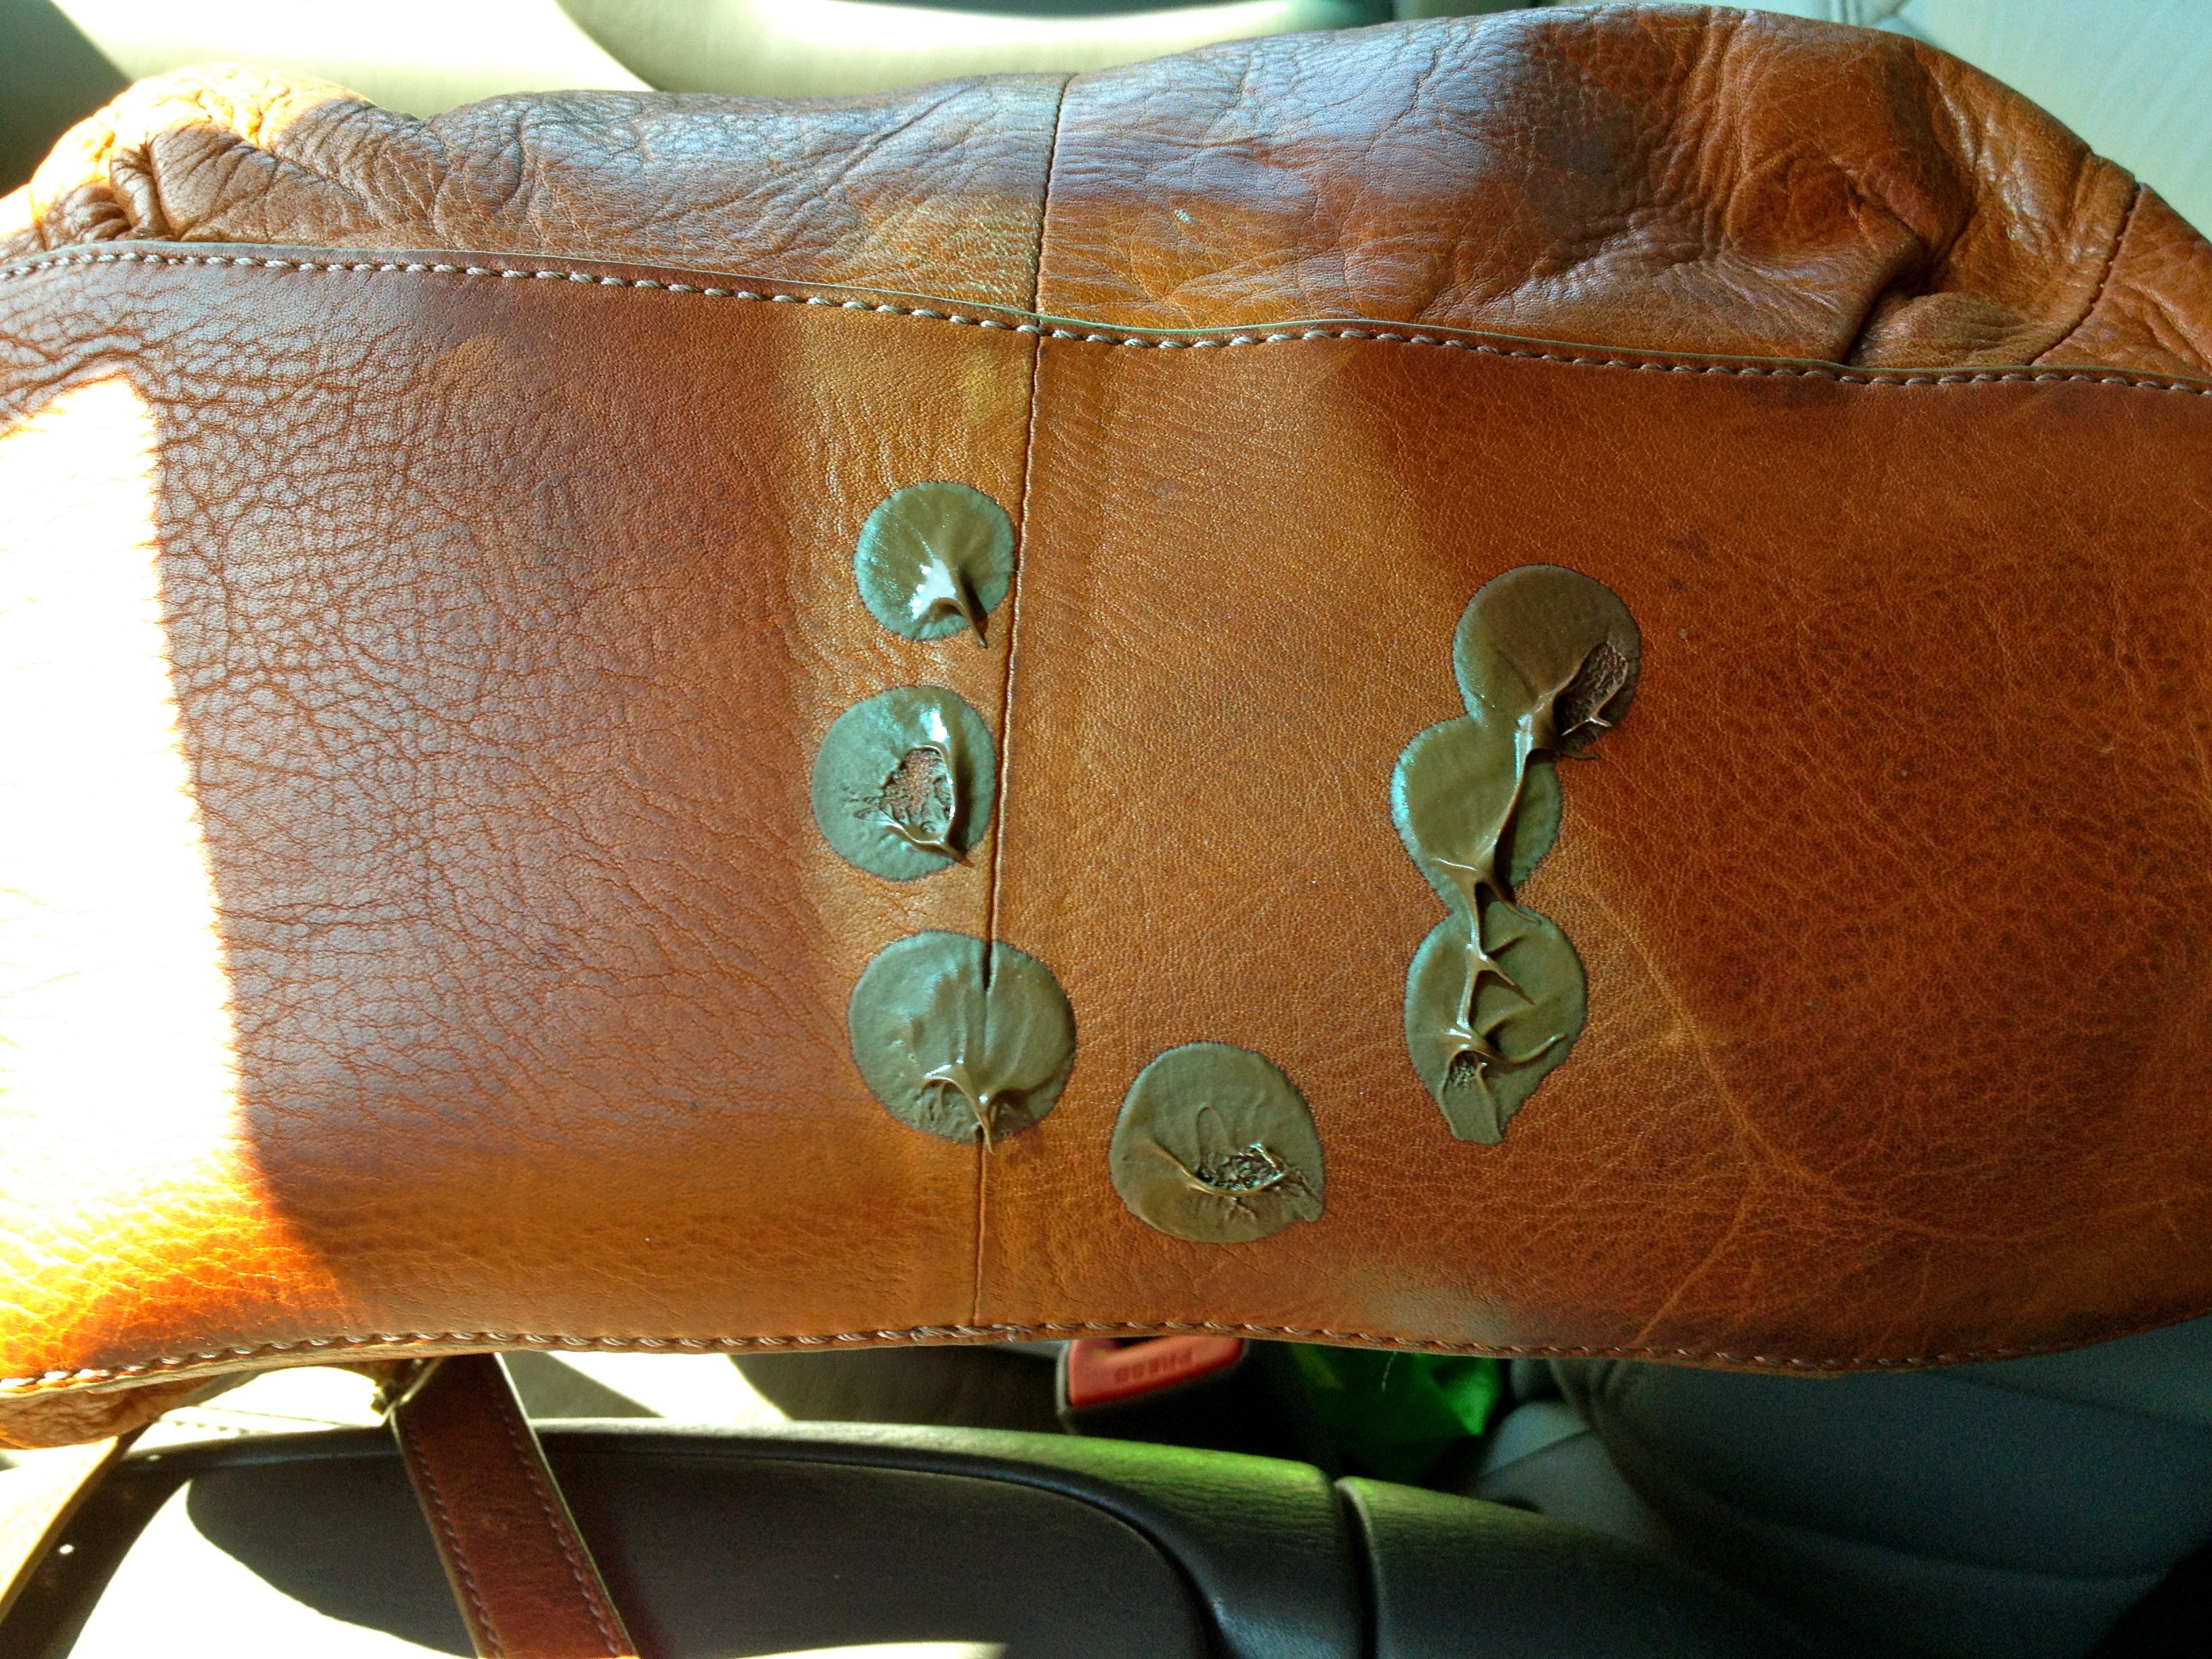
On a completely unrelated note, don’t leave your son’s story time craft made of milk chocolate chips in the front seat of your car on a hot and sunny fall day while you get groceries, blissfully unaware.

Oh…and then certainly don’t place your J.Crew handbag on top of said melt-y craft when you return to the car. Really!?!? Really!?!? And instead of weeping uncontrollably I opted to laugh when my son, upon seeing the mess, says, “Mom, I can’t believe you ruined my craft.” That’s right son. The 20 cents worth of chocolate chips will indeed be hard to replace. Indeed.
What are you hearting this fall? Happy fall Friday friends!
Stacey
Football season is in full effect! And whether you are a rabid fan, a casual observer or a why-would-I-spend-my-beautiful-Saturday-watching-men-in-uniform-tackle-each-other-type…you still gotta eat! And this deliciousness (thank you Midwest Living for the recipe!) is a perfect meal to enjoy at a tailgate or anywhere else for that matter.
These sandwiches are easy, quick, can be made ahead of time and contain bacon and cheese. Can I get a Yes! and Amen!?
Here’s what you’ll need to enjoy these slammin’ sandwiches.
Ingredients
- 3 skinless, boneless chicken breast halves
- 1/4 teaspoon garlic salt
- 1/4 teaspoon black pepper
- 1 small red onion, cut in 1/2-inch slices
- 1 tablespoon olive oil
- 1/3 cup mayo
- 1 tablespoon coarse ground mustard
- 2 12-inch loaves baguette-style French bread
- 9 slices crisp-cooked bacon (crisp is code for nearly burnt, the best way to enjoy bacon in my slice of the world)
- 8 slices cheddar cheese
First you will need to rinse the chicken and sprinkle it with garlic salt and pepper. (My package of chicken came with four pieces so in the spirit of keeping this poultry team together…I cooked all four.)

Next, slice the red onion and remind yourself to have a copious amount of gum or mints available so your onion breath doesn’t destroy friendships at your tailgate or your table.
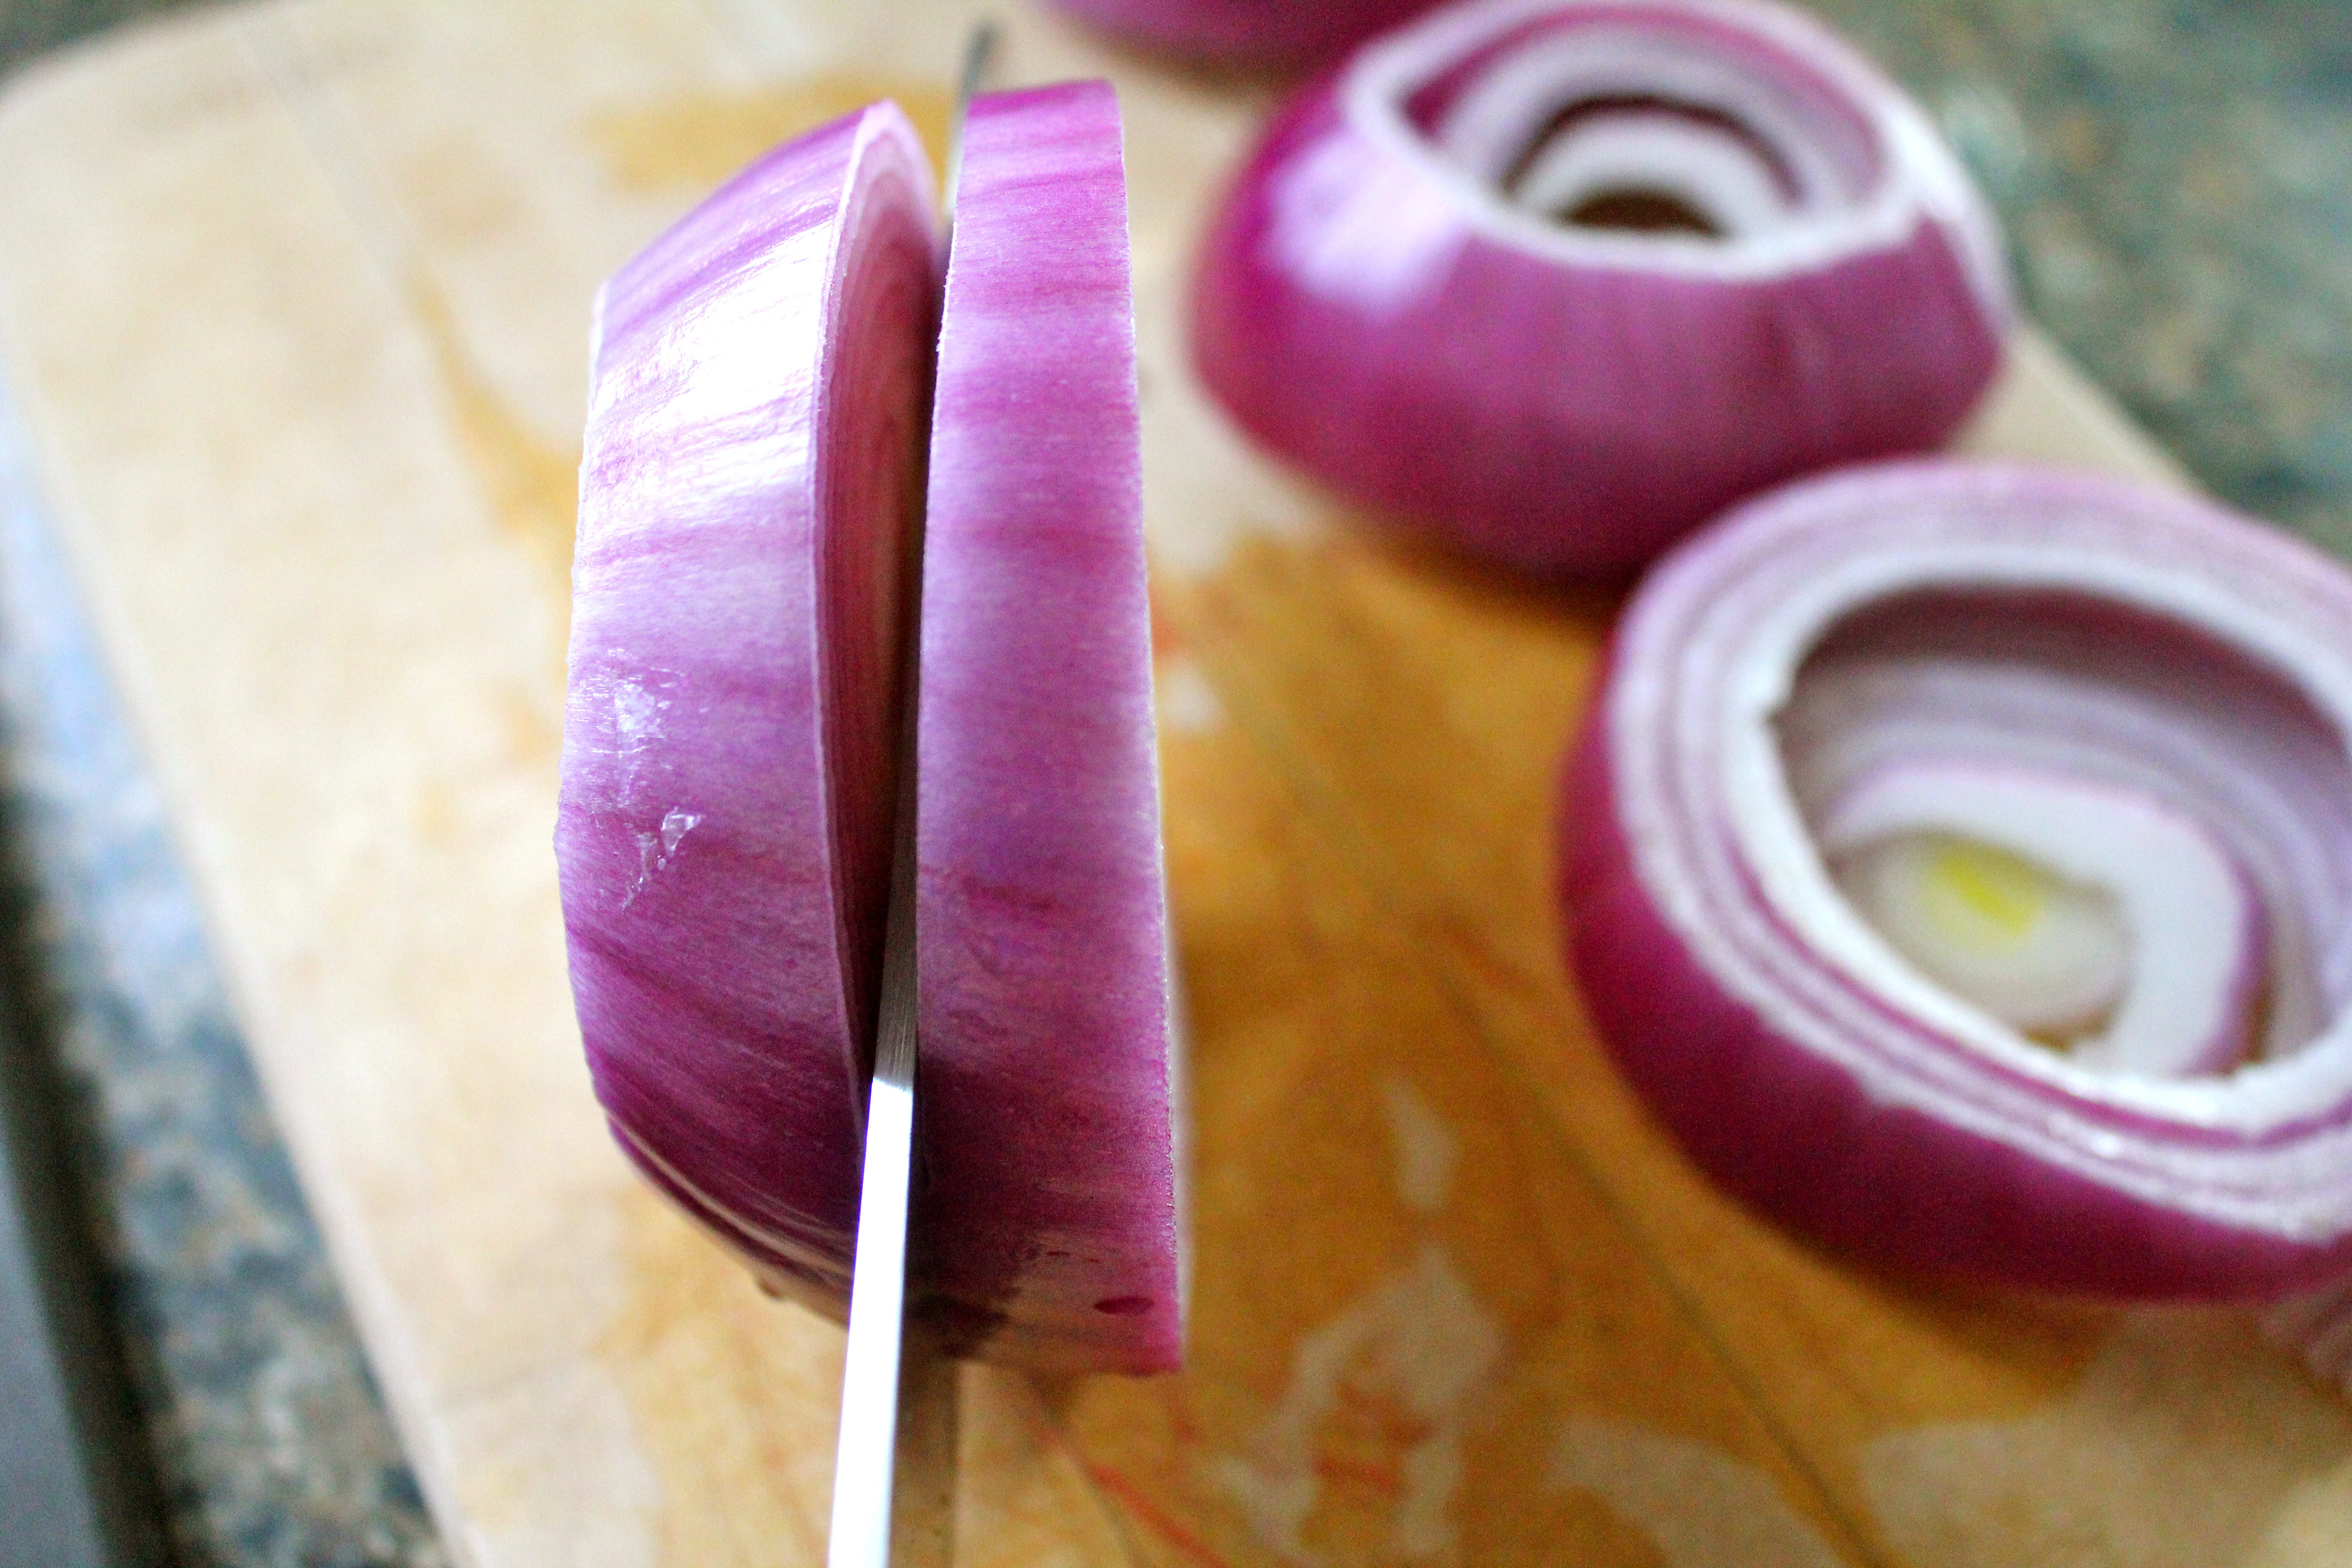
Coat both sides of the onion with olive oil.

Cook the onions and the chicken on medium heat for 12 to 15 minutes or until chicken is no longer pink (170 degrees F) and onion is tender, turning once halfway through.

The recipe calls for this to be done on a grill or with a grill pan. I originally made this recipe in March. And I was too cold to go outside and grill so I just made it inside on my stove top. Apparently I am a fair weather griller.

Meanwhile, combine the mayo…
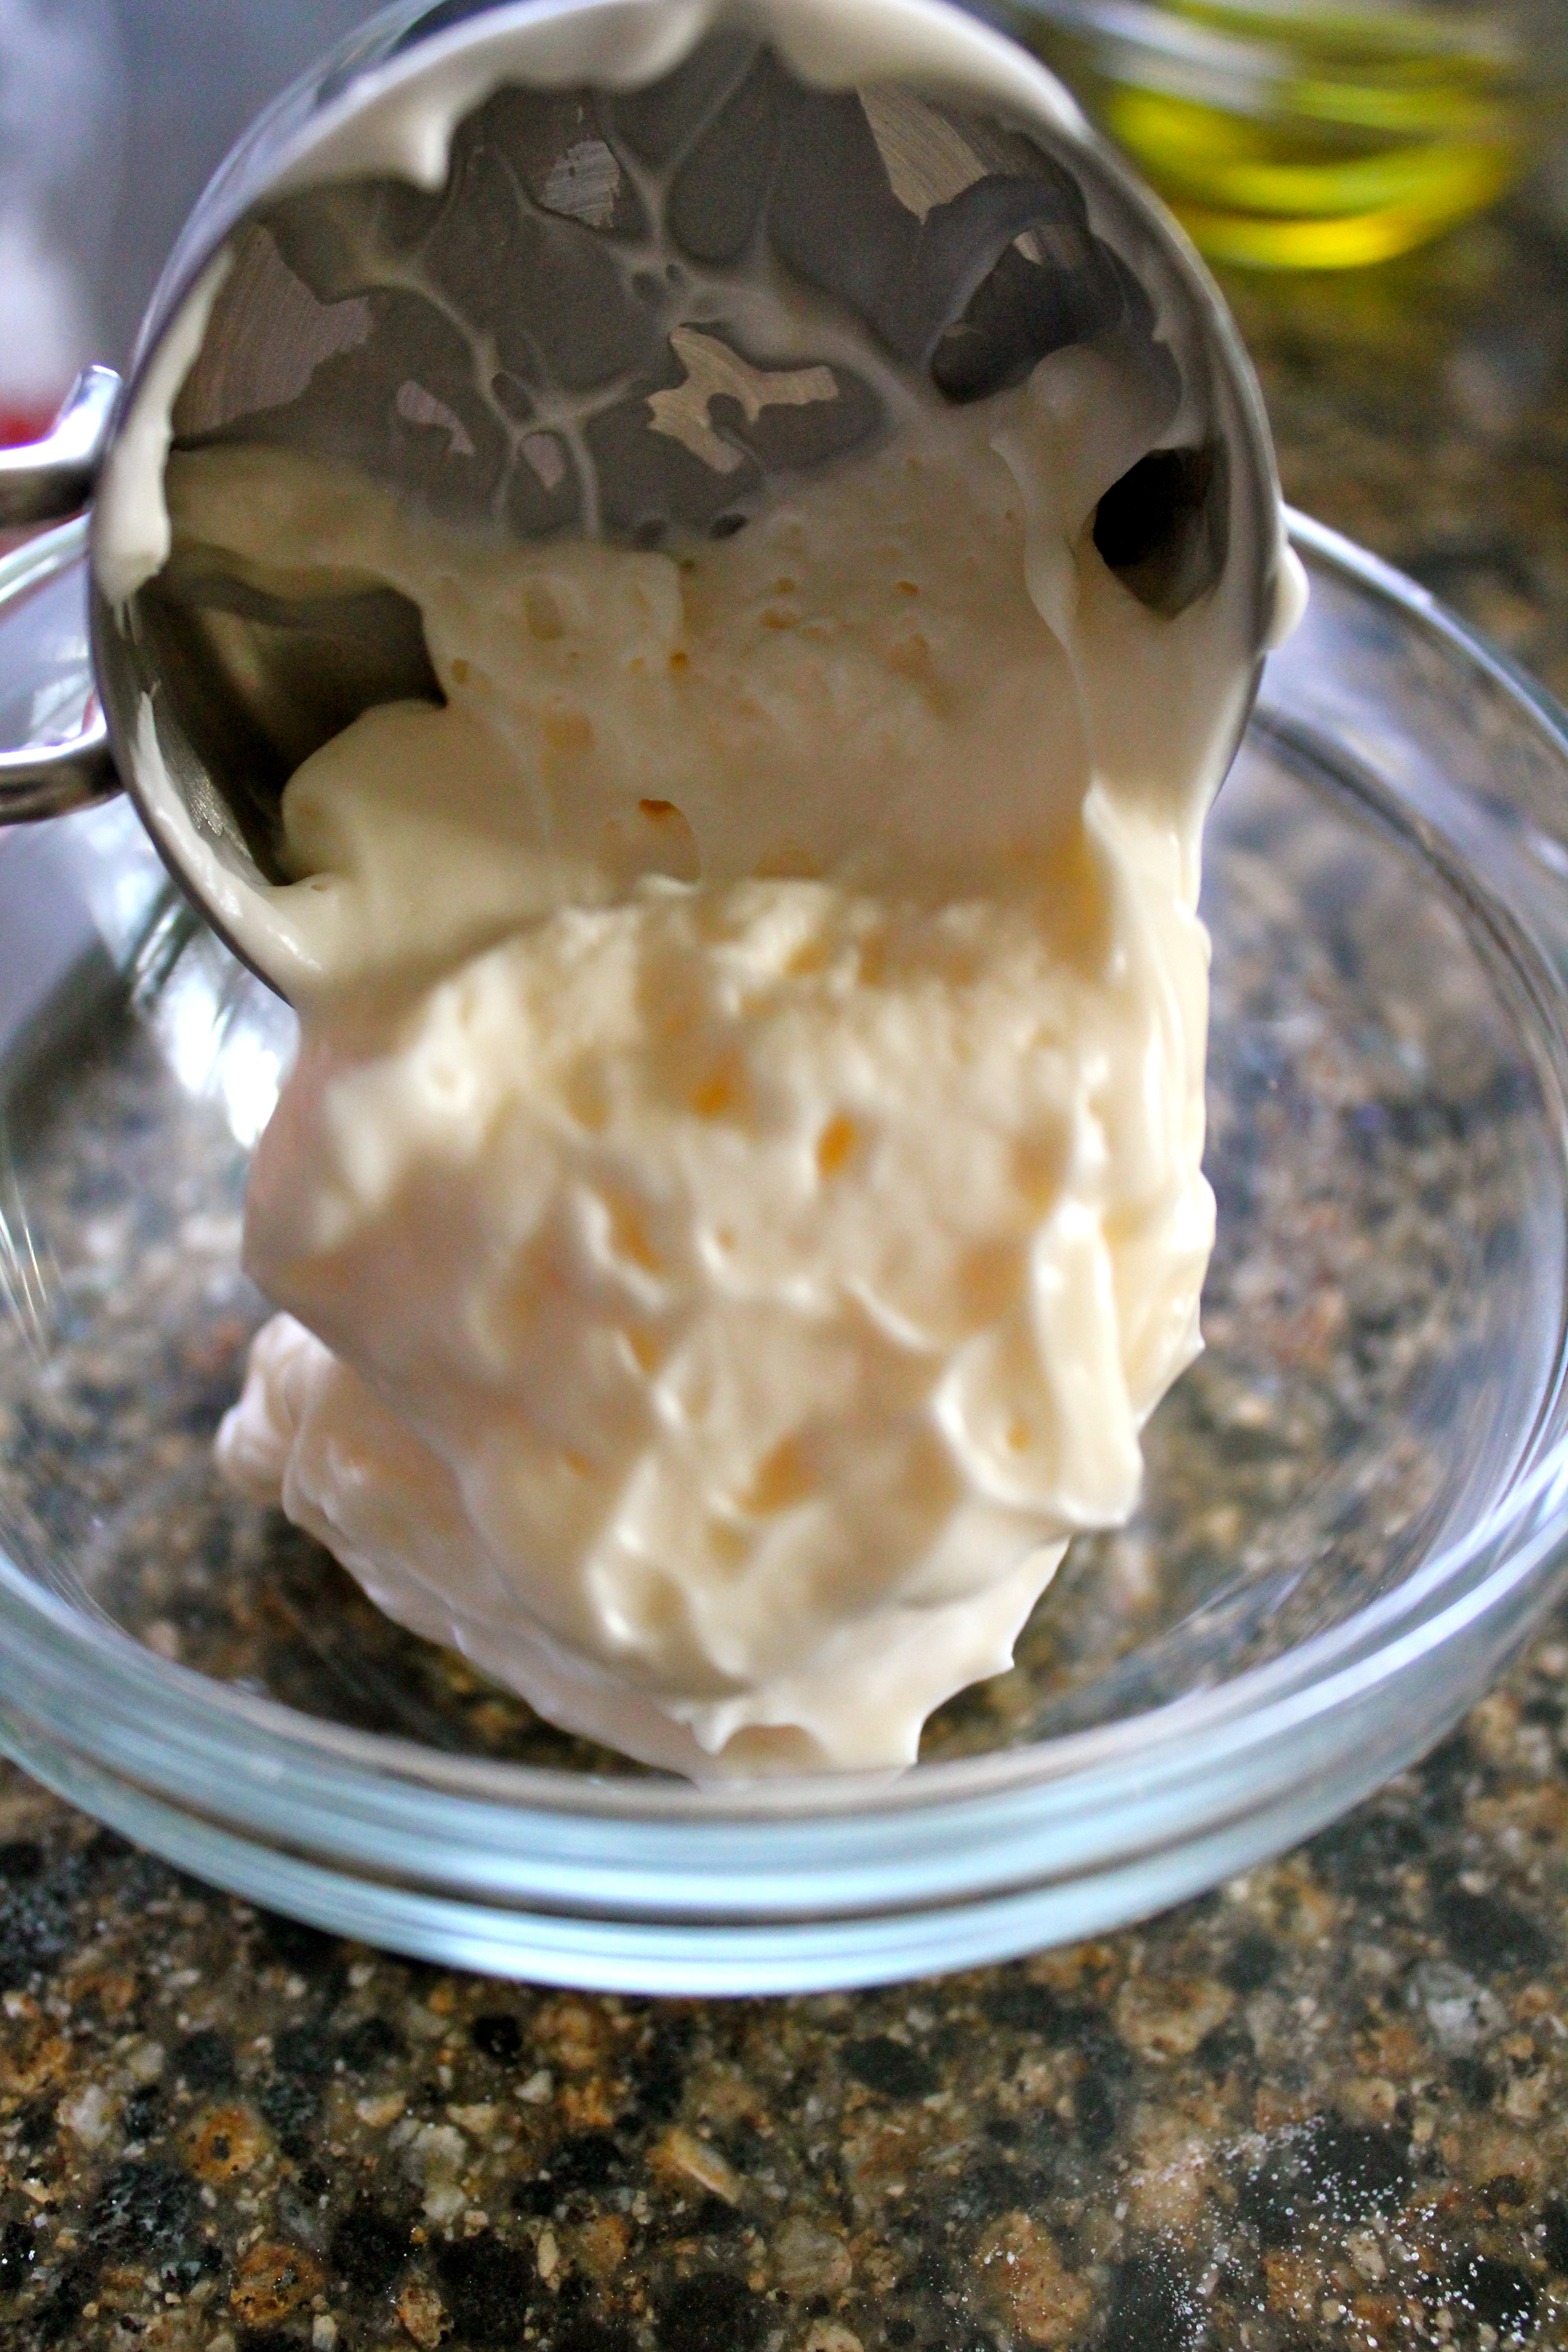
…and the mustard.

Yum-o!

Slice that bread in half horizontally,
and then hollow out each half, leaving a 3/4-inch shell. Then try really hard not to be permanently scarred by my creepy looking hand in this picture.

Oh…and don’t forget to cook that bacon! The crispier the better. That applies to many areas of life really. Well…except for sunbathing, hair styling and baking.

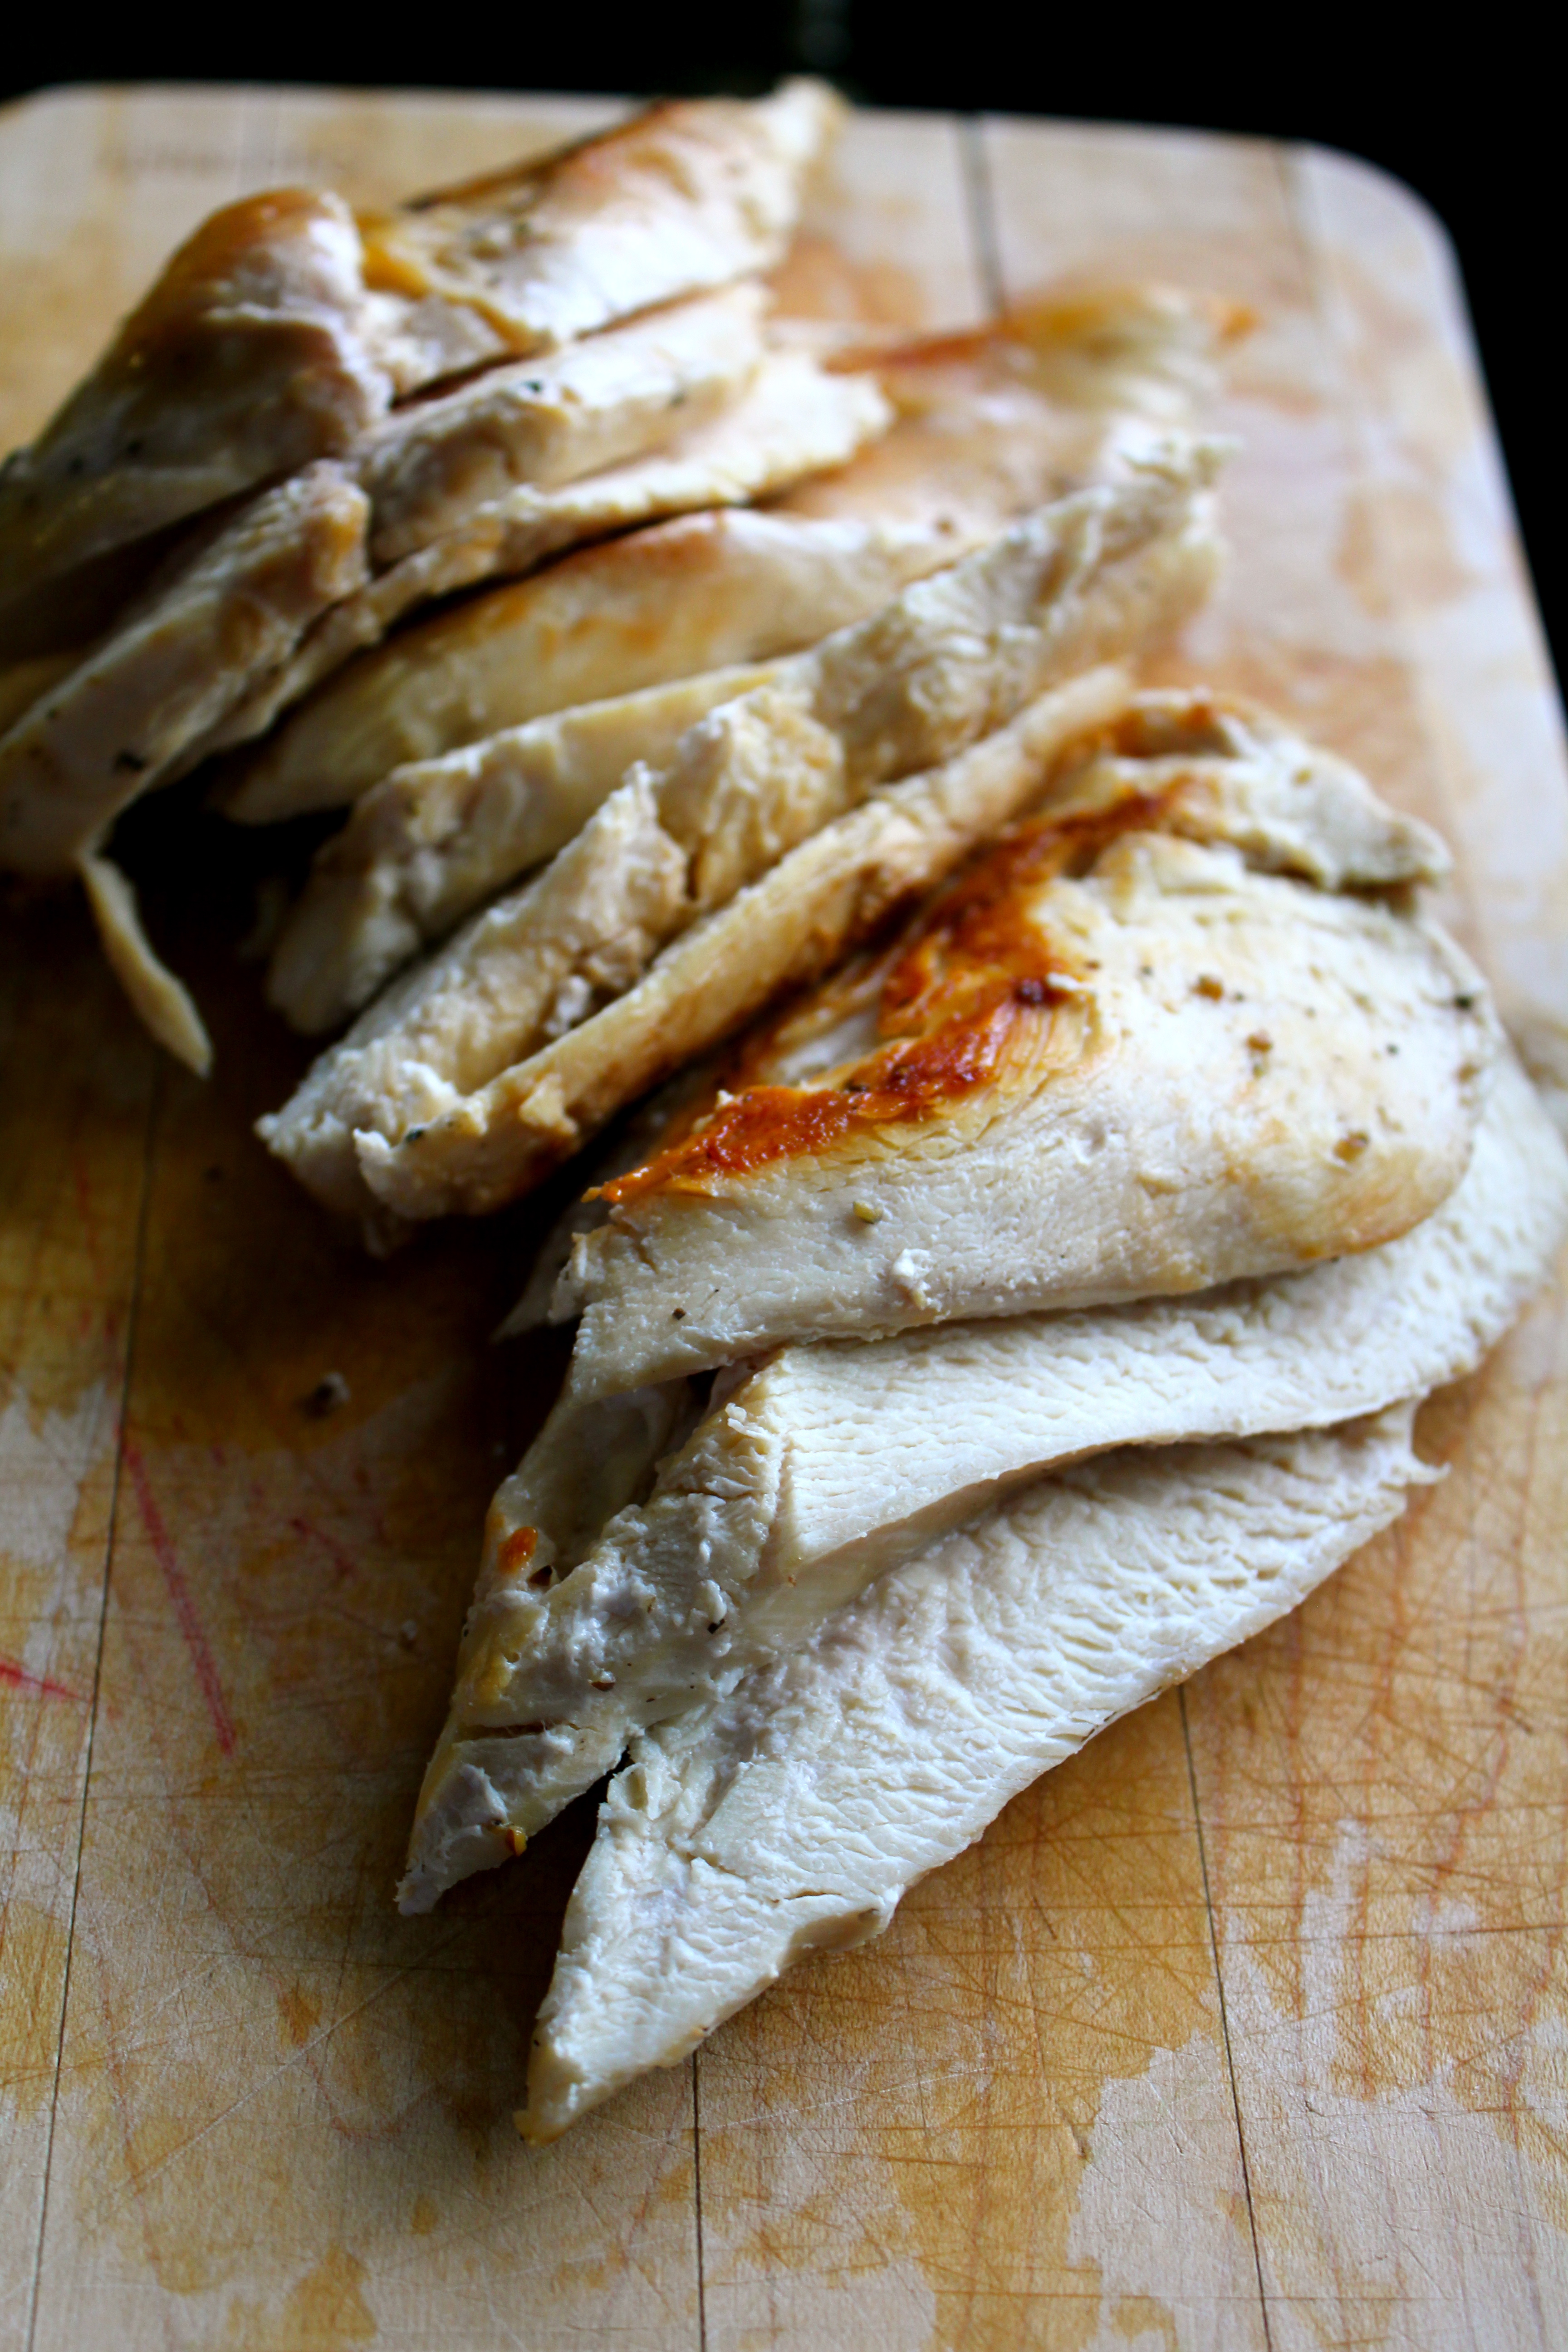
Once the chicken is done, remove it from your stove top or grill.
Thinly slice that chicken and separate the red onion into rings. Caution: even though the words onion and rings were used in the same sentence above, it does NOT mean that breaded blessing of an appetizer is going to manifest. We must all move on.
Spread the insides of the bread halves with the mayonnaise mixture.

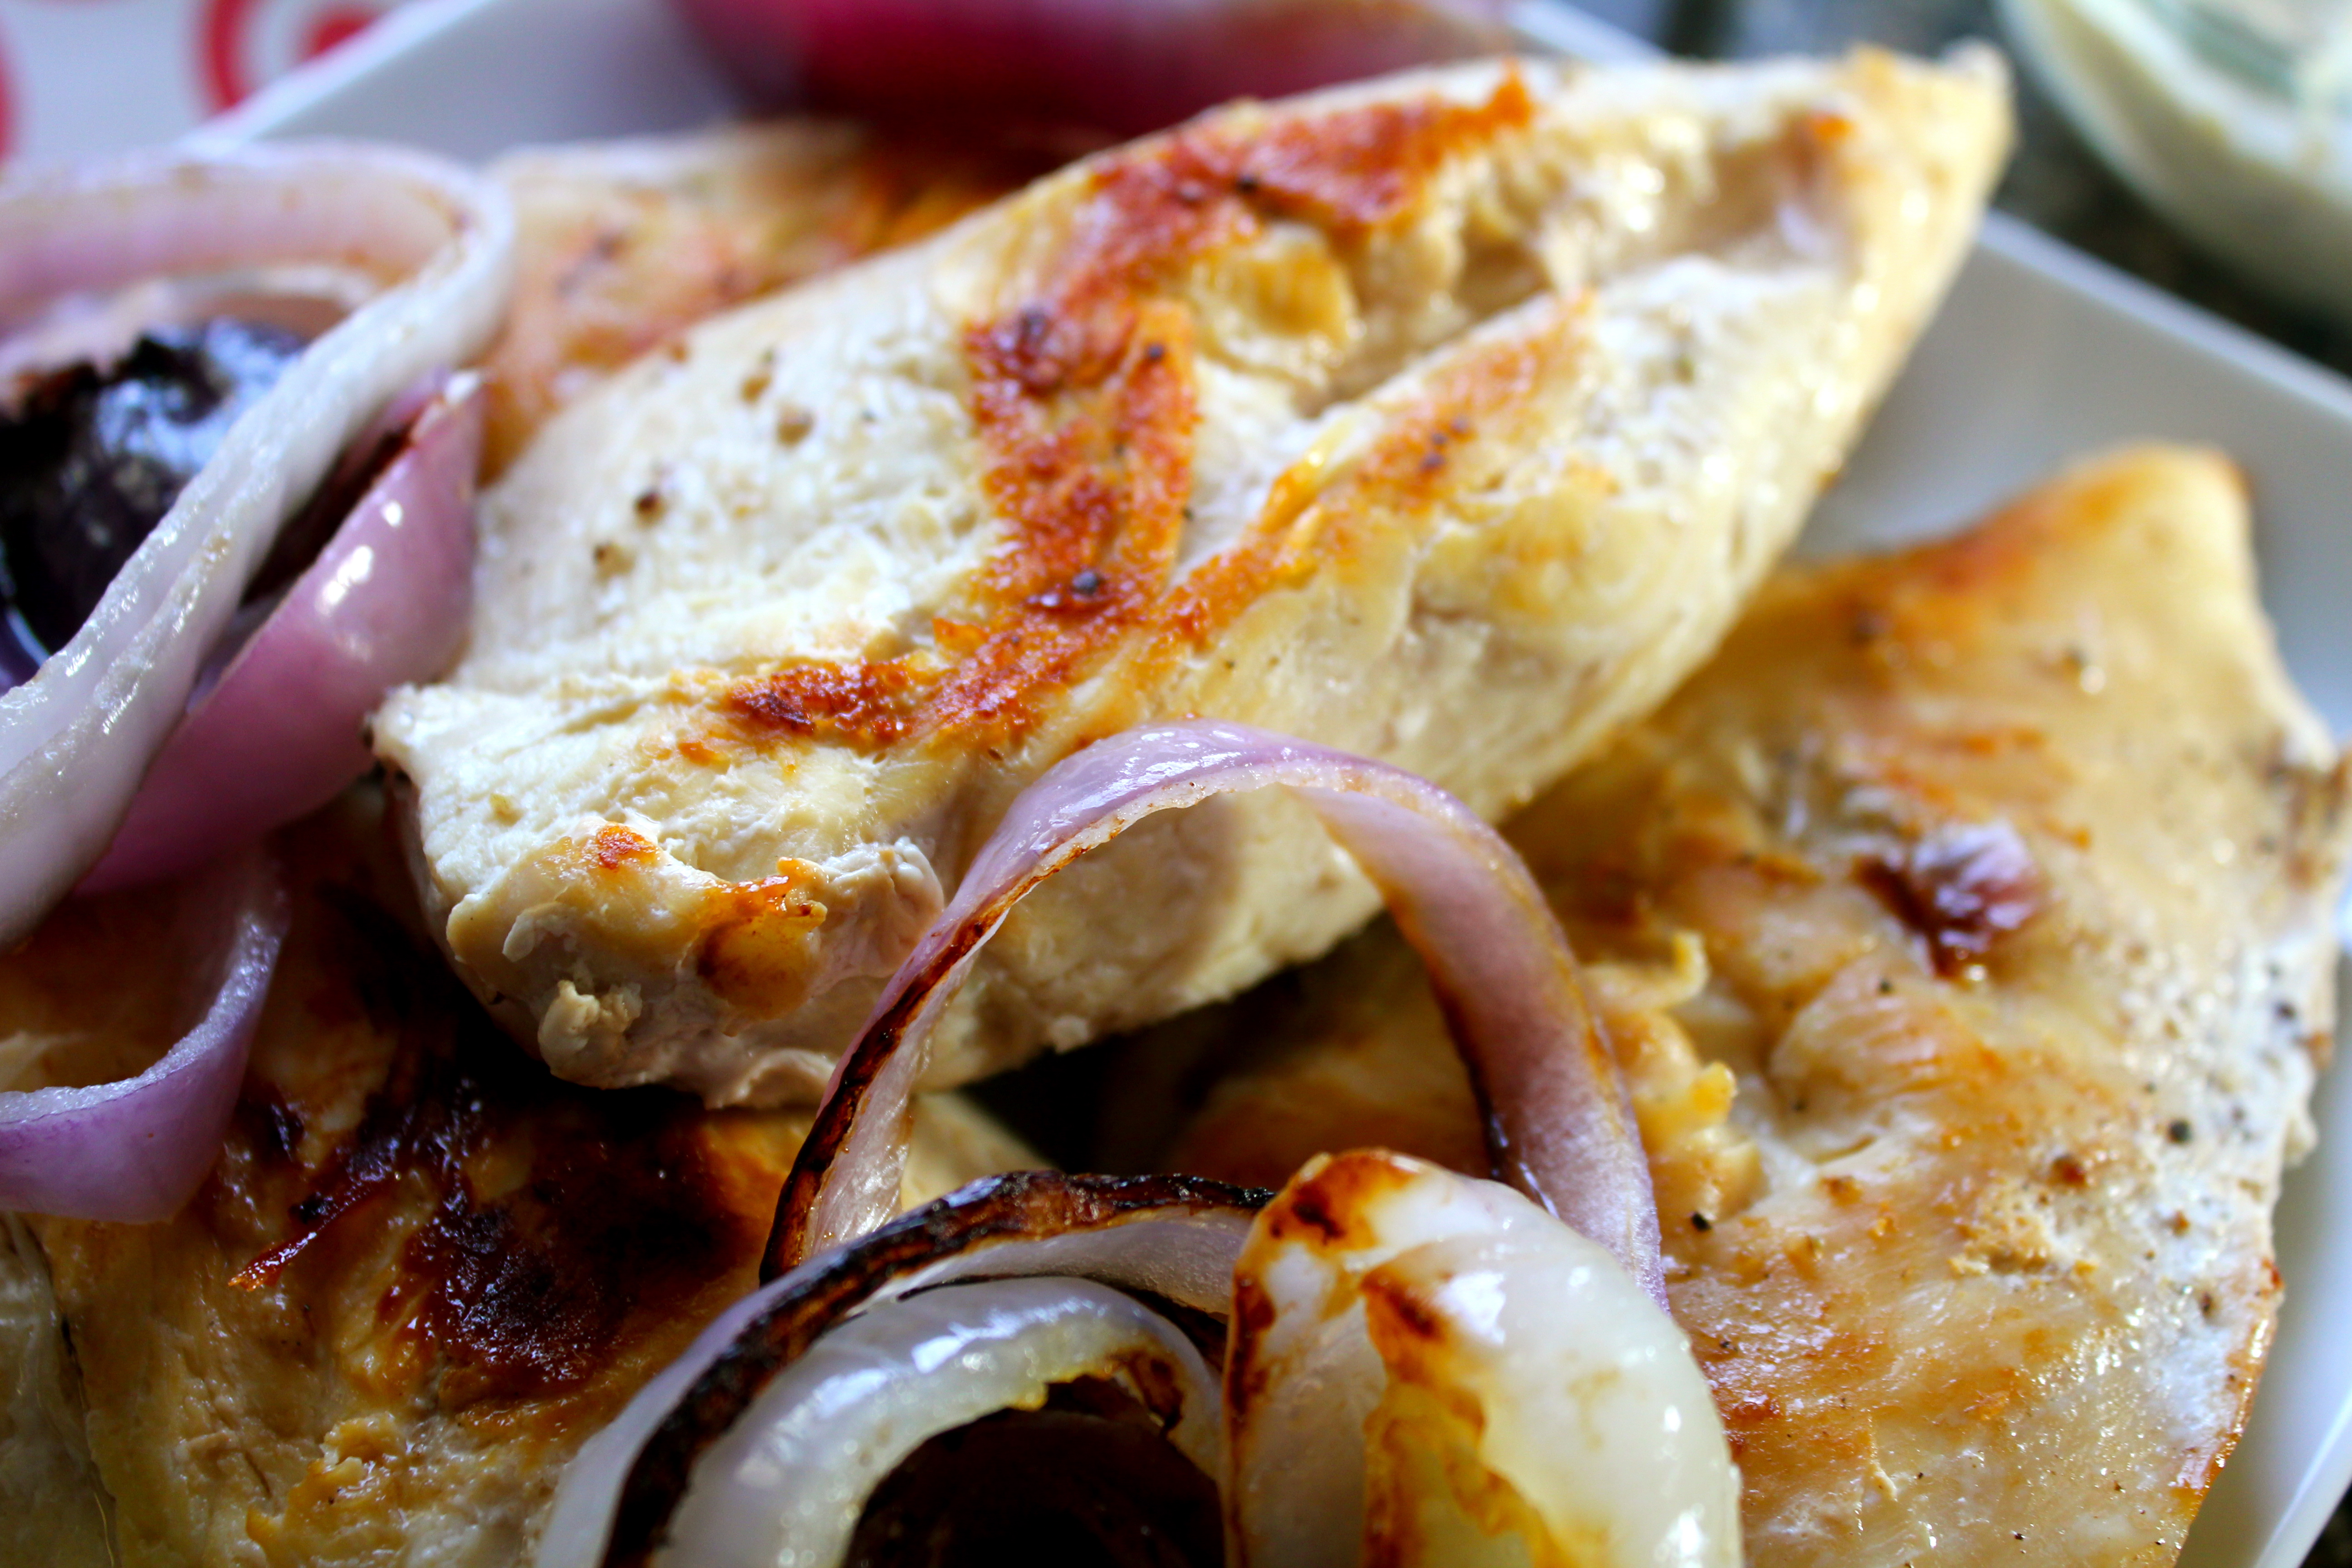
Layer the bottom bread pieces with chicken, onion, bacon, and cheese. Replace the tops and press the sandwich together all nice and snug. The bacon and cheese and chicken are becoming besties at this point in the process.

Slice each sandwich into serving size pieces and then…

…hold your sandwich up to admire all you’ve accomplished. But don’t pat yourself on the back at the same time or I can’t be held responsible for what could happen.

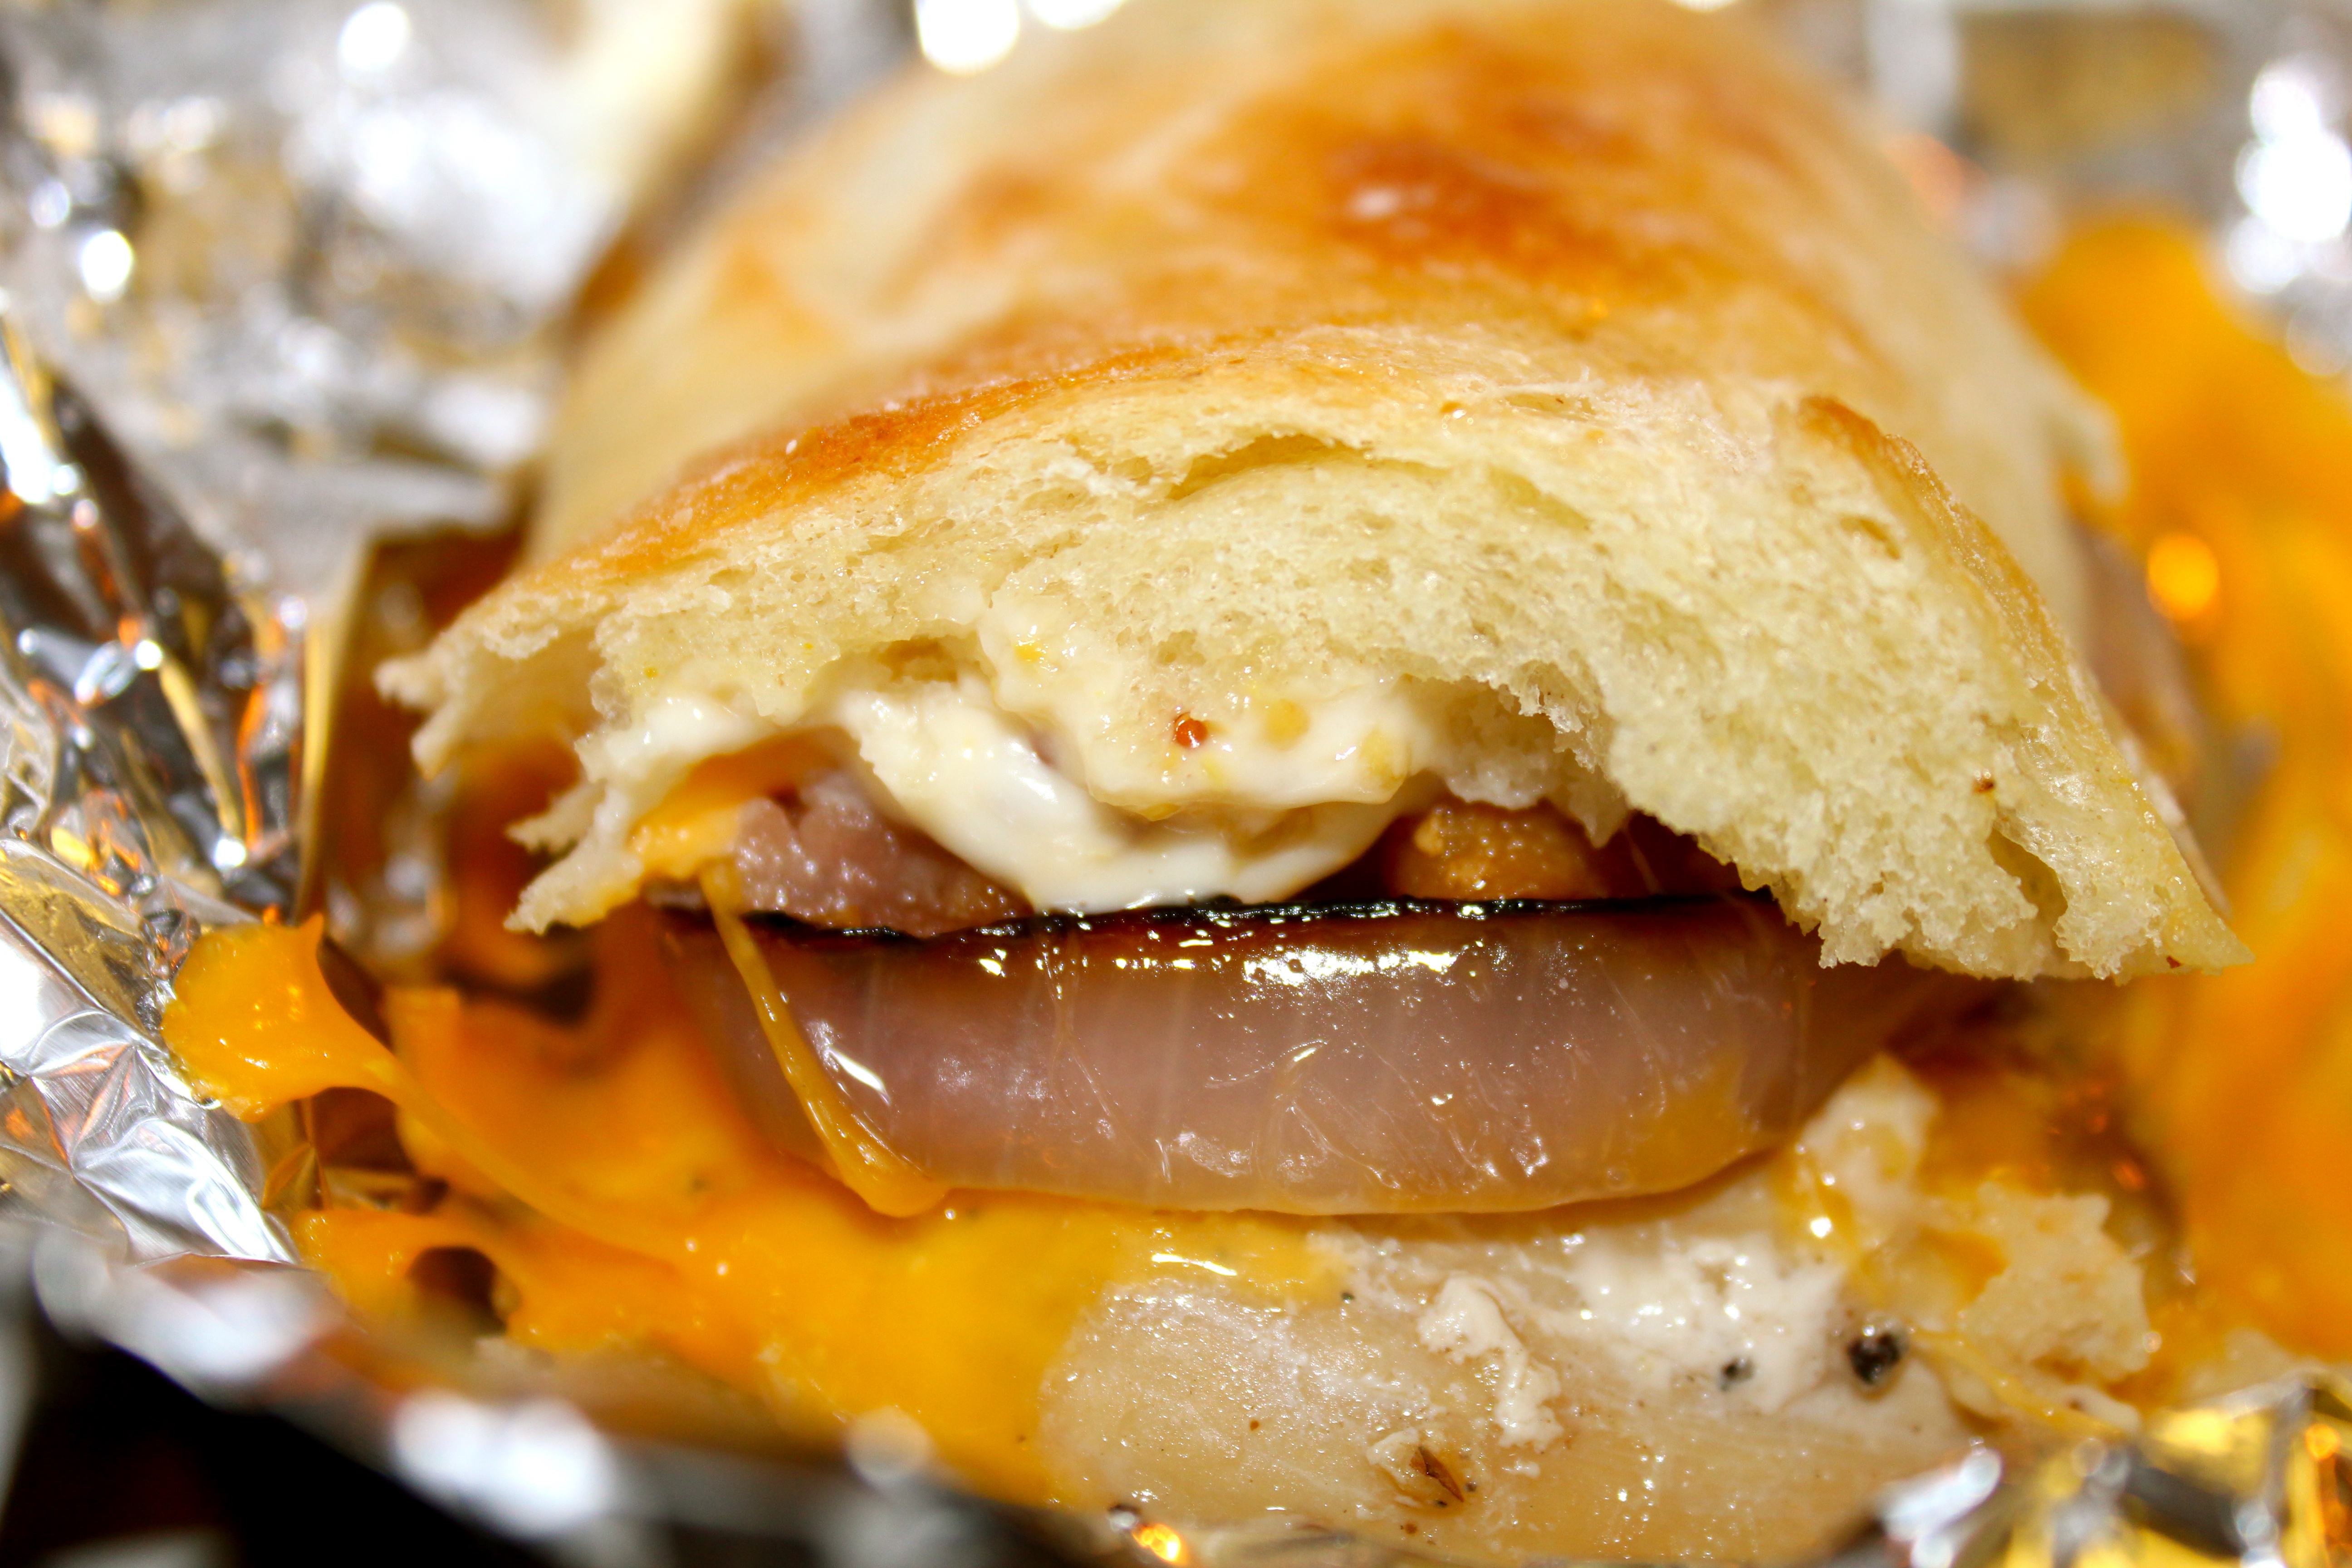
Tightly wrap each sandwich in foil. If you like, chill up to 24 hours.

Or if you’re like me and rarely have your life planned 24 hours ahead of time…much less your meals…cook or grill straight away!

Cook these babies in a 350 degrees oven for 10 minutes, or until heated through. Melt-y awesomeness!
Then leave to go answer the door, have a lovely but brief conversation with your friend at the door and then come back to find your dog enjoying your chicken, cheddar and bacon masterpiece too. (Good thing I cooked that extra piece of chicken!)

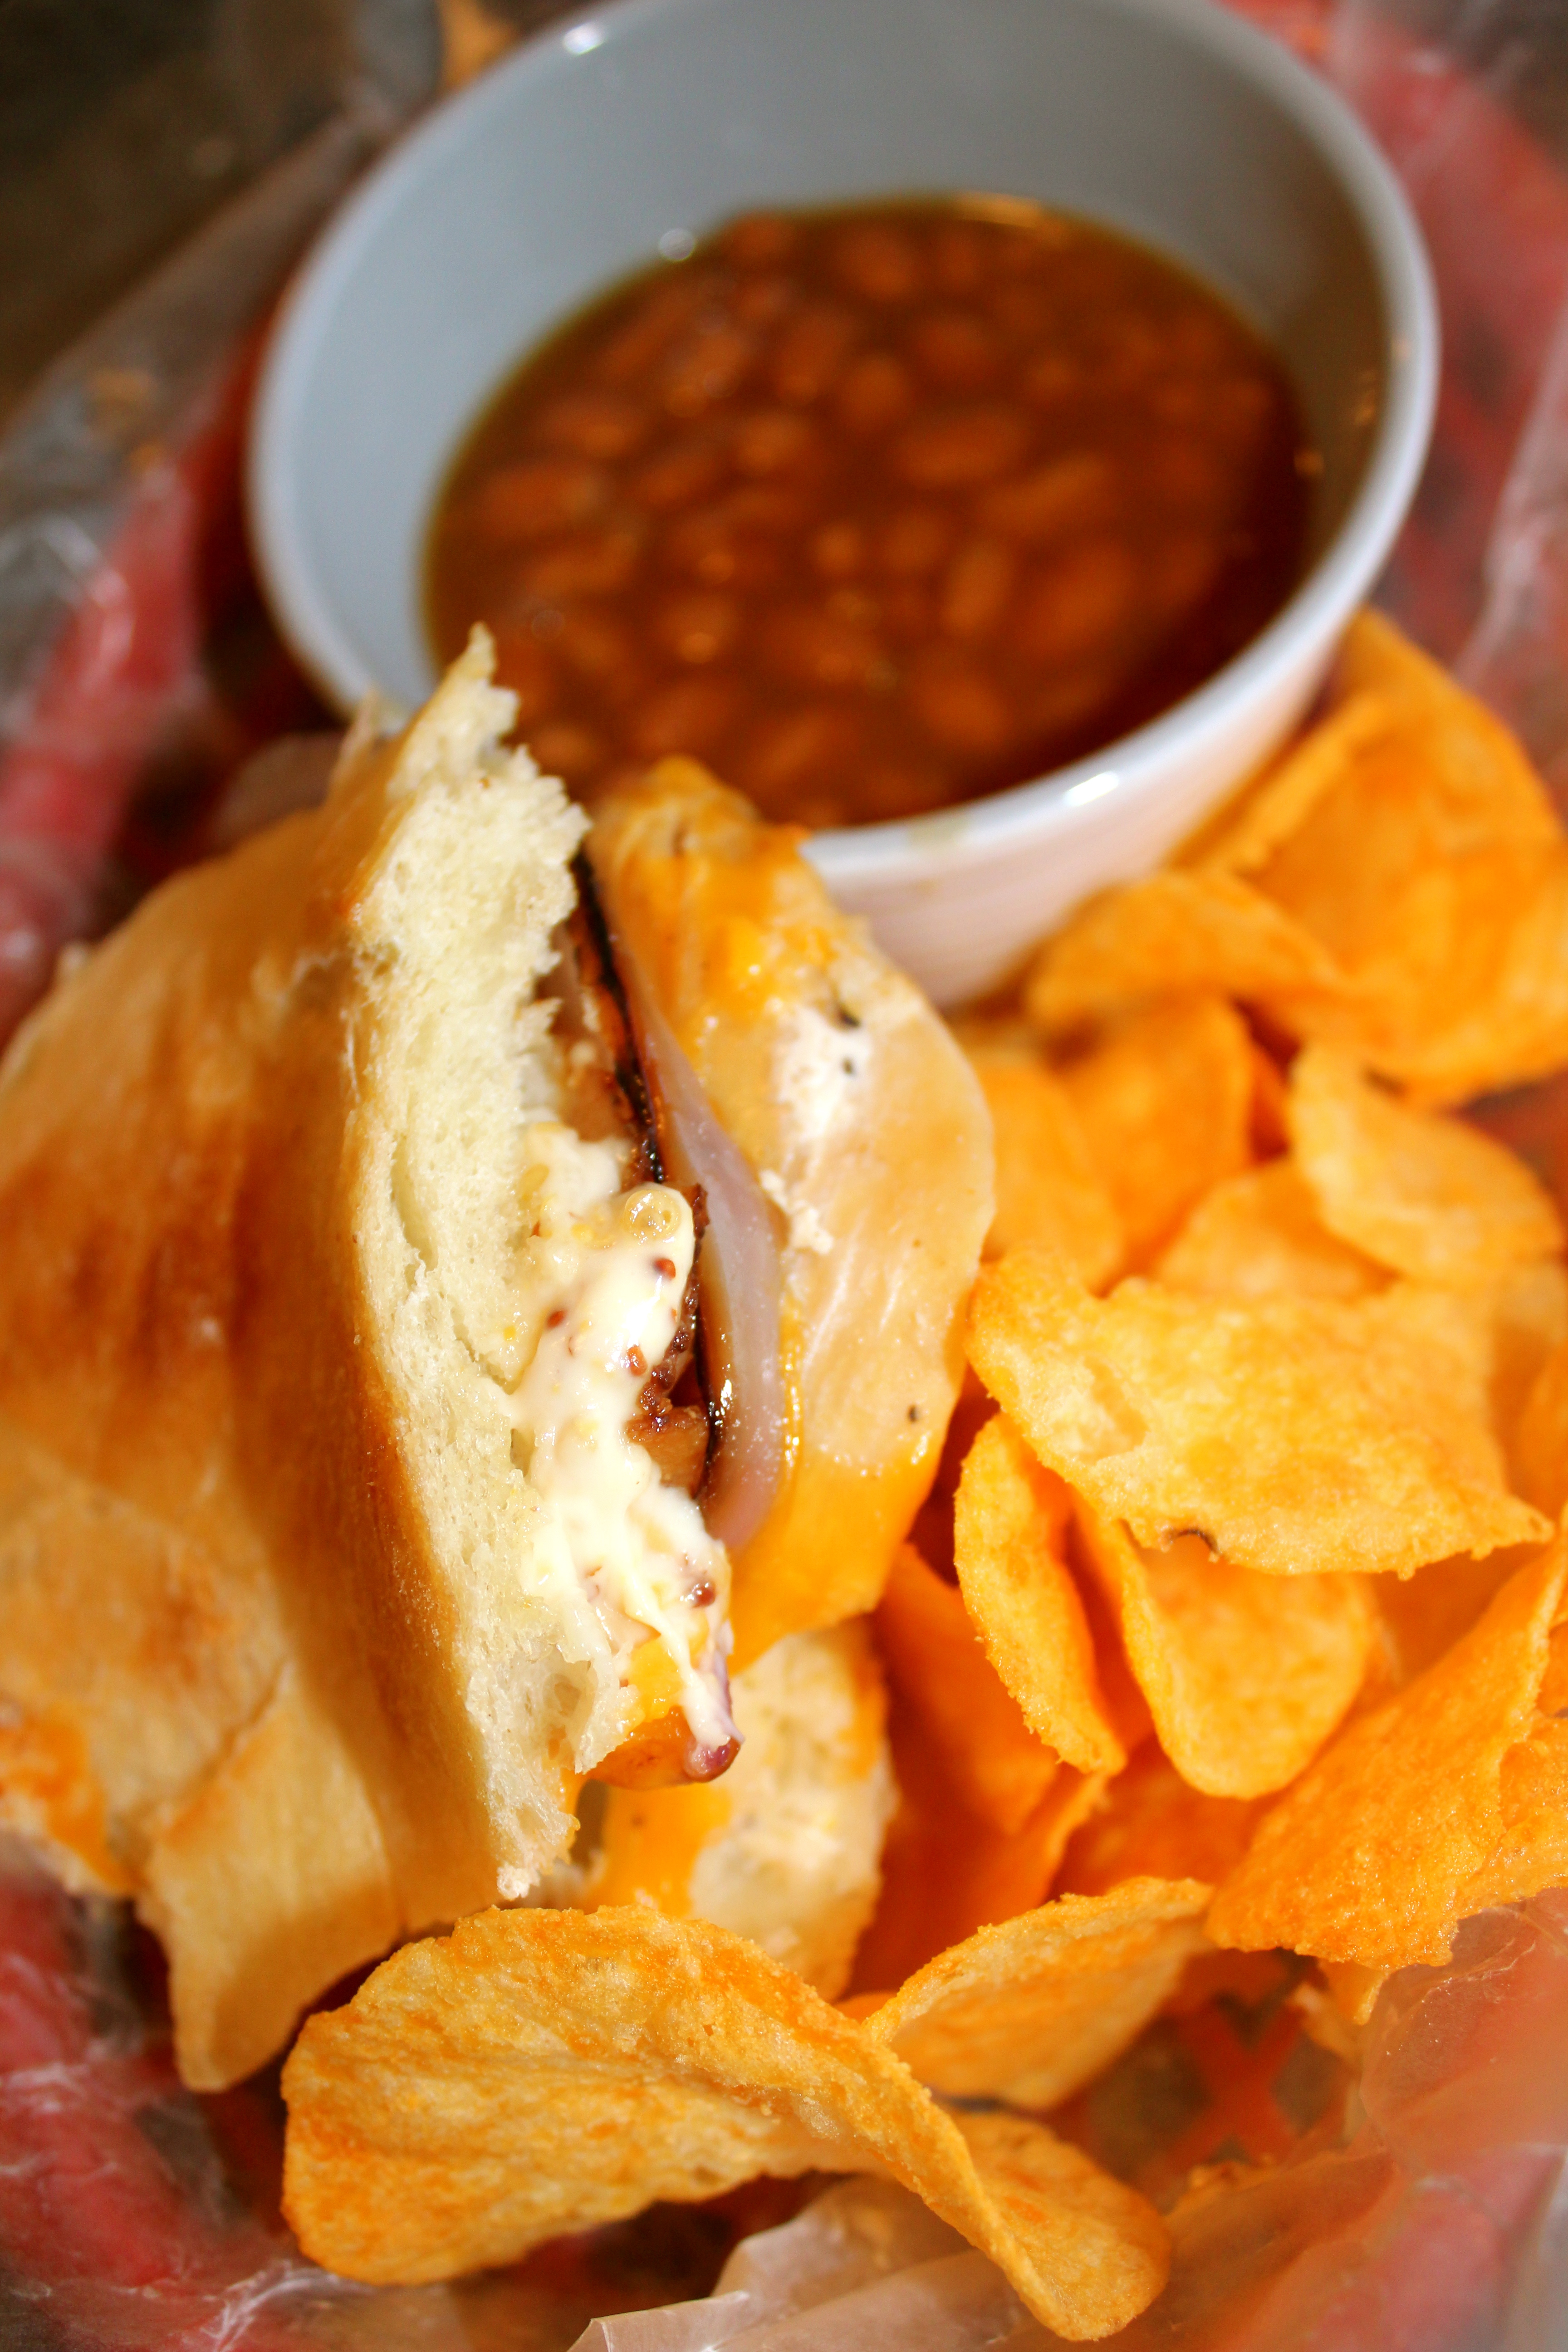
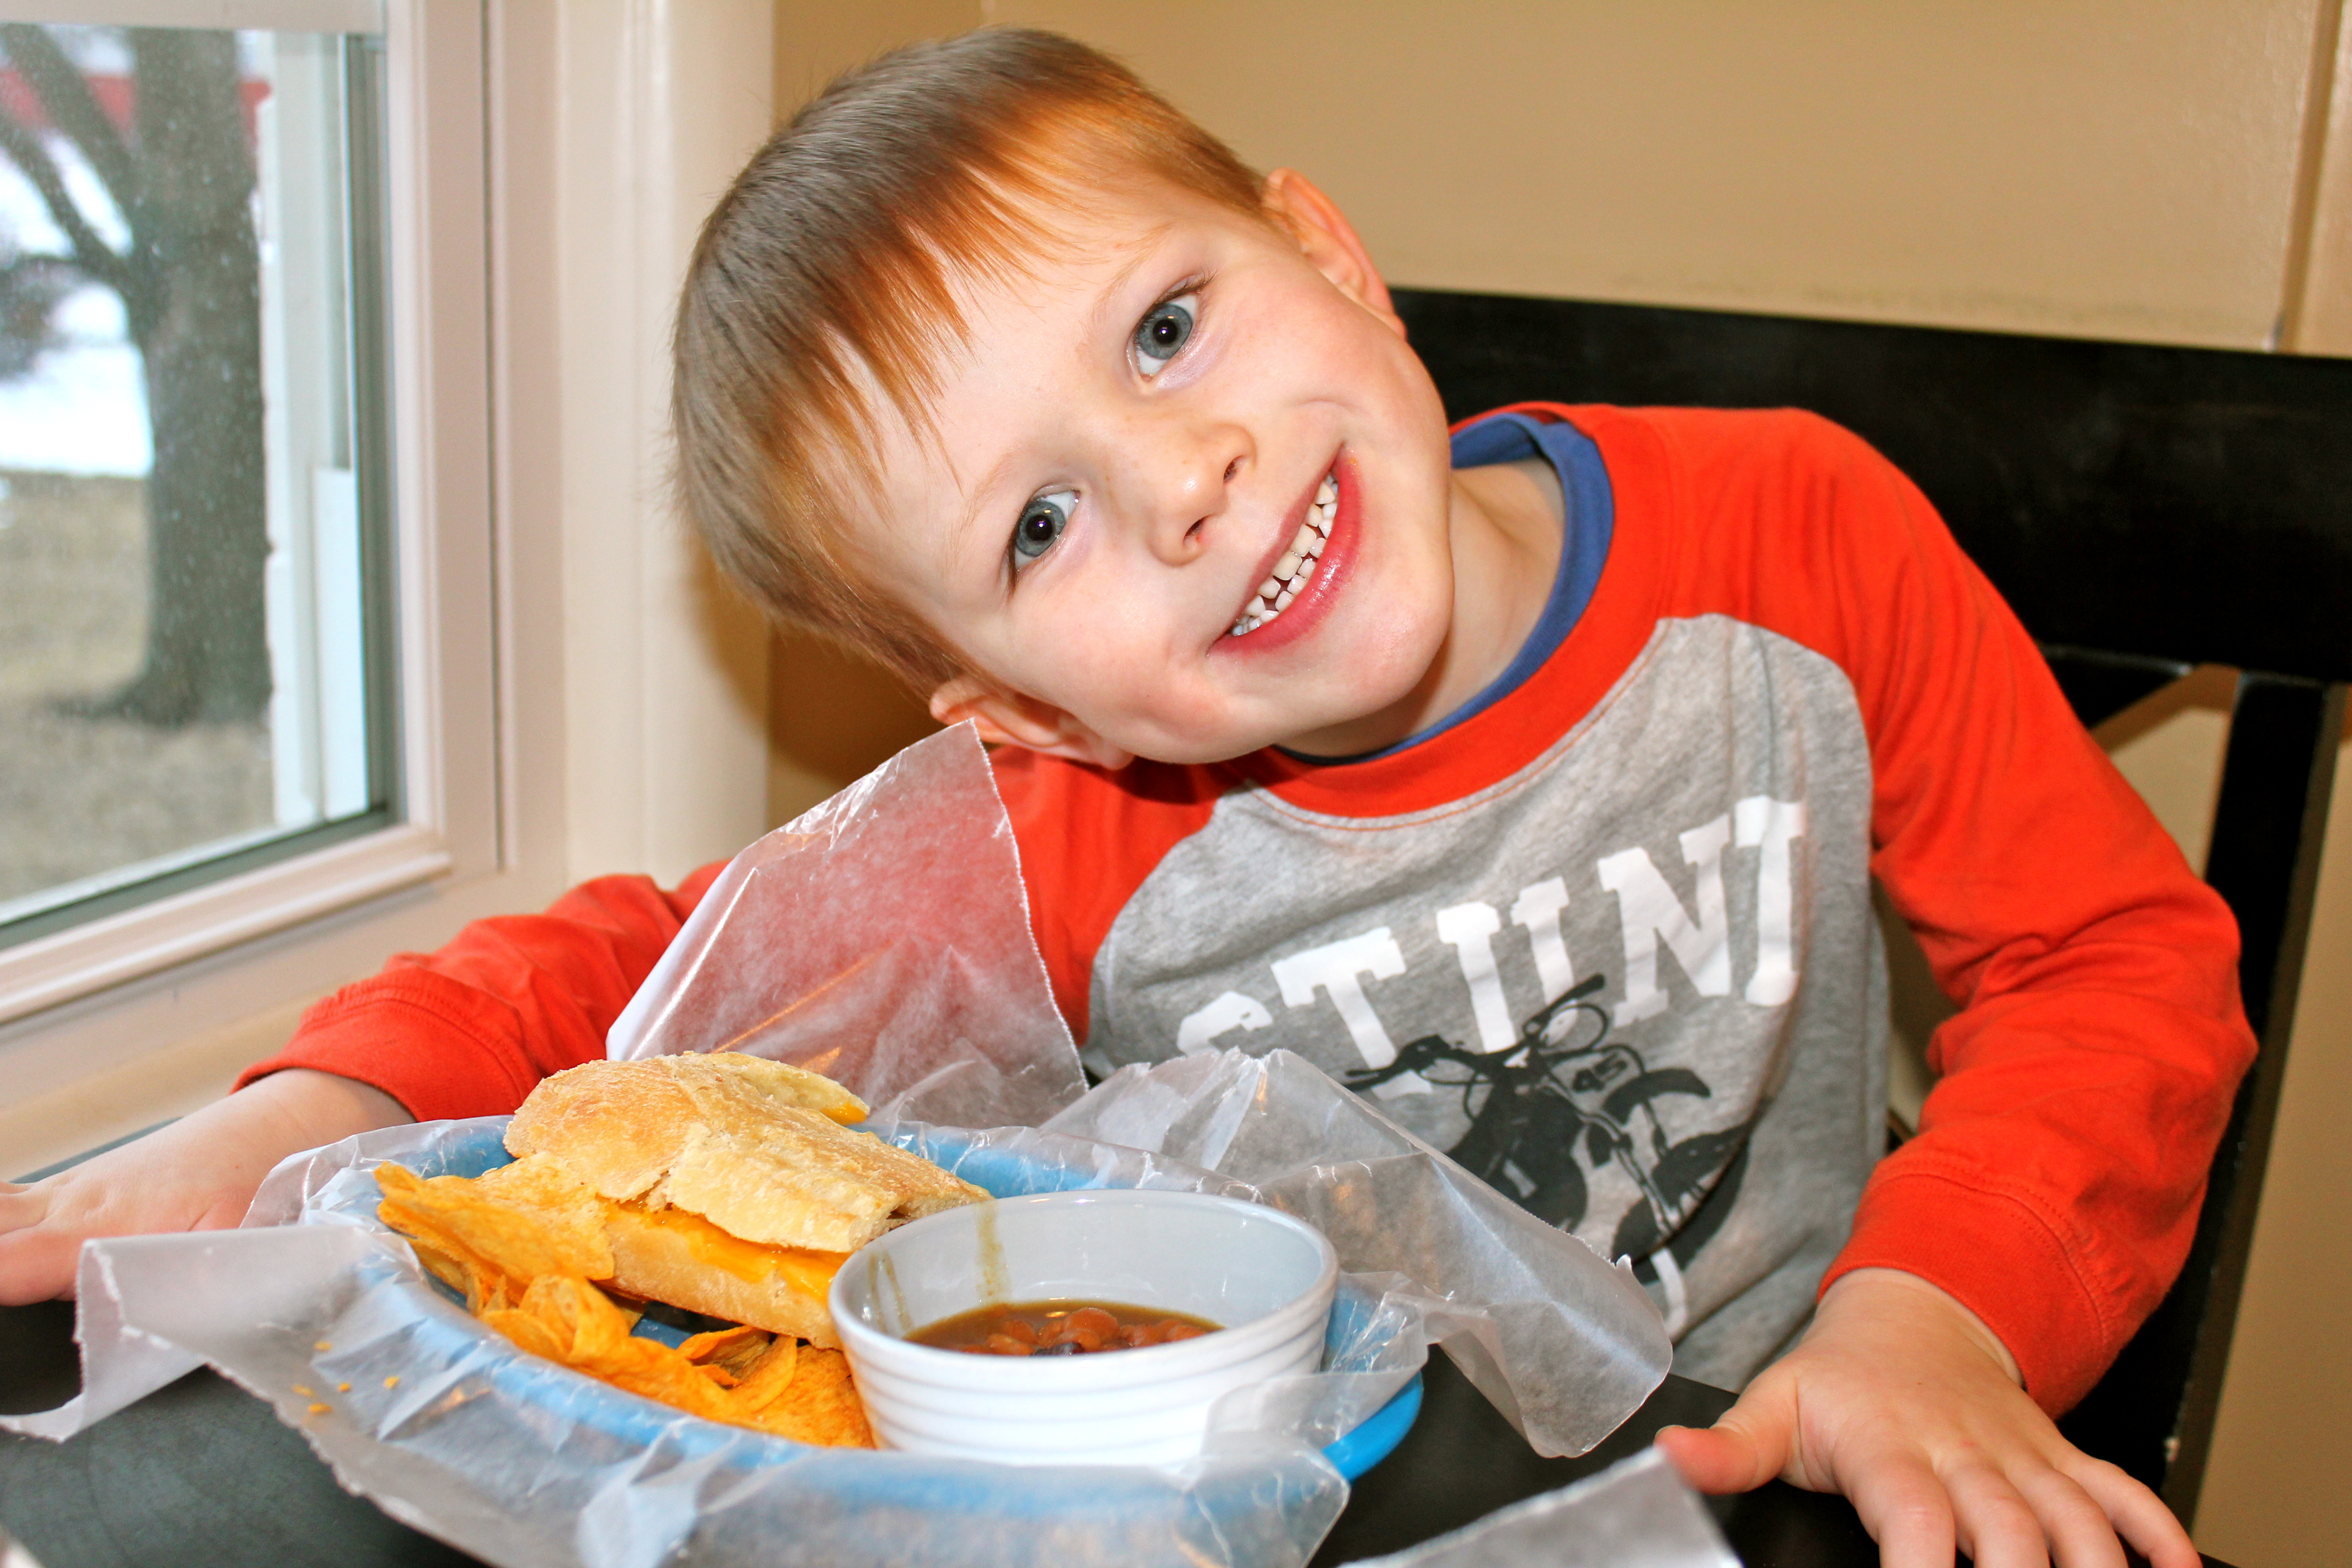
I decided to round out the meal with some baked beans and BBQ potato chips and placed them all in some plastic baskets we have in our tailgating stash. My kids get the biggest kick out of eating meals in baskets. Oh, the simple things.
Enjoy your weekend of cheering, eating and relaxing! And remember…everything is better with bacon!
Go Team Go!
Stacey
P.S. Here is the link to Midwest Living’s original recipe.
When you’re on vacation and you’ve got some extra time on your hands this can easily happen.

This little slice of magic is called putting your camera on the self-timer setting just to see what you can capture. The camera takes a new picture approximately every second or two so you really don’t have a whole lotta time to worry about your pose…you just do something. Clearly.

Isn’t vacation just the best? You don’t even have to shower to be a part of the fun. On a completely unrelated note, my nephew is such a doll and such a great sport. Aawwww…..

There really is a method to all this madness. To celebrate my parents 40th wedding anniversary (yeah for marriage!), I wanted to take a full family photograph that I could then gift to them later. And in order to have a fighting chance at a keeper (after all, we do have four children age 7 and under in this family), I needed to ensure a couple of things before I had everyone sit down to give this a whirl.
#1. I had to make sure that the self-timer was set to give us a maximum number of photo opportunities in the shortest amount of time because I knew once I got up to reset that camera I was going to lose some people. I’m looking at you Beaut.two! I’m looking at you!
#2. Since I don’t have a tripod (yet!) I needed to get the the height right to fit everyone in. A fair number of magazines and books stacked on a kitchen stool did the trick. There really is no stopping my will to MacGyver my way through photography.
I had no idea that this ‘practice time’ would turn out to be so fun.
The camera caught action shots (my favorite)…

…and more posed shots (only because I made them).
And that’s enough of that whole posing thing, friends! My models were fearless and natural and took direction well.

I mean what photo shoot is truly complete without the sprinkler? I dare say none. None!

All the giggles were priceless and their commitment to the work unmatched. After each mini-session, they nearly tackled me to check out their photos and then would use what they saw to better themselves. It was a thing of beauty really.

And then I made my brother get in on the action. He thought it would be hilarious to close his eyes…the WHOLE time!

But have no fear…Beaut.one used Uncle A’s closed-eye-pose as inspiration.

And gave it a whirl herself. And she totally made it her own by adding the gaping mouth move. I am fairly certain this pose will make its way to a Vanity Fair cover soon.

So all of that…yielded this! And I’m so very glad it did. The only thing I would change? Planting another large tree or two in the middle of the lake to block that light pouring in between my brother and my dad’s heads. Or constructing a completely new sliding glass door opening so I could set the bench up in a different place. Now I think of it!

But if we’re being completely honest here…this is the one I will always treasure.

If you have some free time on your hands, get out that camera and let your loved ones go nuts. You will never wish you had fewer photos of the ones you love.
Have a lovely weekend,
Stacey
P.S. Much more on our vacation in Northern Wisconsin to come later!
winter wonderland?!? Around these parts it has been hovering around the 100 degree mark (and over!) for the past week and let’s face it…I’m sweaty. It is hot. And humid. And my trusty air conditioner has been working so much it is planning to unionize and demand overtime pay.
So in the spirit of trying to usher in a virtual cool breeze, I thought I would take a moment and share some photos from Beaut.one’s winter wonderland birthday party. It took place in the dead of winter. When there was snow on the ground. And you could walk to the mailbox without needing a shower. Aah…those were the days.

I can’t quite put my finger on what inspired the idea of a winter wonderland birthday party theme. Maybe it was the fact that Beaut.one was born in the dead of winter? Or maybe it was because I just LOVE to meticulously cut out paper snowflake after paper snowflake night after night with only the glow of my television to keep me company? Wait, that doesn’t sound right.
The winning reason? Christmas clearance shopping, of course! My girlfriend and I hit the stores the day after Christmas and there were snowflake ornaments galore. At 50% percent off I snatched them up as fast as I could find them.

And then when I came across these sweet winter woodland animals…it totally sealed the deal.

So I went home with my treasures and showed them all to Beaut.one. I told her my ideas for a winter-themed party, showed her the pile of snowflakes and the cute little snow-covered woodland creatures. I then told her it was her birthday and it was completely up to her what the theme would be. She said she would think about it. And then I casually said, “Honey, keep in mind that a winter wonderland birthday party would have to include a hot cocoa bar with whip cream and all the fixings.” And well…that settled that.

So the first party project was transforming the snowflake ornaments into two different garlands.

I removed the brown ornament string from each felt snowflake and strung them all together using simple fishing line.
Tada! Simple and inexpensive (each snowflake ornament was 50 cents, yes!) party decorations. And I figured that it is quite likely that these garland will make an appearance as decor in future winters. They could work as Christmas decor or hold their own once all the tinsel is down and you want a little pretty to get you through the rest of the winter.

Next up: the invitation! I decided it would be fun to make sweet mitten invitations out of card stock and cotton balls. I made these in pink and blue and was really happy with how they turned out. Note: the picture below has been altered to hide address and contact information.

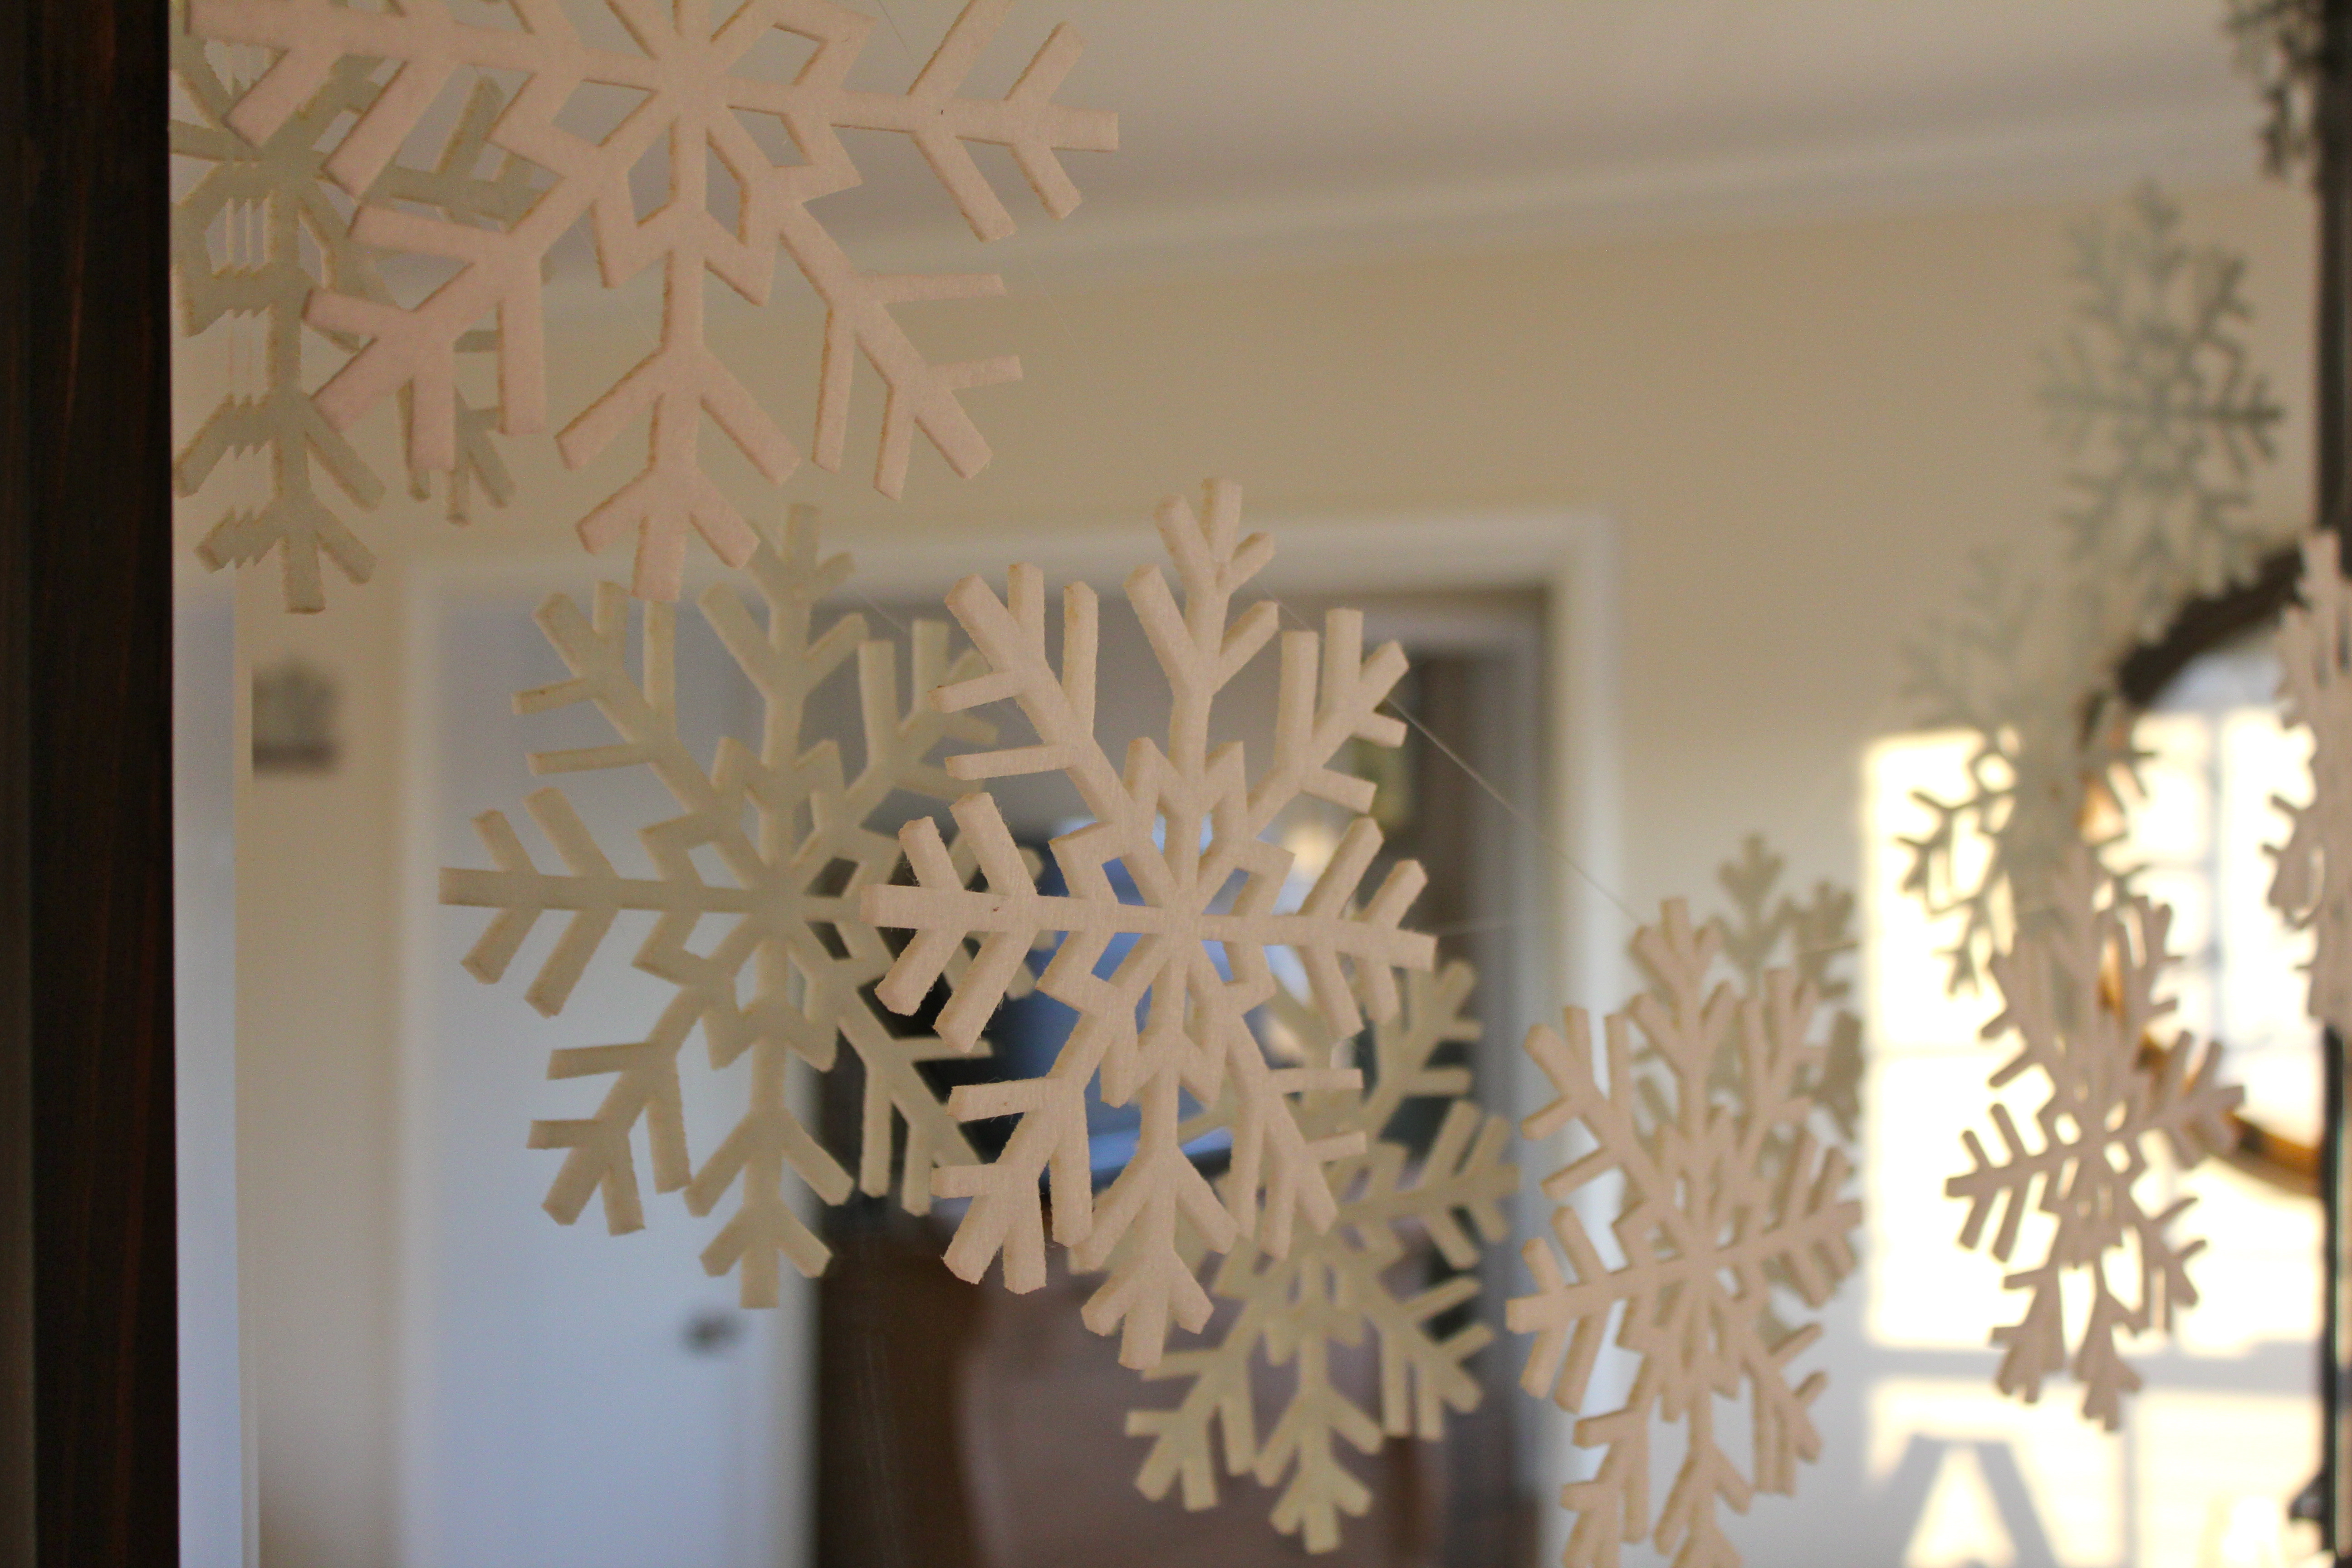
I have whined enough about making all of these lovely snowflakes but all complaining aside, I am so glad I took the time to do it. Beaut.one’s reaction alone was worth every cut. She came downstairs the morning after I had put them all up and with eyes full of wonder kept saying, “Wow! Wow!” Plus, I think they really added to the party atmosphere.

To add to the wintery feel…we also hung snowball garland from the doorways. The snowball garland is just pom-pom yarn I picked up from Michaels. They carry it in a number of color combinations and it has quickly become one of my party mainstays. I may or may not own it in three other colors.

We also hung very LARGE tissue snowballs from the light fixture. Have you guys used these before? The come in an easy to assemble kit from my friend Martha Stewart and I always get a lot of compliments when I use them. We own them in various shades of pink too. That Marty sure knows what she is doing in the party planning arena. I like to pretend we are friends. I am positive she doesn’t do the same.

And here are all the snow-covered woodland creatures holding court as the main attraction on the table. Adding fake snow and some crystal ‘jewels’ helped set the scene and added some sparkly for the birthday girl whose middle name, in hindsight, should have been sparkly.
We have a fairly large dining table that on a typical day stays tablecloth free. But when you know the day will include lots of littles crafting and eating on your glorious table, you want to protect it. Our solution for dressing this behemoth? A painting drop cloth. It is washable and sturdy and affordable and allows me to stay cringe-free as cake crumbs and glue and hot cocoa are flying.

Next up? The party activities! I had made this bottle brush snow globe and thought the party guests would have fun making one too. Until I remembered that our party guests will all be seven and under and may not be as excited as I am about bottle brush trees. Seriously though, aren’t they just the cutest? They are mini evergreens. That you can put anywhere. But I digress.

Instead we opted for crafting My Little Pony snow globes. My sweet friends were VERY excited about these. And so I took one for the team and kept all the bottle brush trees to myself. The sacrifices we as mothers must make.

We made our snow globes with distilled water, a drop or two of Glycerin, glitter and mason jars. I had glued the pony figurines with adhesive ahead of time since the adhesive holds better if it has considerable time to dry.

With the snow globes complete, the kiddos headed off to play snowball stomp. We tied a white balloon (representing the snowball in snowball stomp) with ribbon around each girls’ ankle and the goal was to be the last one left with your balloon not popped. It was a hit!

Then we opened some gifts and oohed and aahed over every Barbie, craft supply and sparkly thing she received. Being a girl totally ROCKS!

After a group shot of these lovely and amazing young ladies…
…we had all worked up quite the appetite. So we ate. The snowman cookies were my favorite. I found the last box of white-chocolate-dipped Oreos on a random shelf in Target. It was late January and these are a Christmas seasonal item around here. This lonely box didn’t even exist in their system. It was like the box manifested itself just for us. It was a dessert miracle I tell you. I used a bit of white frosting to attach the mini chocolate chips as the snowman’s eyes and mouth and orange candy slices as a nose. Cheese balls? You may be wondering why these made the party cut. Well, first of all, these are just plain delicious. Secondly, I needed to temper all the sweet stuff with something salty. And lastly, I had visions all along of finding these in white cheddar cheese so they would really look like snowballs. But no luck. I know they are orange but I was just grateful they weren’t yellow.

And then…the real star of the partay…the hot cocoa bar. Hold me. We let each of the guests come in and concoct their own hot chocolate masterpiece. The fixins: large and small marshmallows, milk chocolate chips, white chocolate chips, chocolate covered marshmallows (for those who don’t want to expend the effort of opening two different jars) and whip cream. I tell ya…it was awesome.

Just plain awesome. And delicious. And yummy. And amazing. And in hindsight I wouldn’t have used paper straws as stirrers (they slowly melted) and I would have had about three more cups. Post party we did keep the hot cocoa bar up and running for the remainder of the winter. Yet another party treat that may make another appearance this year.

If all the previous treats hadn’t put you in a sugar coma yet, the cake will do it!
It is always more fun when your friends help you blow out your cake and make a wish. Always.

I send a very belated apology to all the parents of our party attendees: I am so sorry for loading them up on sugar and hot cocoa and giggles and then sending them home. You all owe me one.

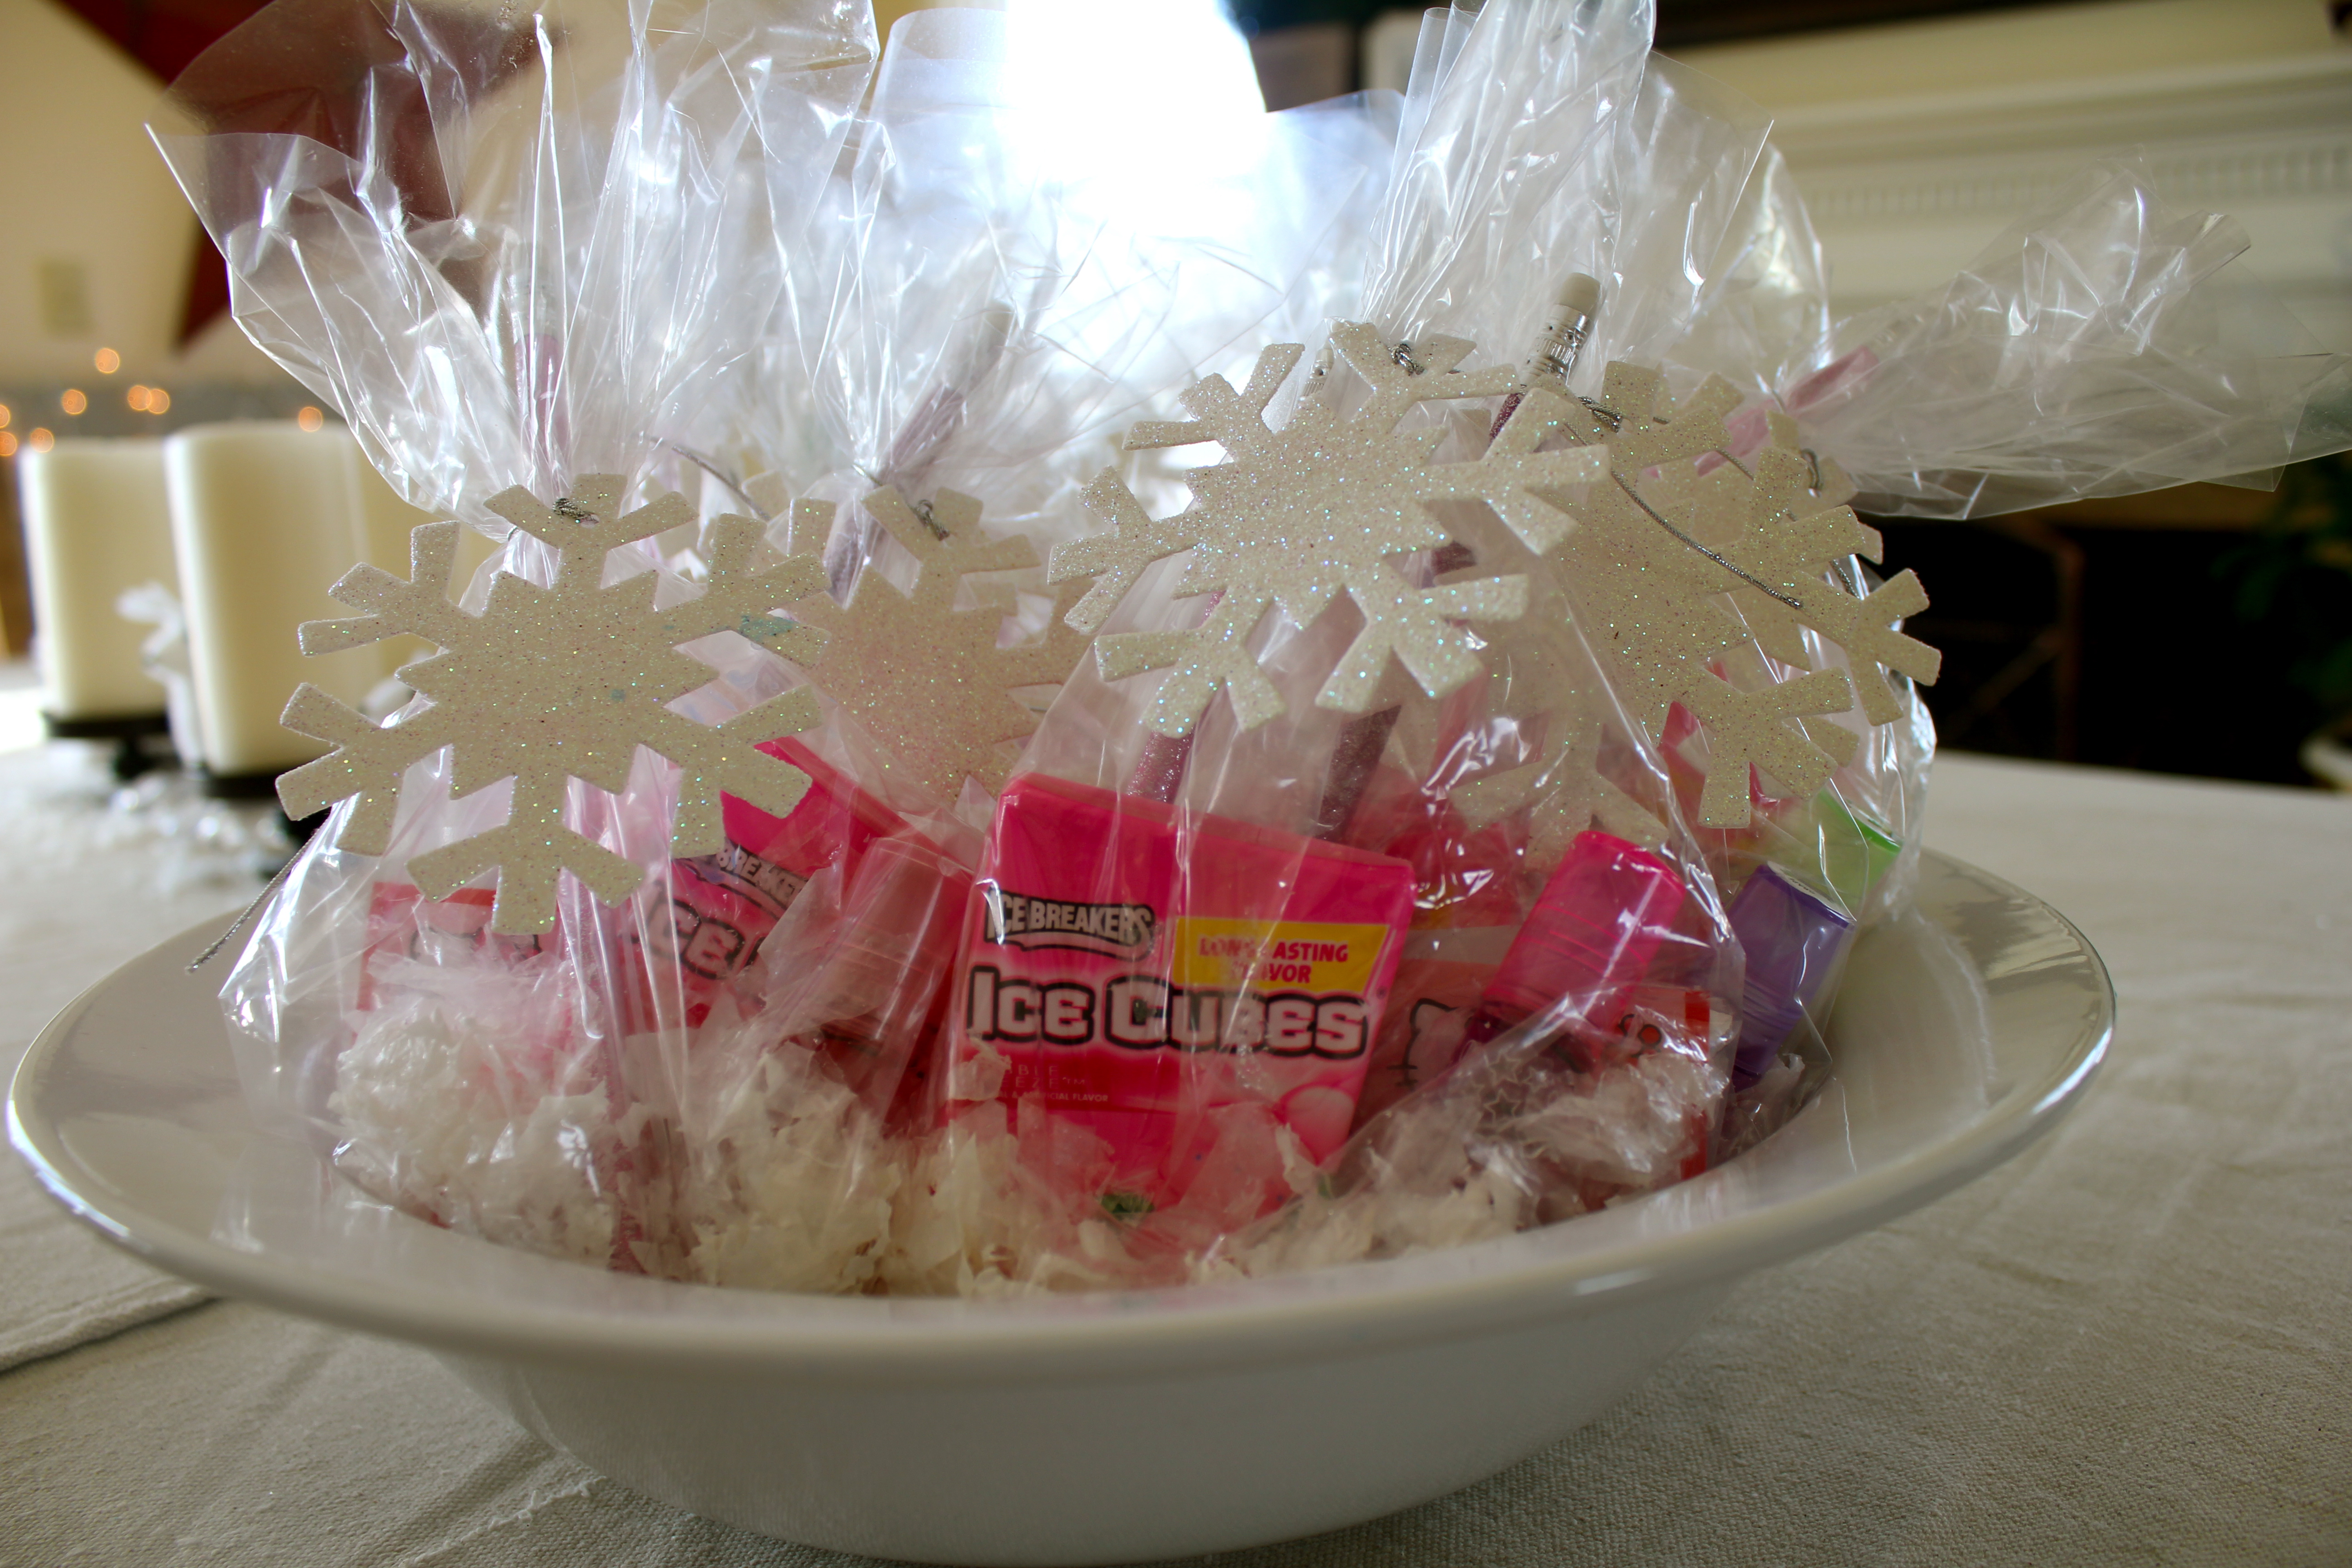
Oh…I almost forgot! Each guest received a party favor that included Ice Cube gum (get it?), stickers, lip gloss, etc. The favor was placed in a cellophane bag full of fake snow. On second thought, I need to apologize for that too. Your respective vans and SUVs were likely sprinkled with the stuff as your little one tried to fish out their treats. I only know from experience. After all, it is only about 6 months later and I am STILL finding fake snow lurking about.
Happy (belated) birthday to my dear, sweet, lovely girl. I will drink hot cocoa loaded with chocolate and marshmallows forever in your honor. I’ll do it.

Stay cool friends,
Stacey
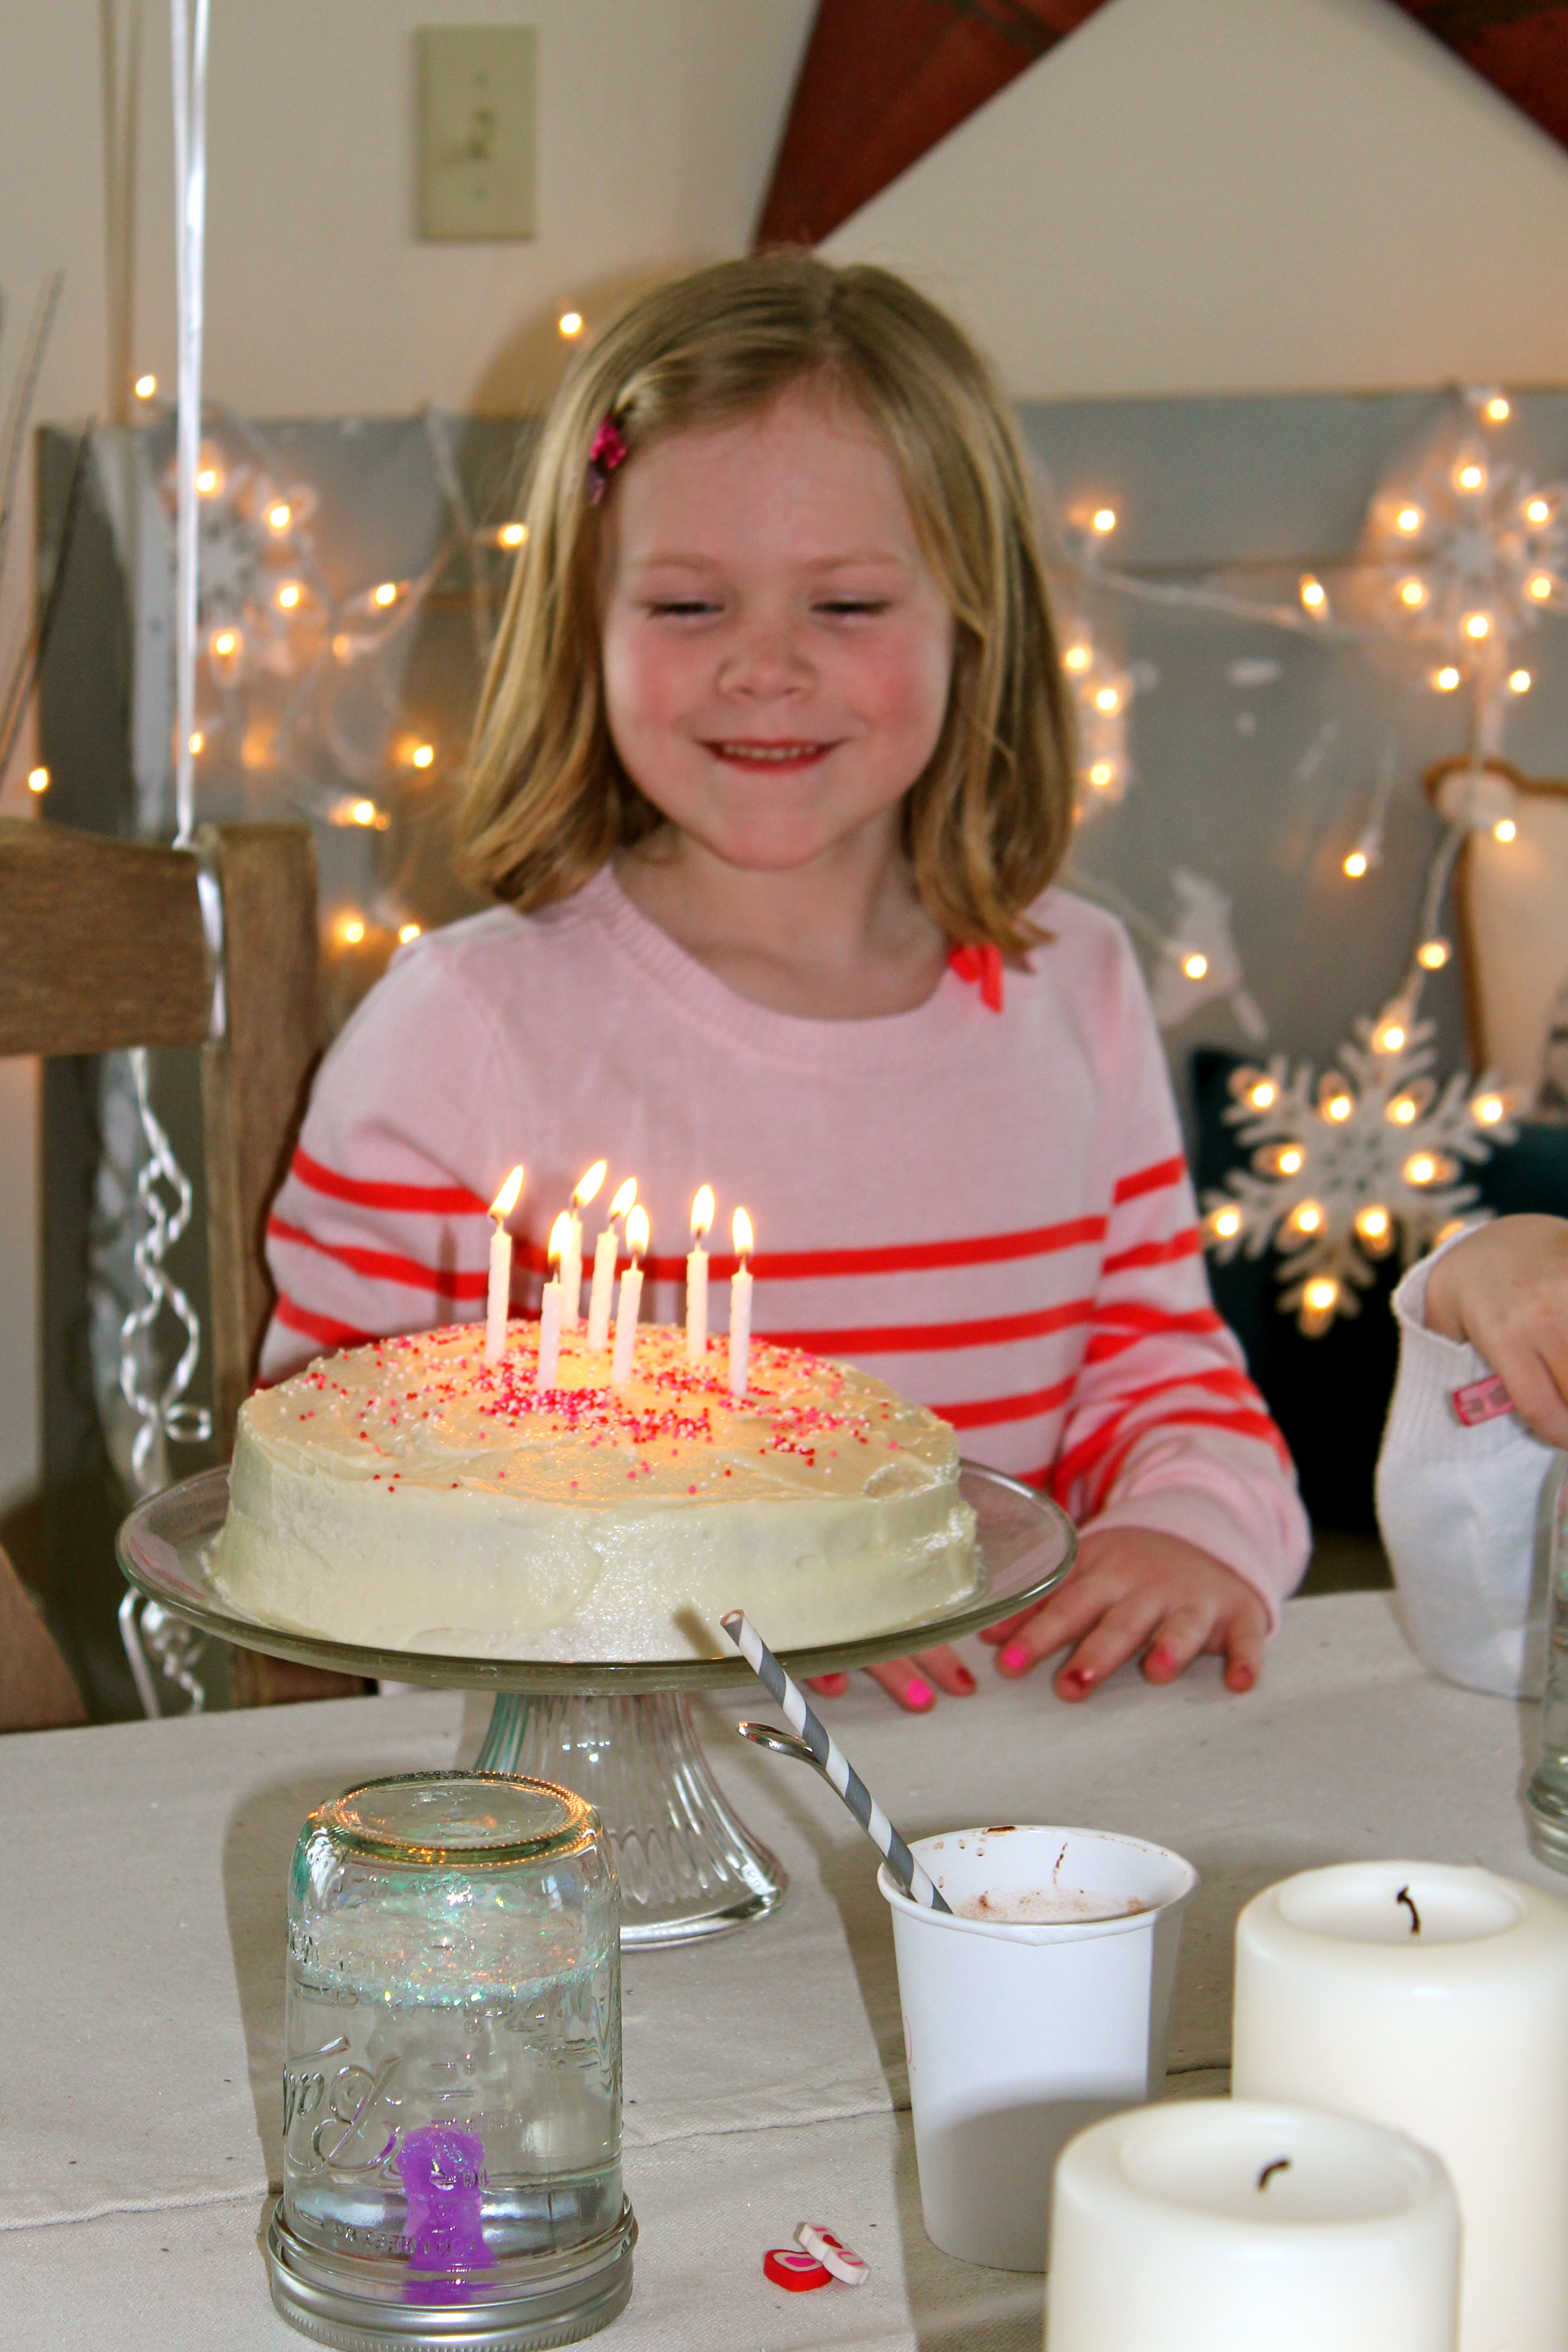
Since we last spoke…a little and a lot has happened. We celebrated birthdays.

Beaut.one ushered in a new year in a winter wonderland. Our family birthday motto: if you are born in the dead of winter…embrace it! It was fun and lovely and unexpected and surprisingly snuggly. And in case you’re wondering, those snowflakes hung out in our living room for a majority of the winter. When you make more than 50 paper snowflakes by hand they are going to stick around for awhile. They just are. At least until your carpal tunnel subsides.

We celebrated another special birthday. And this one had a seven in it too! Semi important detail for the mathematicians in the group: it included more than a decade or two in addition to the 7. As my kids would say with really big eyes, “37! Wow Dad. That’s a lot of fingers. And candles. And fire.”

Since we last spoke…we decided to rearrange our main living space by moving our dining room table into our living room. It was so fun to eat and entertain with the fireplace and the Christmas tree in our midst. We also got to enjoy the beautiful view out the large windows that are normally partially blocked by our sofa. Change is good. Unless it involves your metabolism slowing down as you age. Then change is NO good.

And with our dining room table off and away exploring greener pastures, our dining room transformed into a cozy TV space. We spent many a night curled up in here watching movies, reality TV and Downton Abbey. DA come back to me! I miss my British period drama friends.

And then we decided to switch it all back. And by we…I mean me.
Since we last spoke…we also decided to list our home for sale. And then we decided not to move quite yet and took the house back off the market. And by we…I mean we. This last one was a group decision and we are so happy to stay put for a bit longer.

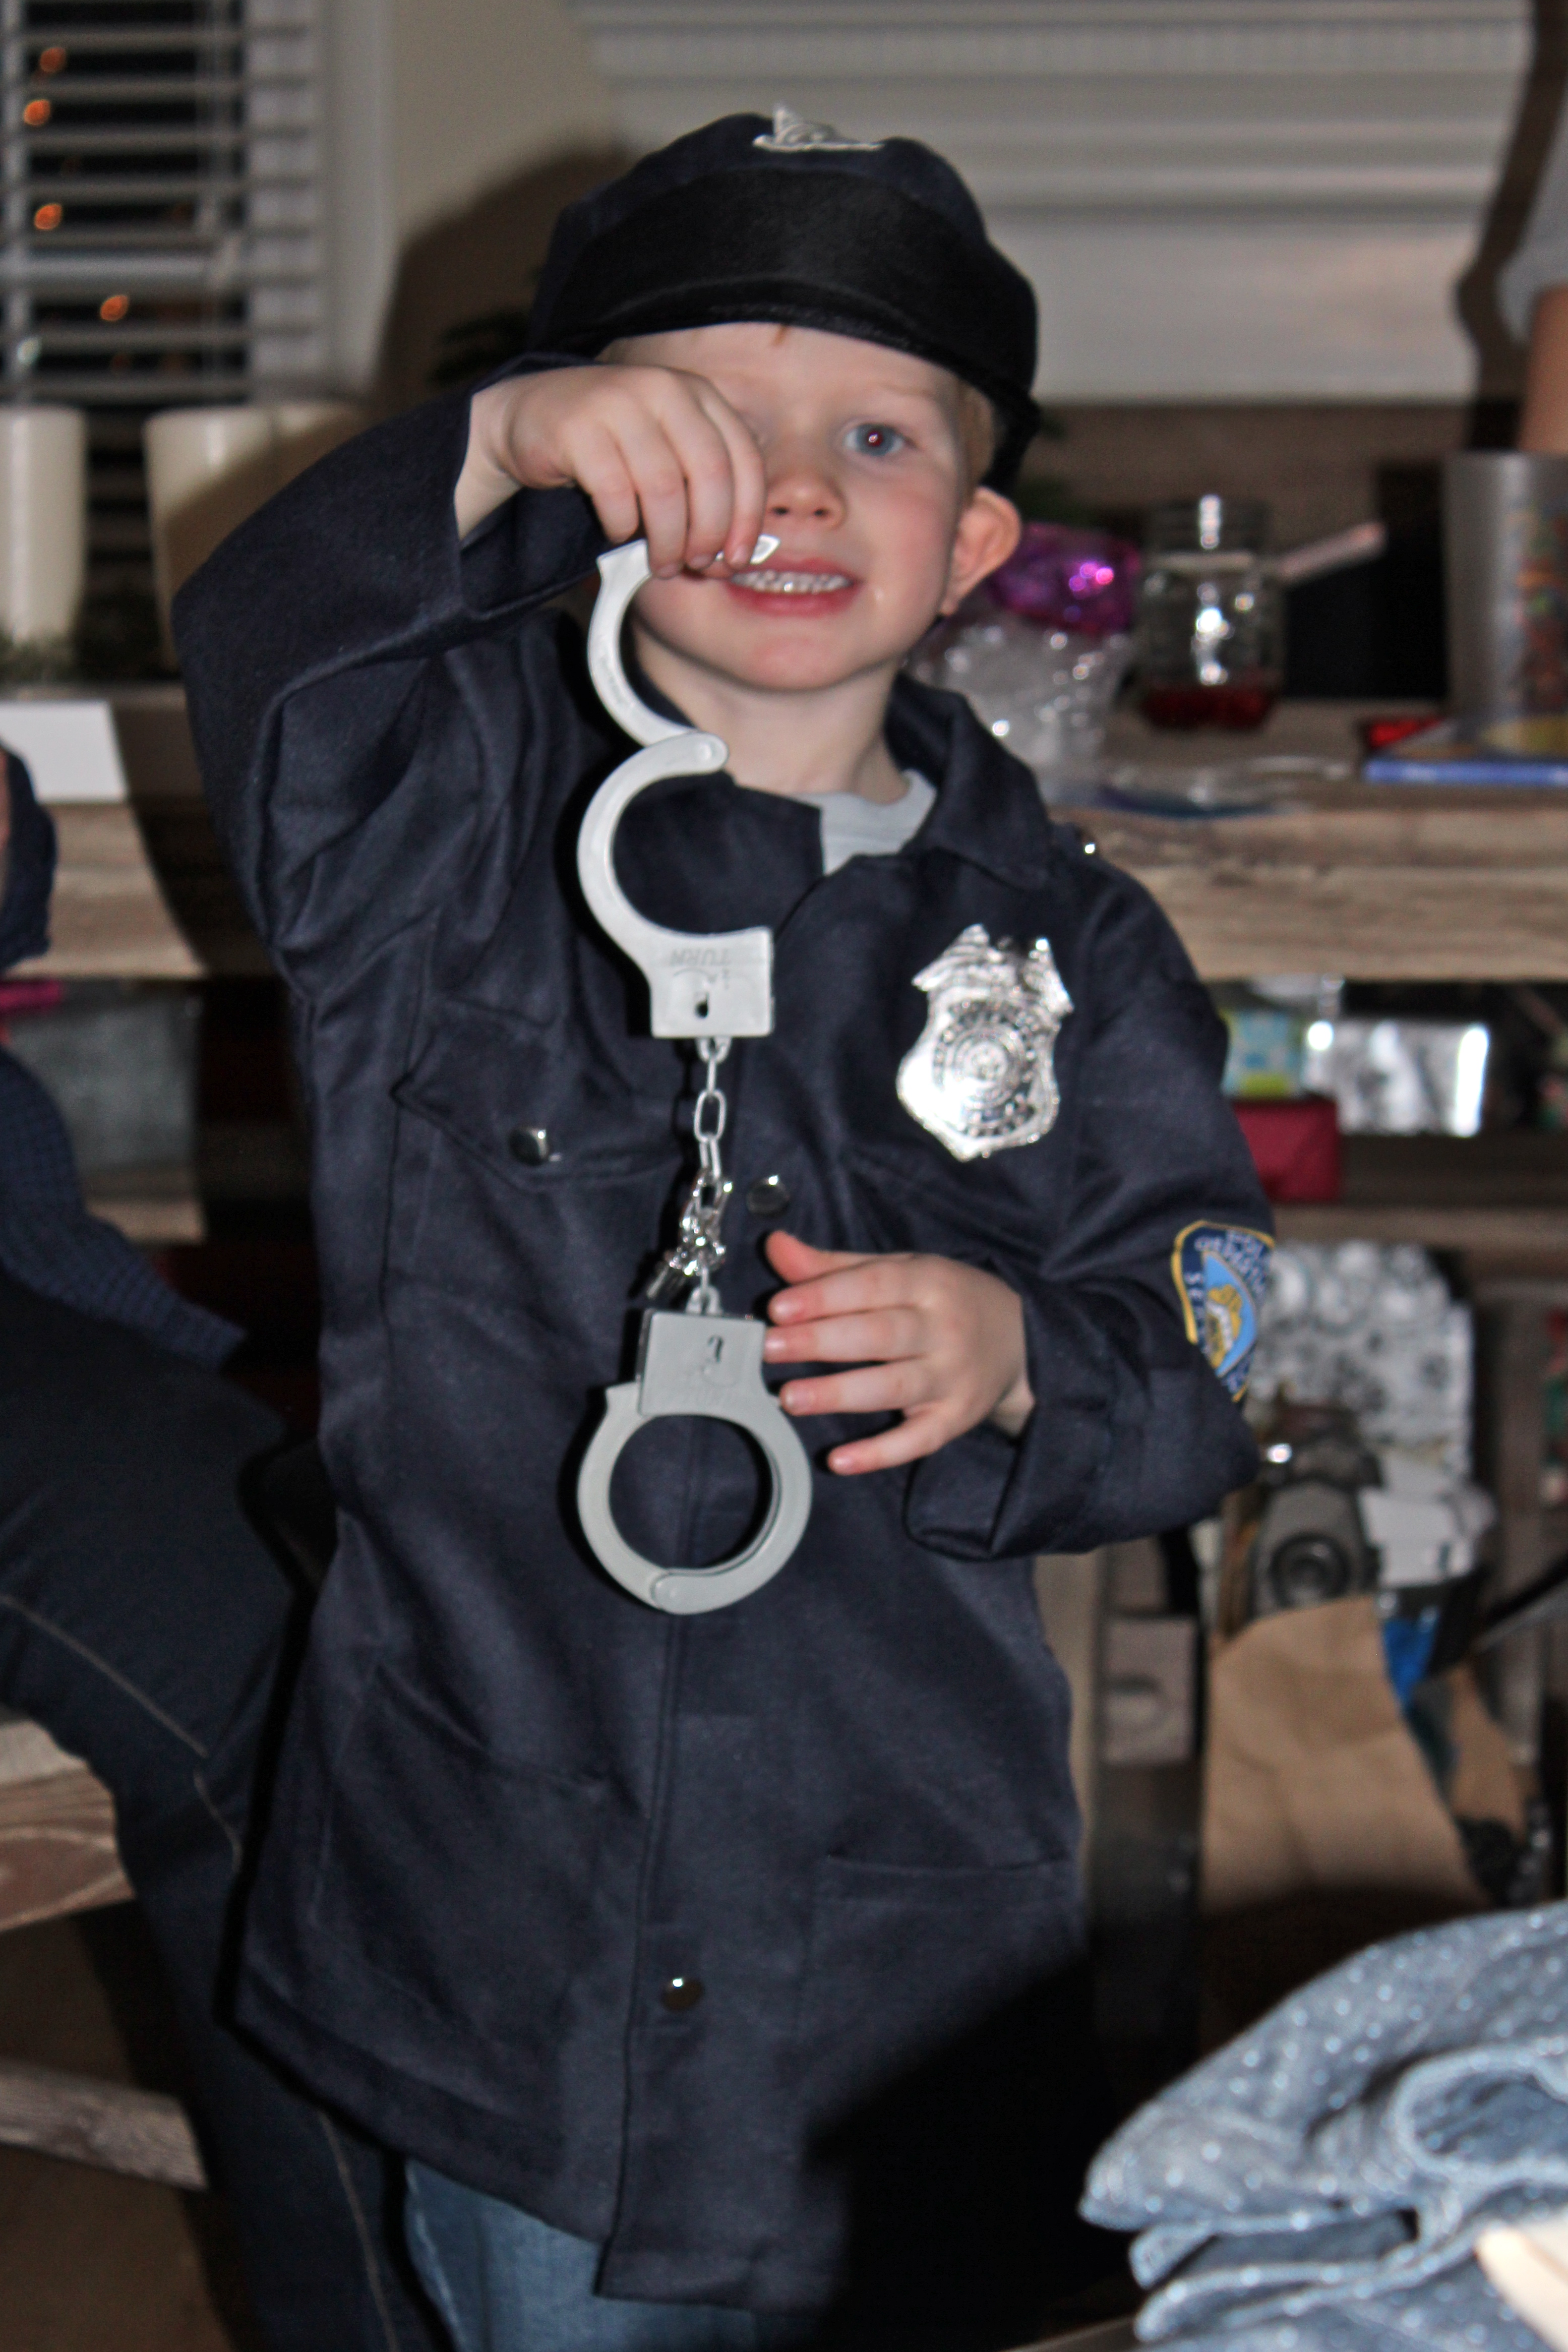
Since we last spoke we’ve had some serious career changes around here. Beaut.two received a police officer outfit for Christmas and the next thing we know he is spending all his free time practicing amateur law enforcement. He is serious about the law and justice and handcuffing his momma to immovable objects and then running off to play.
Beau not only found a new job…he found a new career in a new industry. Can you believe whom people will hire these days? Seriously though, I am so proud of him and his new endeavor. And thankfully…it has nothing to do with selling, making or modeling knit hats and gloves.

Since we last spoke…we spent some time exploring the great outdoors. We did some serious sledding. And you know it has to be serious when a member of your family literally comes out of their boot while careening down a hill.

We celebrated Easter,

the 4th of July,
and this pretty lady’s 102nd birthday. Yes, you read that right. 102 years! Whenever I think about my sweet Grandma three things race through my mind:
1. Grandmas are fun and sweet and generous.
2. Beau is never going to be rid of me. I have some serious longevity genes coursing through my body.
3. Am I saving enough for retirement? Seriously…how long am I going to keep kickin’? And how much is cable going to cost in 2058?
Beaut.two is none-too-thrilled in this shot. He had just been informed seconds before that the cupcakes we were celebrating with contain soy and he can’t eat them. (Food allergies are zero fun.) And he just couldn’t get past it. He just couldn’t.

Since we last spoke…we saw dinosaurs.

Is anyone else a smidge relieved that dinosaurs are extinct when you realize how large and fast and hungry these magnificent creatures once were?

Since we last spoke…we cheered our way through Beaut.one’s inaugural softball season,

Beaut.two’s blast of a baseball season,

a fun and red-faced basketball season,

and another dance recital. She doesn’t look a stitch nervous does she?

Since we last spoke…we encountered our very first pantrum. Pantrum? Never heard of it? We hadn’t either. But it is indeed very real. And it apparently occurs when a young man is not at all appreciative of the fashion statement his amazingly cool orange pants will make on Easter Sunday.

And even though we experienced some fashion-related tears…since we last spoke…we also have laughed a whole bunch! We don’t take ourselves any too seriously around here.

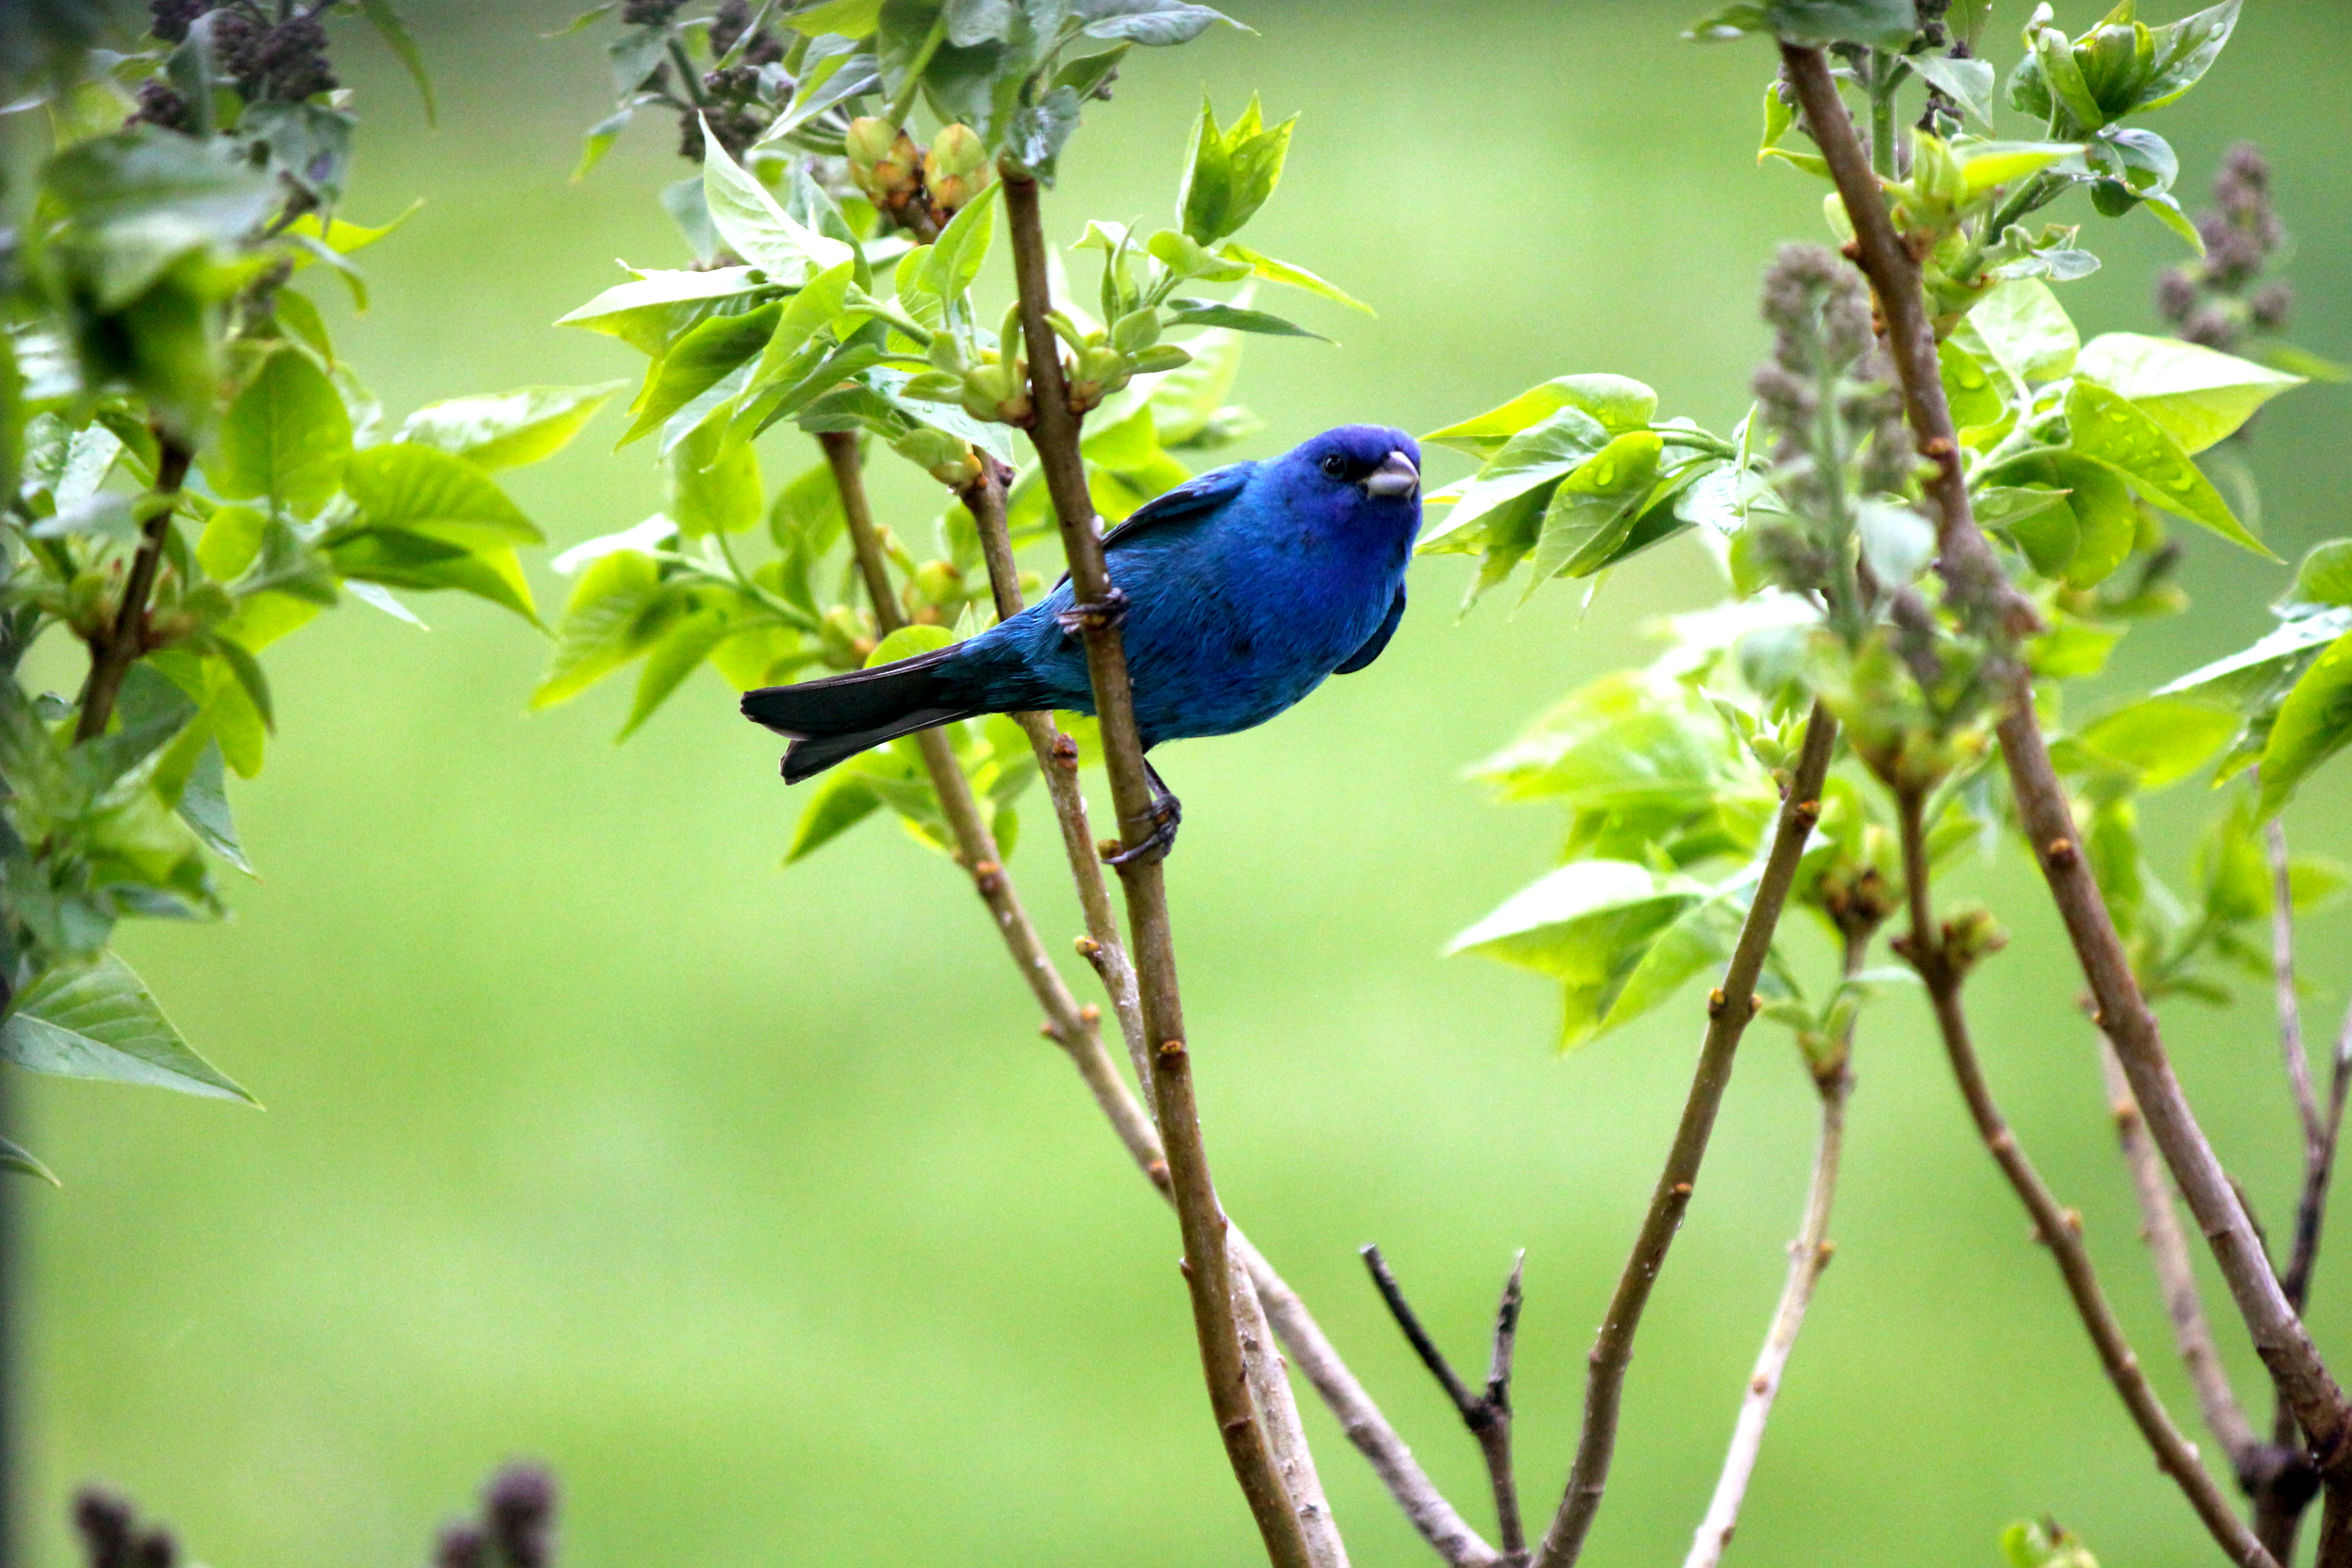
Since we last spoke…we have enjoyed nature’s beauty in our midst. This indigo bunting was taking a rest in our lilac bush. Isn’t it magnificent?
And while on vacation I paddled right up next to this lily pad flower. And nearly capsized the paddle boat Beau and I were on when I decided to stand in order to catch the perfect shot. That brush with death getting really wet was worth it, don’t you think?

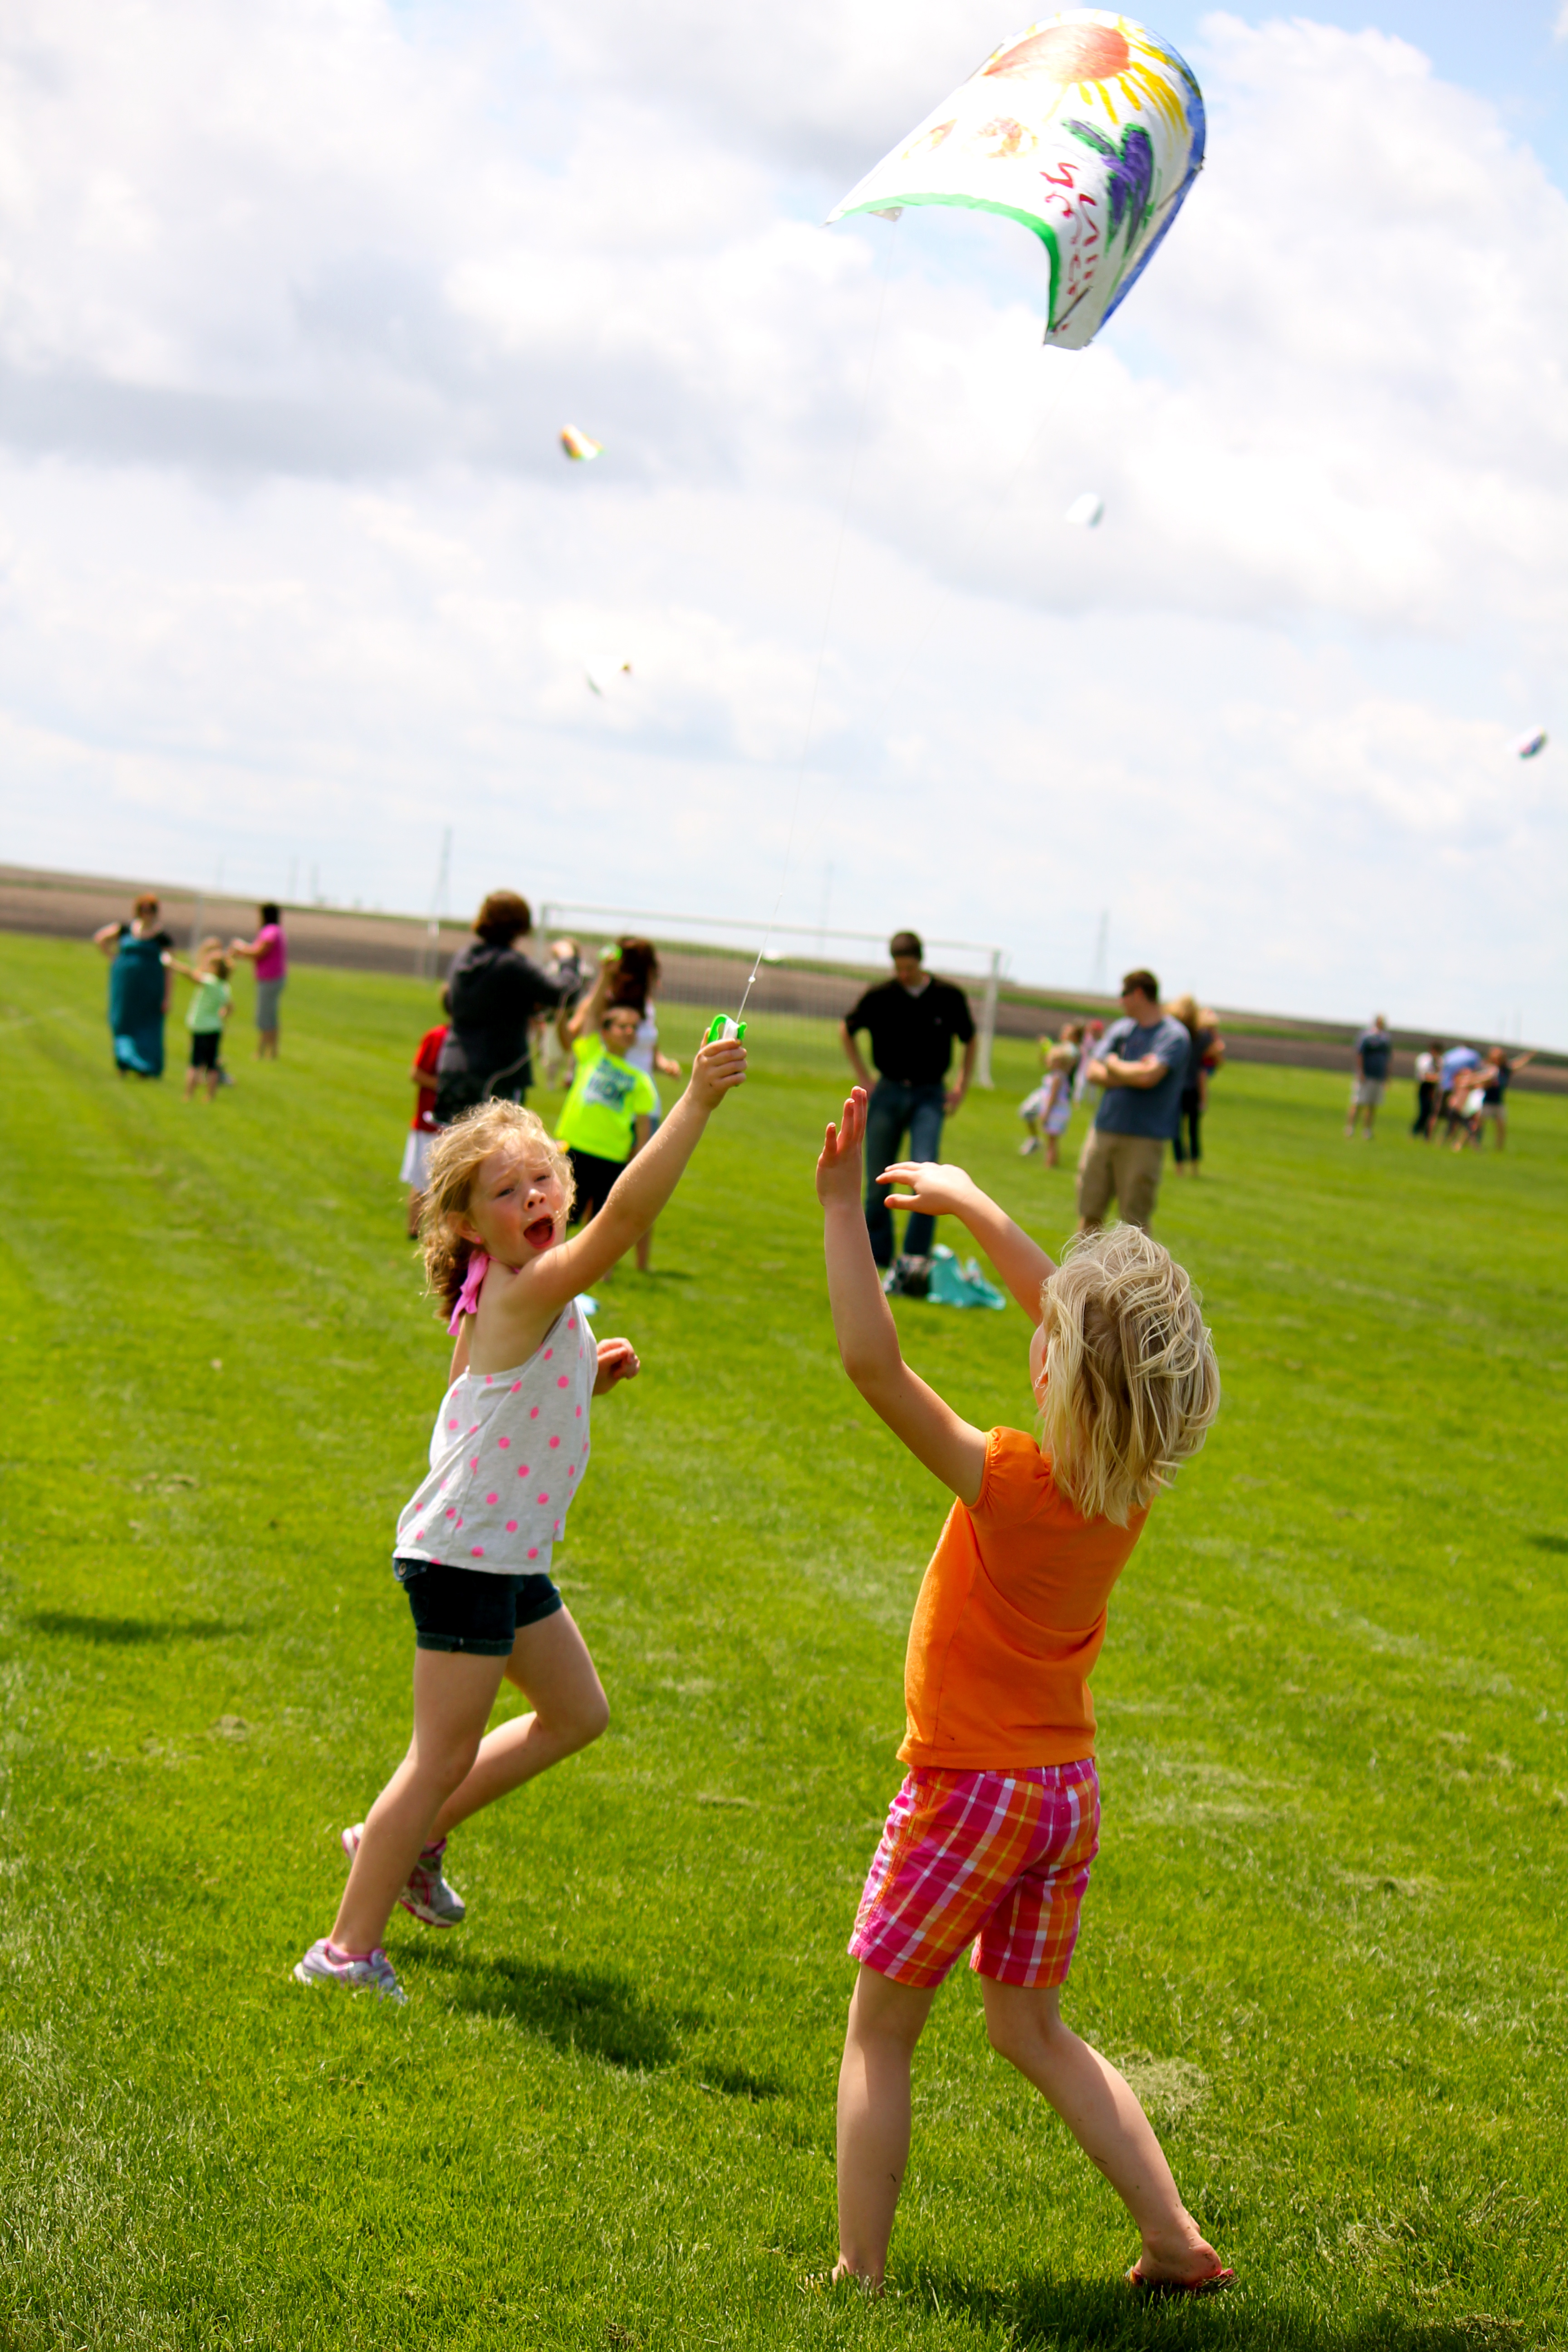
Since we last spoke…we flew kites on the last day of school and…
…caught Tag red-handed trying to eat a banana. See Exhibit A: Chiquita sticker stuck to defendant’s nose. So busted!

Since we last spoke…we have gained an appreciation for 3-D film making but we have lost a considerable number of teeth.

Since we last spoke…our knight in shining armor has saved us from all sorts of dangerous enemies…
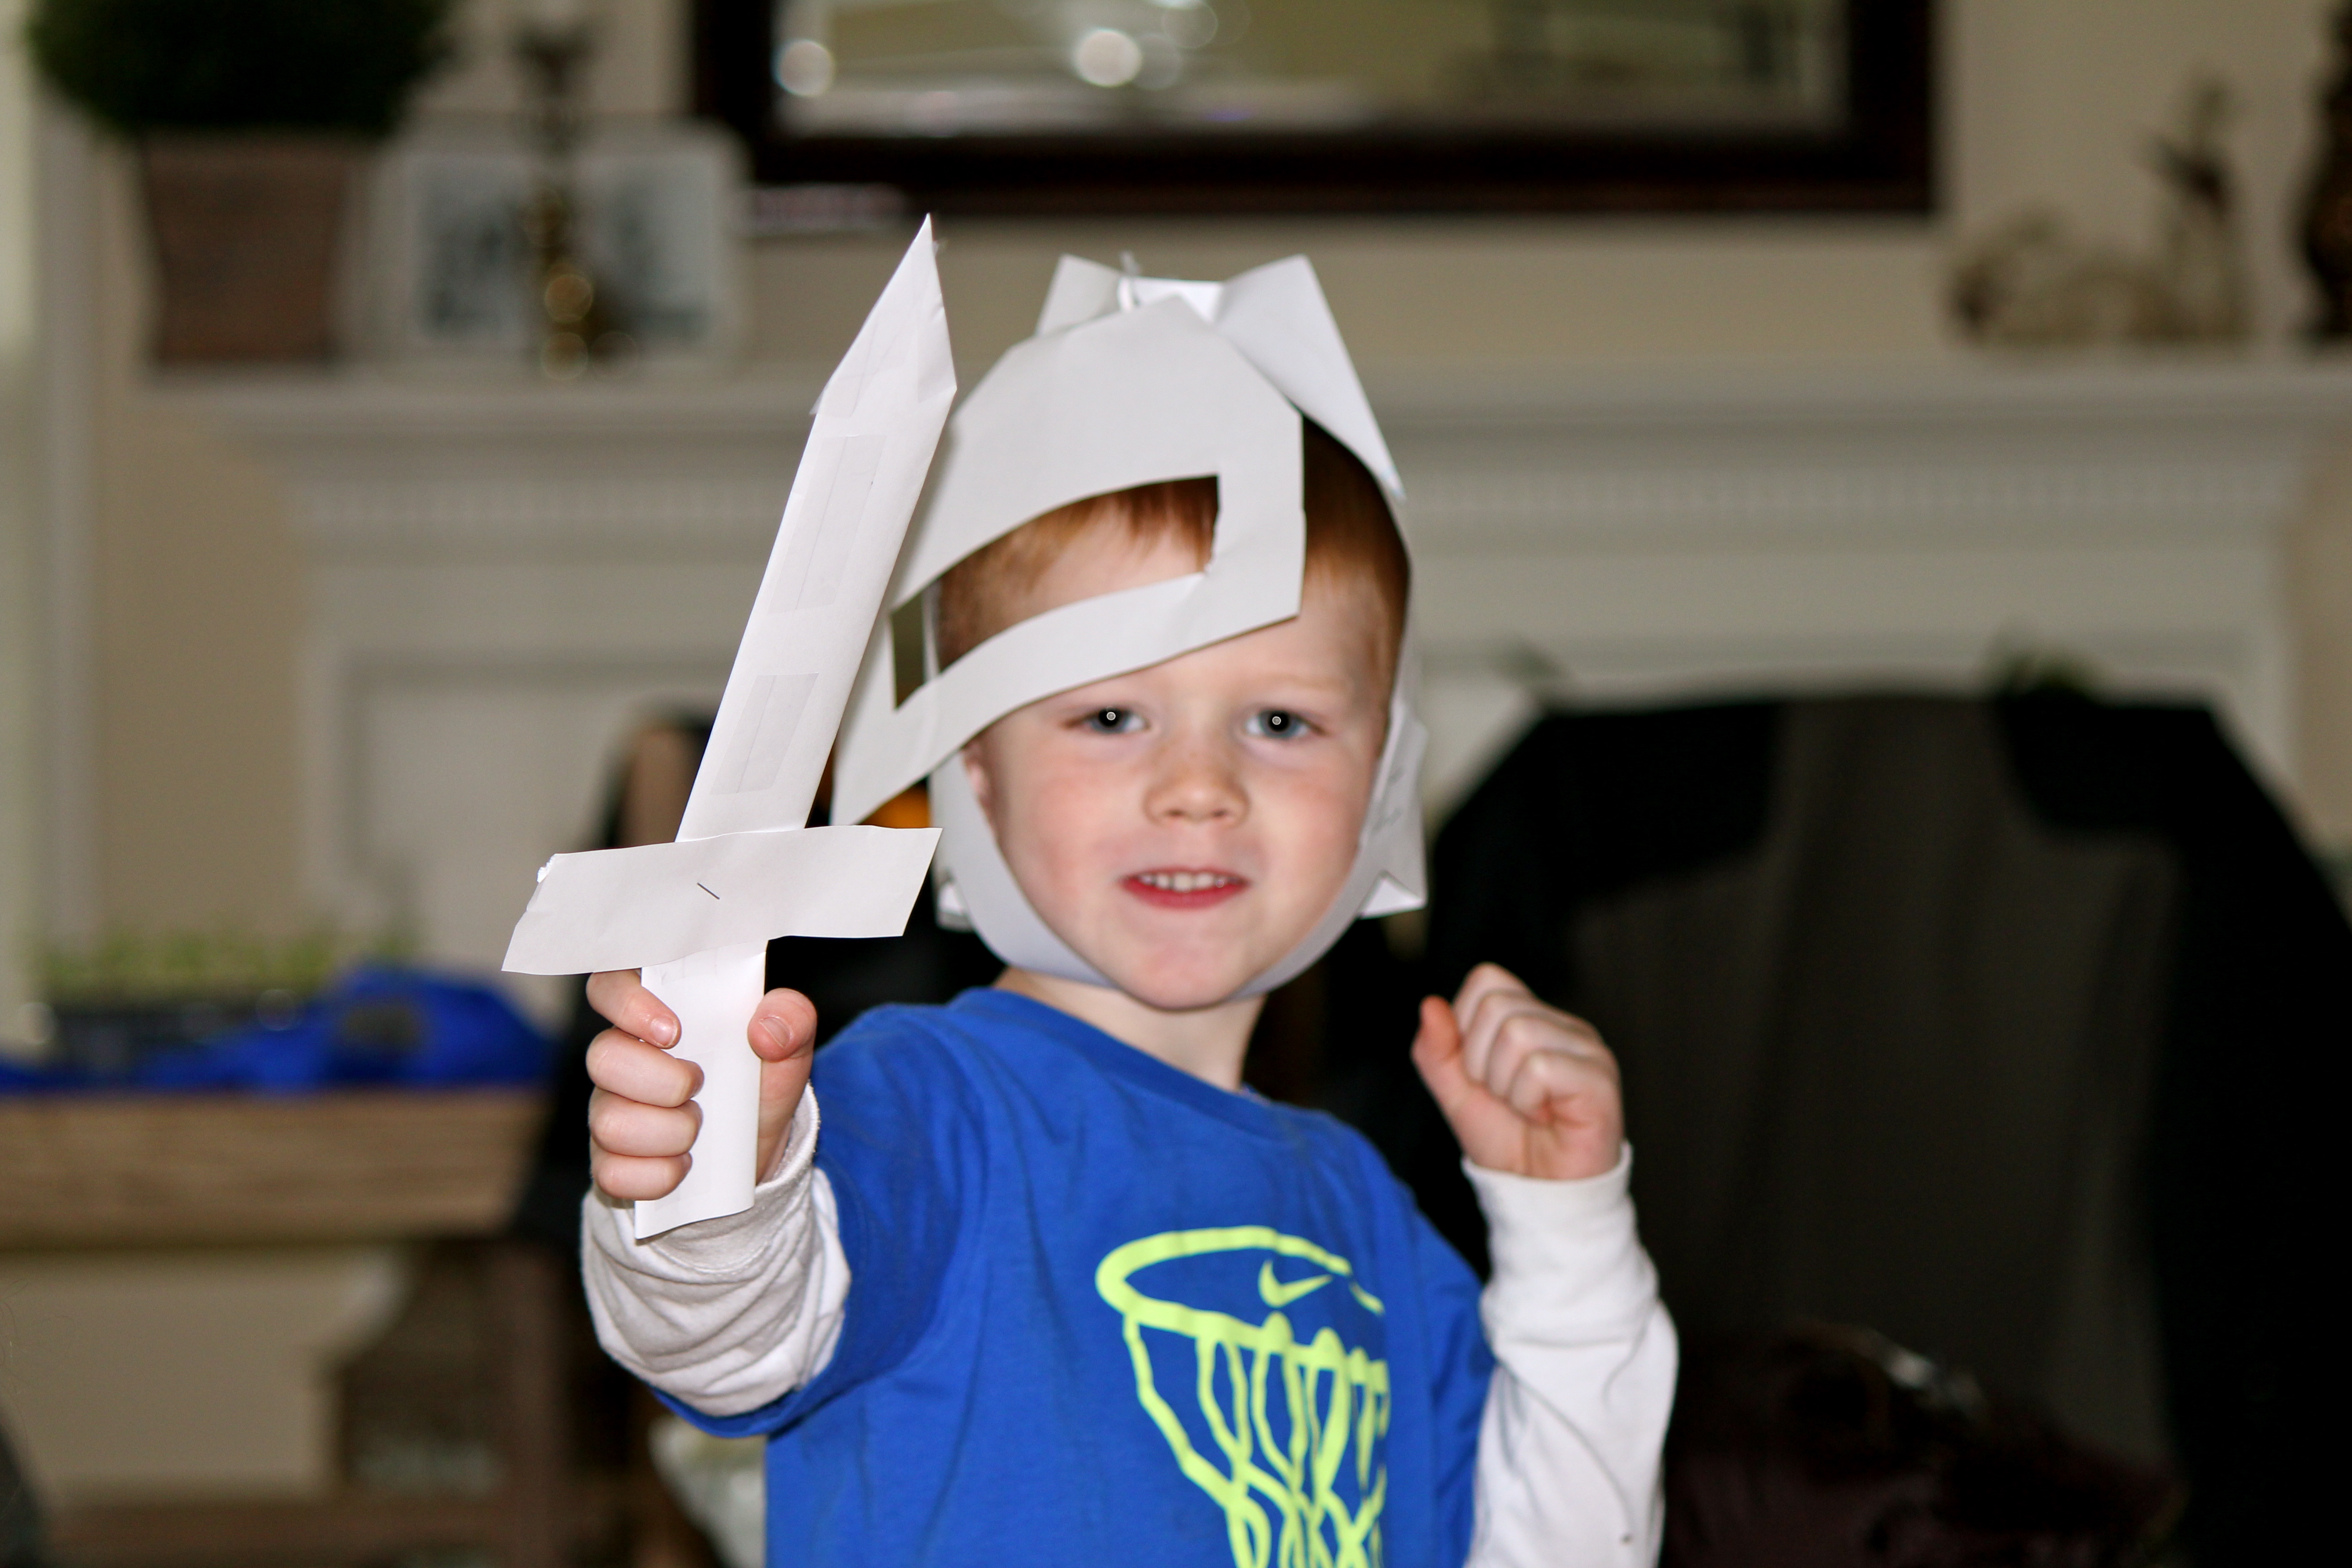
…and made us a serious hit at the Mall of America. It was all his idea to sport the Teenage Mutant Turtle costume and rock it he did. It was awesome-sauce.

Since we last spoke…we have enjoyed much deliciousness from our backyard garden. These rainbow carrots are really sweet and really purple. We have also been eating fresh strawberries by the handful.

While we are on the subject of deliciousness, I would be remiss if I didn’t tell you how I have fielded phone call after phone call from a dear friend of mine since we last spoke. He just talks and talks. And I just listen and listen. Our relationship is really quite time consuming. But a girl has got to do what a girl has got to do.

Since we last spoke…Beaut.two has mastered riding a bike without training wheels. “I’m doing it! I’m doing it!” could be heard from near and far.

And we spent a week in the north woods of Wisconsin vacationing with these crazy and lovely people.

Since we last spoke…we have spent a lot of time enjoying all the simple things summer can bring…

…and a lot of just hanging around…enjoying one another.
What have you been up to since we last spoke?
Stacey
P.S. All photos were taken by me…except the Ryan Gosling one. That little piece of photographic artistry was sent to me by a friend. I can take no credit at all. But who can take credit really? God can…that’s who…for creating Mr. Gosling in the first place. Thank you and good-bye.
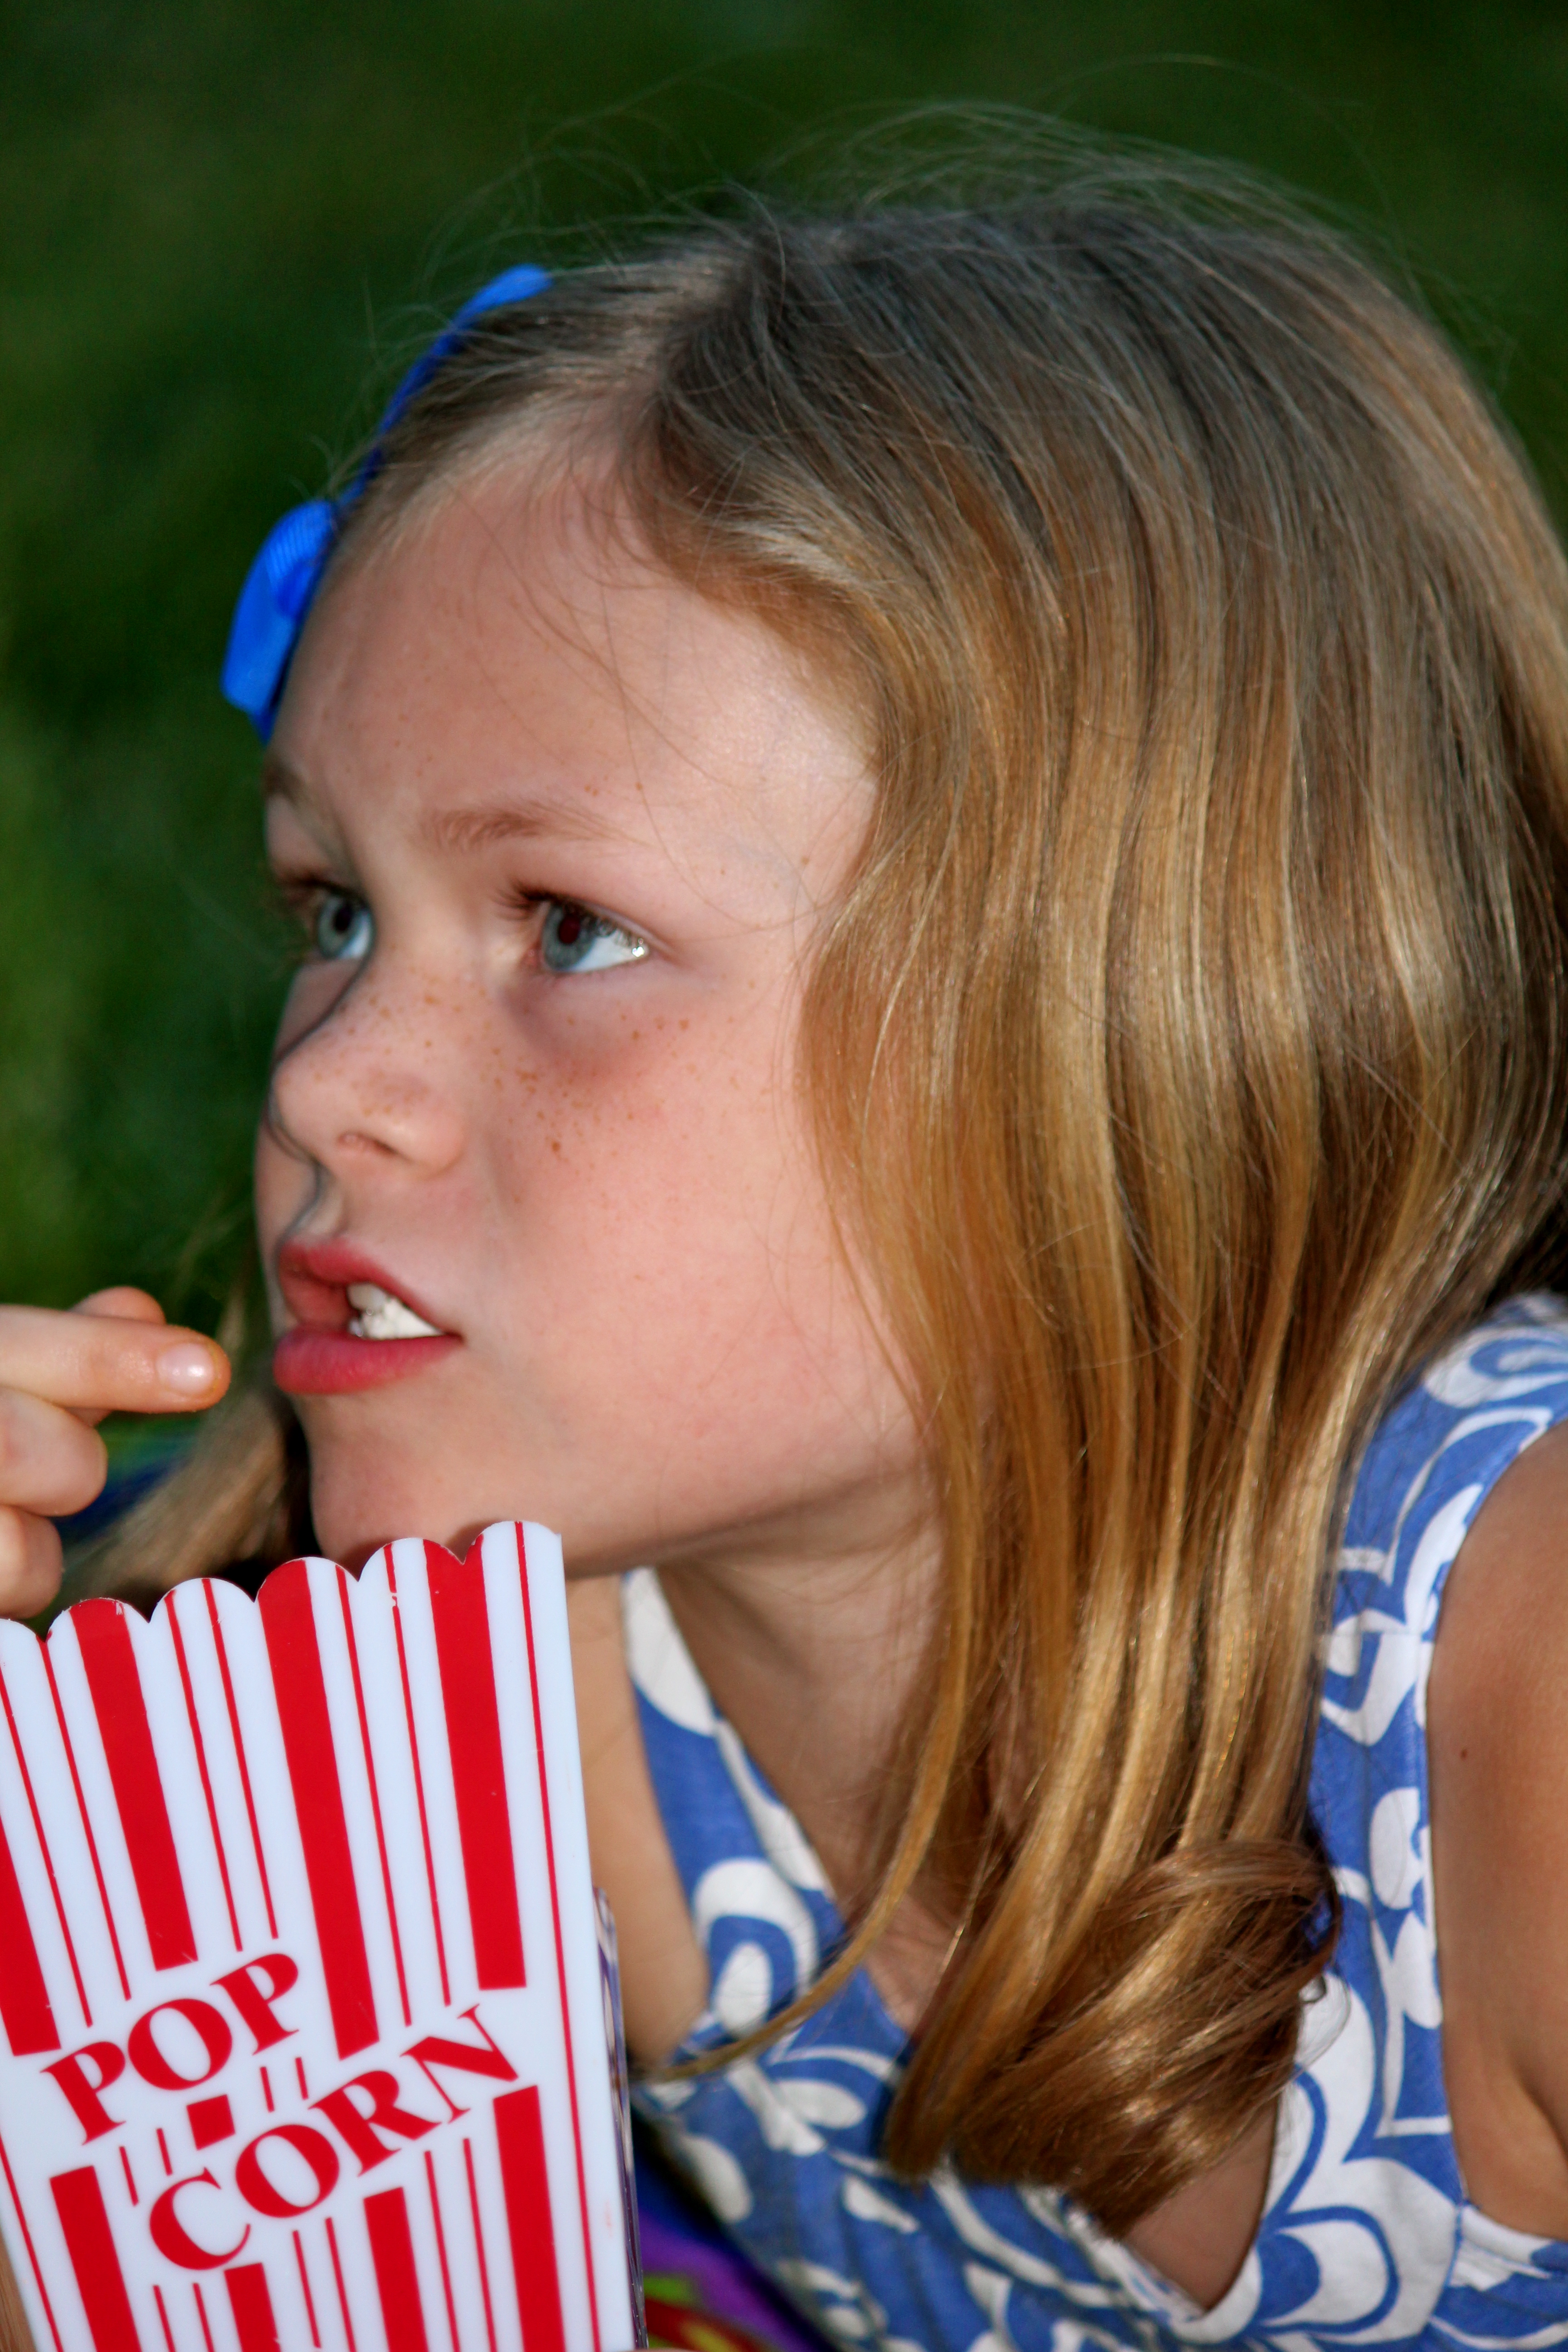
Picture it. It is early November and I have just vowed to never eat another piece of candy again after raiding my children’s Halloween stash for the last three days straight. Upset stomach and all I turn my attention to Christmas. I have to start my Christmas thinking pretty early because Beaut.two’s birthday falls in December too so it is an especially busy time around here! As I began to think about gifts for friends, teachers and family my wondering eyes came across these two homemade projects. And I know I must have still been under some sort of sugar coma because baking is not one of my top talents. Hold your collective breath with me!

Gift Project #1: Yarn Bracelets
Once upon a time I watched Martha Stewart magically transform her leftover yarn into cute, gift-worthy bracelets. And I thought, “I wish I had leftover yarn to make myself a cute bracelet. Heck, I wish I had yarn period. I don’t knit. But I should. That’s it! I’m going to learn to knit so I can have leftover yarn for bracelet making! Wait. Why don’t I skip the learning to knit part and just buy yarn?” It may take me awhile but eventually I get there. Eventually. On to bracelet making…
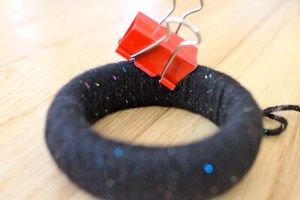
I found these bangles on clearance at Target and used them as my bracelet base. You can use bangle bracelets you have on hand and if you are a child of the eighties, like me, you’re going to have bangles around. You’re just going to.
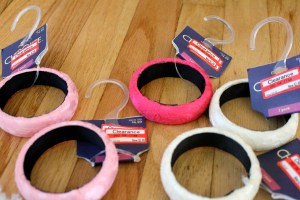
I picked up some glitter yarn at Michaels for $2.99. (Pictured here are both white and black yarns but I opted to make all the bracelets for this project out of the black. I thought the black color would hide dirt and grime better since these were heading to women who all have small children. Small children = dirt and grime and smiles.) You will also need fabric glue and a pair of sharp scissors.

Next, make a yarn ball about the size of a golf ball. If you aren’t a knitter, like me, you likely have no idea how to make a yarn ball. I just followed the directions I found on eHow.com. Here’s the link. Take a moment and relish in your yarn ball making brilliance.

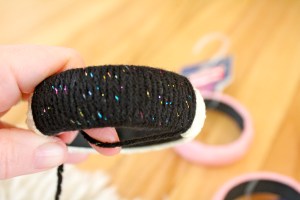
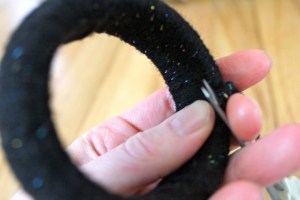
Moving on…begin tightly wrapping the yarn around the bracelet. As you begin, you will want to overlap the first wrap just to hold the yarn end in place.

And then continue wrapping all the way around. It should take you between 15 and 20 minutes to complete.
Once you are finished, attach the end with fabric glue.

Clamp with either a heavy-duty clip or a clothespin to hold the yarn in place while it dries.
Once the glue dries, trim the yarn end and wear!
Or if you must, gift your bracelet to someone special.
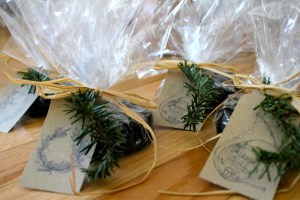
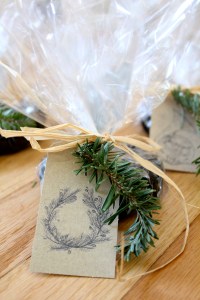
I made five of these beauties for girlfriends of mine. I wrapped them in clear cellophane, tied them with raffia, attached a tag and fresh evergreen. A perfect Christmas gift! The evergreen was from our tree. Not surprisingly, we had sprigs to spare. 🙂 (Read about our very large tree finding expedition here.)
Merry Christmas! Feliz Navidad! Joyeux Noel! Mele Kalikimaka!
Gift Project #2: Personalized Cookies
I saw an article in Midwest Living’s December 2012 issue about these personalized cookies and I fell in love with them immediately. I thought, “I need to figure out how to make these and give these as gifts to teachers and neighbors, everyone really.” Oh, the grand, borderline delusional, thoughts you have in early November! In my still somewhat delusional state I ordered the cookie cutter set and committed myself to making these little beauties.

First step? Make the cookie batter. I used Midwest Living’s Vienna Almond Cookie recipe. And I kid you not, it is quite possibly the most delicious dough I have ever tasted. It isn’t difficult to make either. Here’s what you need.
Ingredient List:
3/4 cup slivered almonds, toasted
2 1/4 cups all-purpose flour
1/4 teaspoon salt
1 cup butter, softened
3/4 cup sugar
1 egg
1 tsp. vanilla
1/2 tsp. finely shredded lemon peel
1/4 tsp. almond extract
Makes 48 cookies. FYI: I doubled the batch so that is why my ingredient amounts look large!
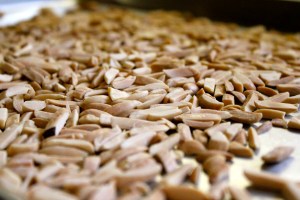
I bought regular slivered almonds and toasted them myself.

You will NOT regret taking the 10 minutes (at 350 degrees) it takes to toast these. It adds such a richness and depth to the flavor of the cookies.
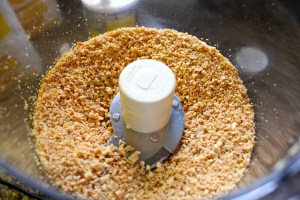
This is me quite excited that I get to use my food processor. This appliance was a MAJOR and VERY IMPULSIVE purchase I made for a post some time ago. And with each use I feel just a bit better about it.

Finely grind those toasted almonds using that powerful and very necessary food processing tool.
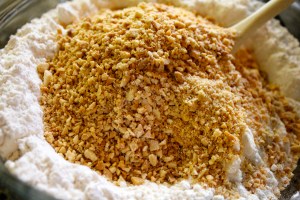
In a small bowl, combine flour…

…and salt.

Add the toasted almonds, stir and set aside.
Beat sugar and butter on medium speed until lightly fluffy.

Beat in egg,

vanilla,

lemon peel,
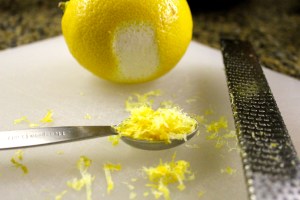
and almond extract! At this point your kitchen is quite possibly the best smelling place in the world.

Beat in the flour mixture a bit at a time. If the dough becomes too thick for your mixer, stir in the remaining flour mixture. Just try and not taste this dough. Just try! It will whisper your name until you do. It is a persistent and delicious dough. You are powerless to fight it. Powerless!

Divide the dough in half and wrap in plastic. (Because I doubled the recipe I had four balls of doughy deliciousness!) Chill for 2 hours. I left my dough in the refrigerator for 3 days before I made the cookies. I put the wrapped dough in a plastic storage bag just to ensure it didn’t dry out. When it was time to use the dough I let it warm up and soften a bit before rolling it out. You can likely skip this step if you just chill for 2 hours instead of 3 days!
On a lightly floured surface, roll dough to 1/4 inch thickness.

Get out your Brigitte “Message on a Cookie” Text Stamp & Cutter Set. I ordered mine from fancyflours.com for $20.00.

It is made by a German company, hence the very German words all over the box. Don’t let that intimidate you. They also have instructions in English! This small feat of engineering looks like this when you take it out of the box.

Decide on your cookie message and put in the individual letters mirror-inverted.

Put your message in the cutter and get ready to create cookie magic!

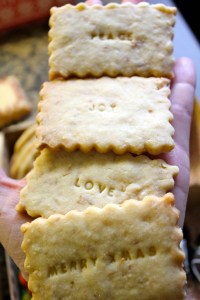
In addition to individual name cookies, I made ones that said Peace, Love, Joy and Merry Xmas. The possibilities are endless! Bake in a 350 degree oven for 8 to 12 minutes or until edges are light brown and centers are set. Cool for 1 minute before transferring to a wire rack to cool completely.
I also added cookies made with this HOMEMADE cookie stamp in our gift box. I found this stamp at World Market for $3.99.

I had never used a cookie stamp before either. Nothing like throwing caution to the wind to try something new when you’ve got the pressure of the holiday season and the fact that you’re giving these as gifts!

I used the same Vienna Almond Cookie dough for these as well.

I LOVE how these turned out. I bought red royal icing and used it to fill in the heart. I had also never worked with royal icing before. Caution to the wind people!

I also made these adorable frosting-free sugar cookies. I was looking for frosting-free options so the baked goods would stack and travel well to their intended recipients. I followed these steps to the tee and I loved how they turned out! Be sure not to over bake them or they will get pretty hard and tough.

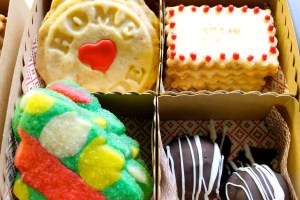
Drum roll please! The cookie boxes ready for delivery! The chocolate deliciousness in the bottom right corner? Oreo Truffles. I figured if you’re anything like me you noticed them and may or may not have tried to reach through the screen to see if you could try one. Catch up to our chocolate fantasies technology. Catch up!


In case you’re wondering, the cookie boxes are from Martha Stewart crafts. I bought them at Michaels. All boxed up and ready for delivery!

Wishing you and yours a very Christmas! May the Spirit of this season remind you of all you have to be thankful for and for all that is possible.
…“Do not be afraid. I bring you good news that will cause great joy for all the people. Today in the town of David a Savior has been born to you; he is the Messiah, the Lord.” Luke 2:10-11
Abundant blessings and joy,
Stacey

