
Homemade Christmas Presents: Bracelets and Cookies
Picture it. It is early November and I have just vowed to never eat another piece of candy again after raiding my children’s Halloween stash for the last three days straight. Upset stomach and all I turn my attention to Christmas. I have to start my Christmas thinking pretty early because Beaut.two’s birthday falls in December too so it is an especially busy time around here! As I began to think about gifts for friends, teachers and family my wondering eyes came across these two homemade projects. And I know I must have still been under some sort of sugar coma because baking is not one of my top talents. Hold your collective breath with me!


Gift Project #1: Yarn Bracelets
Once upon a time I watched Martha Stewart magically transform her leftover yarn into cute, gift-worthy bracelets. And I thought, “I wish I had leftover yarn to make myself a cute bracelet. Heck, I wish I had yarn period. I don’t knit. But I should. That’s it! I’m going to learn to knit so I can have leftover yarn for bracelet making! Wait. Why don’t I skip the learning to knit part and just buy yarn?” It may take me awhile but eventually I get there. Eventually. On to bracelet making…
I found these bangles on clearance at Target and used them as my bracelet base. You can use bangle bracelets you have on hand and if you are a child of the eighties, like me, you’re going to have bangles around. You’re just going to.

I picked up some glitter yarn at Michaels for $2.99. (Pictured here are both white and black yarns but I opted to make all the bracelets for this project out of the black. I thought the black color would hide dirt and grime better since these were heading to women who all have small children. Small children = dirt and grime and smiles.) You will also need fabric glue and a pair of sharp scissors.

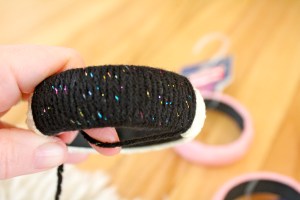
Next, make a yarn ball about the size of a golf ball. If you aren’t a knitter, like me, you likely have no idea how to make a yarn ball. I just followed the directions I found on eHow.com. Here’s the link. Take a moment and relish in your yarn ball making brilliance.

Moving on…begin tightly wrapping the yarn around the bracelet. As you begin, you will want to overlap the first wrap just to hold the yarn end in place.

And then continue wrapping all the way around. It should take you between 15 and 20 minutes to complete.
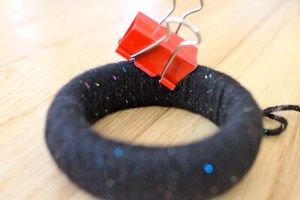
Once you are finished, attach the end with fabric glue.

Clamp with either a heavy-duty clip or a clothespin to hold the yarn in place while it dries.
Once the glue dries, trim the yarn end and wear!
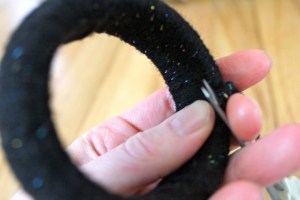
Or if you must, gift your bracelet to someone special.
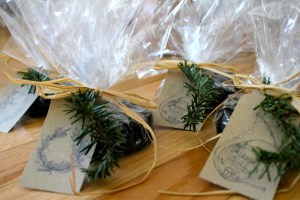
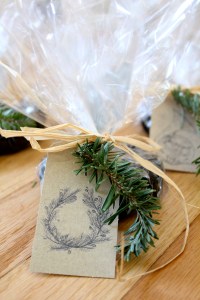
I made five of these beauties for girlfriends of mine. I wrapped them in clear cellophane, tied them with raffia, attached a tag and fresh evergreen. A perfect Christmas gift! The evergreen was from our tree. Not surprisingly, we had sprigs to spare. 🙂 (Read about our very large tree finding expedition here.)
Merry Christmas! Feliz Navidad! Joyeux Noel! Mele Kalikimaka!
Gift Project #2: Personalized Cookies
I saw an article in Midwest Living’s December 2012 issue about these personalized cookies and I fell in love with them immediately. I thought, “I need to figure out how to make these and give these as gifts to teachers and neighbors, everyone really.” Oh, the grand, borderline delusional, thoughts you have in early November! In my still somewhat delusional state I ordered the cookie cutter set and committed myself to making these little beauties.

First step? Make the cookie batter. I used Midwest Living’s Vienna Almond Cookie recipe. And I kid you not, it is quite possibly the most delicious dough I have ever tasted. It isn’t difficult to make either. Here’s what you need.
Ingredient List:
3/4 cup slivered almonds, toasted
2 1/4 cups all-purpose flour
1/4 teaspoon salt
1 cup butter, softened
3/4 cup sugar
1 egg
1 tsp. vanilla
1/2 tsp. finely shredded lemon peel
1/4 tsp. almond extract
Makes 48 cookies. FYI: I doubled the batch so that is why my ingredient amounts look large!
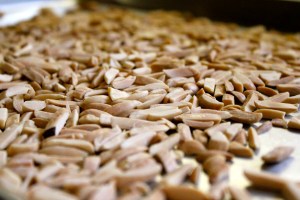
I bought regular slivered almonds and toasted them myself.

You will NOT regret taking the 10 minutes (at 350 degrees) it takes to toast these. It adds such a richness and depth to the flavor of the cookies.
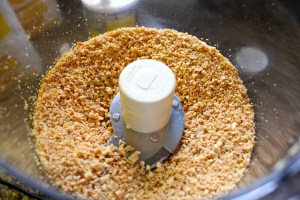
This is me quite excited that I get to use my food processor. This appliance was a MAJOR and VERY IMPULSIVE purchase I made for a post some time ago. And with each use I feel just a bit better about it.

Finely grind those toasted almonds using that powerful and very necessary food processing tool.
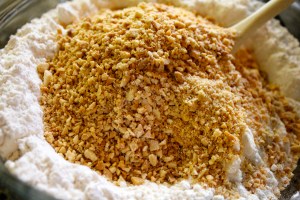
In a small bowl, combine flour…

…and salt.

Add the toasted almonds, stir and set aside.
Beat sugar and butter on medium speed until lightly fluffy.

Beat in egg,

vanilla,

lemon peel,

and almond extract! At this point your kitchen is quite possibly the best smelling place in the world.

Beat in the flour mixture a bit at a time. If the dough becomes too thick for your mixer, stir in the remaining flour mixture. Just try and not taste this dough. Just try! It will whisper your name until you do. It is a persistent and delicious dough. You are powerless to fight it. Powerless!

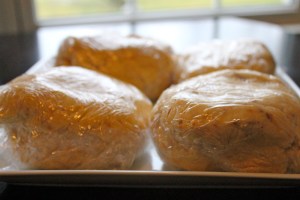
Divide the dough in half and wrap in plastic. (Because I doubled the recipe I had four balls of doughy deliciousness!) Chill for 2 hours. I left my dough in the refrigerator for 3 days before I made the cookies. I put the wrapped dough in a plastic storage bag just to ensure it didn’t dry out. When it was time to use the dough I let it warm up and soften a bit before rolling it out. You can likely skip this step if you just chill for 2 hours instead of 3 days!
On a lightly floured surface, roll dough to 1/4 inch thickness.

Get out your Brigitte “Message on a Cookie” Text Stamp & Cutter Set. I ordered mine from fancyflours.com for $20.00.

It is made by a German company, hence the very German words all over the box. Don’t let that intimidate you. They also have instructions in English! This small feat of engineering looks like this when you take it out of the box.

Decide on your cookie message and put in the individual letters mirror-inverted.

Put your message in the cutter and get ready to create cookie magic!

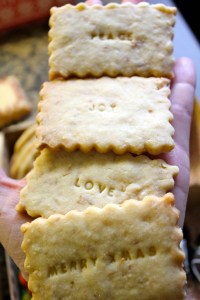
In addition to individual name cookies, I made ones that said Peace, Love, Joy and Merry Xmas. The possibilities are endless! Bake in a 350 degree oven for 8 to 12 minutes or until edges are light brown and centers are set. Cool for 1 minute before transferring to a wire rack to cool completely.
I also added cookies made with this HOMEMADE cookie stamp in our gift box. I found this stamp at World Market for $3.99.

I had never used a cookie stamp before either. Nothing like throwing caution to the wind to try something new when you’ve got the pressure of the holiday season and the fact that you’re giving these as gifts!

I used the same Vienna Almond Cookie dough for these as well.

I LOVE how these turned out. I bought red royal icing and used it to fill in the heart. I had also never worked with royal icing before. Caution to the wind people!

I also made these adorable frosting-free sugar cookies. I was looking for frosting-free options so the baked goods would stack and travel well to their intended recipients. I followed these steps to the tee and I loved how they turned out! Be sure not to over bake them or they will get pretty hard and tough.

Drum roll please! The cookie boxes ready for delivery! The chocolate deliciousness in the bottom right corner? Oreo Truffles. I figured if you’re anything like me you noticed them and may or may not have tried to reach through the screen to see if you could try one. Catch up to our chocolate fantasies technology. Catch up!


In case you’re wondering, the cookie boxes are from Martha Stewart crafts. I bought them at Michaels. All boxed up and ready for delivery!

Wishing you and yours a very Christmas! May the Spirit of this season remind you of all you have to be thankful for and for all that is possible.
…“Do not be afraid. I bring you good news that will cause great joy for all the people. Today in the town of David a Savior has been born to you; he is the Messiah, the Lord.” Luke 2:10-11
Abundant blessings and joy,
Stacey


Leave a comment