
Yesterday’s post was all about our Easter celebration. It went a little something like this:

And this. Find all the Easter-y (made up word alert!) details here.

And yesterday I also mentioned that I would give you the step-by-step instructions for the personalized touches. And I don’t go back on my word. At least not lately. So let’s get stepping!
Monogram Place Cards
Oh, Martha Stewart craft paint. How I love thee. So versatile, so reliable and so very, very pretty. She seriously has the most beautiful color palette. I’d like to introduce you to the colors Scallion (32010) and Artichoke (32011). They made fast friends with my new napkins.

I bought these paints at Michaels, the canvases too. Now that I think about it. Almost all the supplies for the place cards came from that little wonderland of creativity.
Artist’s Loft White Mini Canvas, 4 x 4 inch, two per pack.

And then I got about the business of painting. I learned, through trial and error, that painting the edges first works best.

And then…the top. It took a few coats but the previously blank canvas became a green wonderland.

I used mason jars (oh I how love you!) to hold the canvas while I painted. And then they became a perfect drying rack.

The canvases all painted and purty.

Now for some stencilin’. The stencil kit I used was Martha Stewart Crafts Monogram Serif Stencil Set.

Decide on the layout of your monogram (or whatever it is you are stenciling) and trace it onto the tracing paper. As I traced my first letter, I used the bottom of the stencil square as my straight edge. I drew a line under it and then used that to line up the subsequent letters.

Place the tracing paper design on your canvas and decide on placement. This next part can be a little tricky. Carefully line up the first stencil with your traced design by sliding the stencil under the tracing paper.

Tape the stencil in place. (I used stencil tape but I think any low tack tape will do.)

And begin painting! I tried brushes of various sizes and these foam pouncers.

The foam pouncers worked the best, hands down. They distributed the paint nicely, didn’t bleed under the stencil and the word pouncer is just too fun not to use once or twice during your lifetime. Pouncer, pouncy, pouncerific! (My spell check is freaking out right now. Freaking out!)

Admire your work. Admire your steady hand. Admire your supreme pouncer skills. (Sorry I just had to!) And then stop admiring and repeat the process for the rest of your letters.

Monogram mission complete!

A whole slew of monogram magic.

And the finishing touch? A touch of sisal. Sisal is kind of like twine but more like his stronger, stiffer older brother. Find sisal and his siblings at a hardware store near you.

And the canvas finds a home. Happy tears.

Monogram Treat Boxes
I spied these white jewelry boxes at Jo-Ann Fabric and thought they would make a perfect treat box for my little guests.

My craft paint got another workout. I painted the outside of the boxes first.

And then I decided the inside needed a coat too.

I used the same stencil process on these too but opted for just the first initial vs. the whole monogram enchilada. Wait. Did someone say enchilada? Yum.

I filled a square piece of plastic wrap with Easter candies and tied them tight with my good old buddy Sisal.

You probably think all the sisal tying was just for decorative effect. If you aren’t asking, it totally was. If you are, it also helped keep me out of those heavenly dark chocolate M&Ms. Seriously, those things are delish!

And then there were more happy, happy tears.

Happy stenciling! And pouncing. O.K. I’m done. I promise.
Easter is one of my favorite times of the year. It signals the beginning of spring, ushers in warmer weather and celebrates the central story of my faith. What is there not to love? So when I found out less than two weeks ago that we would have the honor of hosting our family’s celebration I started dreaming about what little things I could do to make the celebration special. As a mom of two young children I have very limited time for shopping. During this season of life my shopping trips resemble more of a timed track event than the browse and dream scenario I would prefer. And because I’m short on time I don’t have the luxury of shopping several stores, so I have to work with what’s available where I happen to be. Does anyone else shop for home decor at the hardware store?
So with that in mind…
I love styling dinner tables. Here was our Easter table this year.
What inspired it all? Those lovely grass green buffet napkins (love that color!) I bought at World Market. But seriously, green is always on my mind. I think about our landscaping, our budget, our diet…hourly. All green.

The next green element? Personalized place cards. I stenciled our guests’ monograms on individual canvases. (I will detail how to make these in tomorrow’s post.)
I was really happy with how they turned out. I haven’t stenciled since I was a kid but now I’m hooked. It was so fun, so simple and a great way to include a very personal touch.
Place cards on the plate. Anyone else ready to eat? Now that I think about it I am pretty much always ready to eat. Yup.
With my napkins bought and place cards crafted, I focused my attention on the center of the table. I wanted to keep the green theme rolling so I headed to the closest garden center at my local Home Depot. I knew I wanted green (surprise! surprise!) live plants that were short enough so guests could chat during dinner. These beautiful jade plants fit the bill.

And of course these beauties needed a serious container upgrade. I found these silver numbers at Jo-Ann Fabric & Craft.

And these too. I added some simple moss to the little ones.

Green live things meet green not-so-alive things.

If you are at all interested in conversation, you shouldn’t really put height in the center of the table. Or maybe you’d prefer to eat in silence and without making eye contact. That actually may end up being a really great design trick for some of you and your less-than-awesome guests.
But no one says you can’t add a little height at the ends of the table. I placed these paper mache eggs (Michaels) on a simple wood pedestal. Tall, dark and handsome.

And now with the main table complete…

…it was time to pull the kids’ table together.
I didn’t think the little party guests would be thrilled with personalized canvases. But personalized boxes…
…filled with Easter candy? Now that is something I figured they could get on board with.
I bought white jewelry boxes, painted them inside and out, stenciled their initial, filled them with candy and tied them up with sisal.

Each child also had their own spring-inspired plate. Notice the nod to green in each one.

I found these sweet craft projects at Jo-Ann too. I placed one at each chair and it helped keep little hands busy while dinner was being made.

My beauties helped me put the entire kids table together and they loved being my right and left hands.

An Easter wreath in the dining room.

Me capturing it all. Wow! Those are some blue pants.

Enough prep. Let’s get on with the celebration already! Grandma brought these darling Easter baskets for the kids. (If you want to see the Easter baskets I made for our beauties go here.)

And organized an amazing Easter egg hunt!

Auntie hiding some of the goods.

An egg waiting for a little one to snatch it! Or a bird to eat it…whatever.

An egg hung with care.

A tree full of treats. Me and my serious sweet tooth love it!

The hunters ready for the hunt.

And success!


Craft time with the cousins!

Fruit cups.

And a spring dinner full of deliciousness.

The dinner guests ready to embark on the time of their life. O.K. That may be a stretch but it was close. Did you see that plate of food?

I hope you and yours had a blessed Easter! And I would love to hear all about it.
Stacey

This week I took a few quiet moments and snapped some photographs of all the spring blooming in our backyard.

Photography forces me to slow down, really look and enjoy the beauty that surrounds me. I don’t do it enough. Unless of course admiring nature’s beauty means gazing upon my face in the mirror each morning. I can’t even finish that sentence without snickering.

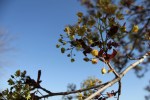
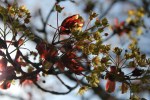
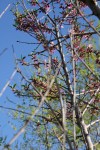
We have two red maple trees in our backyard. They literally have the most beautiful blooming process I have ever seen.

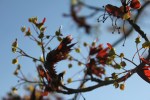
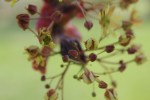
The process begins with hundreds of buds that seem to appear overnight on each of the trees.

And then those buds bloom into the most beautiful yellow-green flowers.

The flowers envelop the tree in a sea of petals.

And from these amazing flowers spring forth the leaves that give the tree their name.

Only something nature could produce so perfectly.

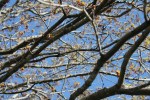
The maple leaves peek out ever so slightly…

…slowly waking up from a long winter’s nap.

And then they begin to stretch their legs and spread their wings.

Magnificent.

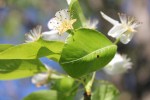
Our pear tree in bloom isn’t too shabby either.

The amount of detail in each bloom is just lovely.

Is anyone else hungry for a ripe and juicy pear right now?

And one of my personal favorites…lilacs. I think I can actually smell them through the screen. It was a windy day so most of my shots had an impressionistic blur to them. This was as clear as it got.

May the beauty that surrounds you take your breath away…today and always.

And may you remember the One who created it all…just for you.

Happy (early) Easter!


Tropical Oasis. I wish. I really wish I was talking about this.

Or this.

This would do too.

But instead I am talking about this. Valspar spray paint. And the name of this beauty of a color? You guessed it. Tropical Oasis.

It is the closest thing I have gotten to a tropical oasis in too long. The photos above were taken on a vacation Beau and I took a few years ago to the Rivera Maya. It was lovely. It was tropical. It was relaxing. It was oasis-y. It smelled better than this Tropical Oasis experience. Spray paint is potent stuff. So is the primer I used.

But I wanted to do something to spruce up this chair. It was picked up at a flea market many, many moons ago and then painted white. As evidenced by this photo the chair got some heavy usage from Beaut.one, her booster seat and the joy of launched food. Then we moved and it languished in our basement until recently.

At the first hint of spring I get about the business of spring cleaning our sun room. Because this hard-working room is between our garage and our main entry door it takes the brunt of all the dirt, grime, salt and sand that comes with an Iowa winter.

And so as I was cleaning I was thinking. Thinking and cleaning. Cleaning and thinking. Thinking about what we can do to update this glorious room. We love it. We spend so much time out here napping and reading and napping some more. Currently, this room is full of mismatched furniture and accessories that came with us when we moved. It works…but not well.

And so my time and budget stretched eyes focused on the sweet little flea market chair. And I think some of those cleaning fumes got into my brain because initially I thought it would be a good idea to paint that baby red. Bright red. You can see hints of it here. Literally radiating. I didn’t get far before I realized that wasn’t a super awesome idea.
So I pulled out my can of primer and primed. No hint left of that red oops-y.

And then I got my Tropical Oasis on.

And while it isn’t a vacation by any stretch.

It does make the little oasis in our home a bit more tropical.

The paint has a gloss finish so it shows all the little imperfections of the chair. But if little imperfections bothered me I am pretty sure I wouldn’t get out of bed in the morning.

The chair loves its new look. And its new wardrobe. The fun, flower-filled chair pad is from World Market.

And I think it adds a lovely pop of color in this sun-drenched room.

We left the chair outside for two full days so all the spray paint fumes could dissipate. So when we finally brought it in, we had some very excited family members.

And now all I can think about is two things: #1 Can I spray paint pillows? No?! I love the color of the chair so much. I’m officially on the hunt to find accessories that match. Or at least something else I can subject to the spray paint. #2 When, oh when, am I going to go on a tropical getaway again?

I’m off to dream up other sun room updates. And vacation plans.
What have you spray painted lately?

Knowing how to roast a chicken is a skill every home cook should have in their back pocket…or in this case, their apron pocket. It is so simple you can cook it on a regular ol’ Wednesday for your family to enjoy but fancy enough that if a head of state, a certain celebrity that goes by the name of Martha, Prince Harry or someone else equally fancy knocked on your door, you could wow them with this dish. Who knows? They may involve you in a major policy decision that changes the course of human history, invite you to become the new face of food for her empire or drop to one knee and ask you to become the next princess. What? It could happen. But if you don’t know how to cook a roast chicken, then none of this is gonna happen. None of it. I’m just saying.
Ingredient List
1 large roasting chicken (the one I used was a little over 6 pounds)
1 lemon cut into slices
a whole lotta garlic (1/2 a head or so)
3-4 sprigs of fresh oregano
sea salt
1/2 stick of softened butter

Preheat your oven to 375 degrees. Put the lemon slices, garlic and oregano in the chicken.


Rub the chicken skin with the stick of softened butter. It will turn this wrinkly, pale looking chicken into golden brown loveliness. Now that I think about it, my haven’t-seen-a-hint-of-sun-since-last-August legs could definitely use a little of this treatment.
I keep the butter in the wrapper to protect my hands from getting covered in the goo.

Sprinkle the bird with a generous amount of sea salt.

Let that chicken roast for about 1 and 1/2 hours, rotating the pan periodically to ensure even cooking. The chicken is done when a thermometer inserted into the thickest part of the thigh reads at least 170 degrees.
Once that golden baby is finished, pull it out of the oven and let it rest for 10 – 15 minutes before carving. It has worked hard getting all brown and delicious so the least you can do is give it a couple of minutes before you go hacking it into pieces. That’s not it. Actually, the rest allows the juices to stay in the bird instead of running all over the plate. It will be worth the wait. Trust me.

Behold this work of art!

Now stop beholding and enjoy!

We served the roast chicken with roasted potatoes and garlic. All the roasting was in honor of National Roasting Day. No, not really. I don’t think there is such a thing but we sure acted like there was. Since I learned this recipe for the One Grocery Trip…A Week’s Worth of Meals posts, I have made it no less than four times. A definite family favorite! See the recipe for the potato amazing-ness here.

And here is all that was left of our meal. No, not really. We did not ingest 6 pounds of chicken…at least not this time. We still had chicken left for sandwiches, wraps and salads. Yeah!

Roast a chicken today and you could be famous tomorrow. Famous!
It’s wild around here. It really is. It is wild in both literal ways and in not-so-literal ways. Here’s what I mean.
Literal. Rose-breasted grosbeaks enjoying a little lunch outside our kitchen window.

Beau was so excited when they showed up for the first time he just started snapping away.

We also get red-winged blackbirds (pictured), two different types of orioles, blue jays, nut hatches…

…bluebirds (pictured), sparrows of all stripes and swallows.

Also feasting at our restaurant are red-bellied woodpeckers (pictured). I have never quite understood their name since their head is so obviously red and their belly is so not. But who am I to argue with the ‘Bird of Iowa Field Guide’?

Goldfinches, house finches, juncos and cowbirds join us too. And last year for my hubby’s birthday the kids and I got him this hummingbird feeder.

It didn’t take long for these beautiful, amazing and petite creatures to join us. They inhale that sugar water.

And my personal favorite? The cardinals. Here they are dining on the fallen seeds after a snowfall. Beautiful and tidy. That’s why I love them so!

And if you’re wondering if by wild I only meant birds you would be wrong my friend. Very wrong.

Meet Jumpy. Beaut.one named our backyard squirrel because he literally jumps across the yard. Except when Tag chases him. Then he runs like he’s running for his life. Which he is. Jumpy pillages our bird restaurant daily.

Our only contiguous neighbor, other than corn and bean fields, is this beauty. Sweet Sophia. I just love her. And she loves the camera.

Oh, and all the fish. Some friends in the neighborhood have an amazing pond that they are so gracious to let us fish whenever we want. My son looks absolutely mesmerized by the fresh catch dangling in front of him.

Wrong-o! Scratch that. Make that terrified!

And then there are the coyotes. Yes, that’s right. Coyotes. Up until this moment I had only occasionally heard them howl at night. But never had I seen one. In the foreground of the photo you can see our burn pile and the end of our backyard. He looks far away but he really isn’t at all. We didn’t have our telephoto lens on (too freaked out to move) and this is shot from inside the safety of our home. The wild beast was taking a moments rest in the field directly behind our backyard. Directly behind where my beauties play on their swing set and chase each other.

A little too close for comfort for me (the boys and my girl thought it was super cool!) so we I was relieved when he moseyed on. I realize these photos aren’t the best…a little like a fuzzy ‘Big Foot sighting’…but I promise you it was very, very real.

Bugs! We grow them big out here. Look at the intricacy of this death trap. It really is beautiful…in a macabre sort of way. I did NOT stick around to meet the architect of this web.

And this is the wildest visitor we’ve had yet. You should have seen my surprise when I woke up to this face outside my window one Saturday morning. He normally hangs out closer to our trees but I don’t think he was any too happy that we had slept in. We call this guy Grodd. You would only know the deep meaning of his name if you are a huge comic book fan and chances are if you are a huge comic book fan you aren’t reading this blog. Moving on.

In all seriousness, if this was anywhere near my house, my car, my person, my anything I would never be the same. These animals terrify me. I snapped this photo at the Omaha Zoo and then quickly moved along to look at something, anything else.
And now for the not-so-literal wildness of my life.
I mean seriously. What a crack up! You may think that this is a rare occurrence for my daughter, out of character or something. Nope. We are hard-pressed to find a family photo that doesn’t have this face or one of its many versions front and center.

See what I mean. Wild, crazy, lovely.

And then there’s this one. Wild with roars, wild with endless energy, wild with…well, you can see the hair.

My young ones driving a jeep or a tractor is also common around here. A toddler manning any type of vehicle is just pure madness.


And then there’s this guy. He lives here too.

Man of mystery. Comic book lover. Action hero, clearly.

It is a mighty miracle I am as normal and pulled together as I am. See? Totally normal.

I really do love the wildness of this life. It makes me crazy, it keeps me on my toes, it makes me thankful and it definitely keeps me laughing.
What brings wildness to your life?
With Easter a mere ten days away, I thought I would let you in on a little family secret. It is actually quite exciting. Edge of your seat kind of stuff. Headline making really, albeit at a very small newspaper. The kind of insider information that will most certainly make you the star of your work water cooler for at least an hour.
O.K. Enough build-up. And the scoop is: (insert drum roll here) my beauties are getting baskets for Easter! And they look like this.

As I think about it, in hindsight, that probably wasn’t very exciting for you at all. Sorry. So sorry. I think I was caught up imagining the pure joy my children will experience on Easter morning. But if I’m honest I think I am just so excited for myself too. I am actually ahead of the game. The baskets are all put together. All ready to go. All ready to rock their world. I know the baskets and their contents aren’t for me but I totally geek out about this stuff. I think about Easter baskets for months. I think about what I’m going to fill the baskets with, what the basket is going to look like, if I’m going to go with a theme or not, what I need to buy for our kids anyway that I can totally pull off as a gift. That’s normal, right?

The first task of Easter basket business is to get a basket. I scored these two at Target. I actually found them on a random end-cap with some other pretty Easter decor; bunnies, candle, egg wreaths, the like. I am already plotting where I can use them in the house once they’ve run their Easter course.


I filled them with raffia. Each basket took a full bag. I used 40% off coupons at Michaels so they only ended up being $3.60 each.

And while I was buying the raffia, I stumbled upon these two adorable little chalkboard sticks.

I painted my daughter’s with Martha Stewart Crafts Pearl Paint, Pink Taffeta.

And my son’s with Folk Art Craft Paint, Hydrangea.

I was really happy with the way they turned out. And for 99 cents each, what a steal!

I then wrote my children’s’ initials with chalk and stuck them in each basket.

A nice personal touch. They also act like a gift tag, just in case there is any confusion over whose basket is whose. You know the shark swim trunks and Batman socks could go either way.

I then filled a mason jar with the most amazing salt water taffy. The strawberry actually tastes like a real strawberry, the pear just like a pear, the peach just like a peach. Well, you get it. Thank you Russell Stover!

And the second mason jar is full of yummy pastel (Beaut.one) and jelly mints (Beaut.two). It is a good thing those jars seal up tight because my sweet tooth has never met a pastel mint it didn’t like.

What is Easter without jelly beans? I popped some delicious popcorn (see how to make your own homemade corn here) and sprinkled in some jelly beans. Salty and sweet.

And now on to the gifts. I really try to collect things all year long.

And I also like to include some items that we would normally buy the kids anyway, like swimsuits or socks. It is a cost effective way to fill their baskets and in my experience they love a new suit or a new pair of socks just as much as a new toy. My kids are so funny and kind that way.

A breakdown of Beaut.one’s basket:
-Attire: A new swimsuit and swim cover-up. We get our kids a new suit each Easter before summer pool season hits. And a new pair of shoes. Seriously, a girl can NEVER have too many shoes. Plus, these match the new suit. Oh, and pink heart socks. Socks are so fun.
-Smarts: A workbook loaded with fun and challenging worksheets, puzzles, etc. Easter is a perfect time for this too because we tend to bust these out more once school is done for the summer.
-Fun: A Polly Pocket toy I found on the clearance rack after Easter last year. It was a blessed day when my daughter was finally old enough to dress and re-dress and then dress again her own P.Pockets. Those little rubber outfits can be down-right maddening. My girl loves to craft so no basket of hers would be complete without a shout out to craftiness. We bought her this adorable beginning sewing kit. I am secretly hoping she learns how to sew and then teaches her ol’ Mom. And finally, a sequin bunny mask. Just because sequins are shiny and fun and I am always on the hunt for my next photo op.

A breakdown of Beaut.two’s basket:
-Attire: A new swimsuit. He is going to just love it. My son loves sharks. I can already hear him roaring. I am pretty sure sharks don’t roar but being scientifically accurate isn’t his main life goal right now. Snacks are. A new pair of shoes are in order for my boy too. But for a totally different reason. He wears out shoes like it is his job. So he always needs new kicks. My son was with me months and months ago when I bought this pair of Batman socks. And every week or so he will ask where they are. Soon buddy! So very soon.
-Smarts: A workbook full of learning activities too. He has been using one his sister had already completed so he will be beyond thrilled when he gets his own. I can feel his brain growing already!
-Fun: The latest Muppet movie. Does anything scream fun more than The Muppets? They do literally scream. Often. We love Playmobil toys around here and this new firefighter set will add nicely to his collection. I feel safer already. And the duck mask? Well, I have plans for some fun photos. A mom can hope can’t she?

The contents of these baskets are between you and me until April 8th. Deal?
Here’s to you filling all the Easter baskets in your life with happy!

I love Thai food. A lot. And I’ve never attempted to make it at home before. Until now. As I reflect on why, oh why, I would have waited so long I can only come up with one thing: pure lunacy. Don’t be like me. Try this simple and fast Vegetable Pad Thai recipe today. Not tomorrow. Today. It will change your life. It changed mine. Well, in a Pad Thai sort of life changing way. (Insert single, hot, happy tear here.)
Here are the ingredients you need to enjoy this deliciousness.
2 tablespoons dark-brown sugar
2 tablespoons fresh lime juice
3 tablespoons soy sauce
2 teaspoons vegetable oil, such as safflower
3 scallions, trimmed, white and green parts separated and thinly sliced
1 garlic clove, minced
2 large eggs (optional), lightly beaten
1/2 cup fresh cilantro, for garnish
1/4 cup chopped roasted, salted peanuts, for garnish

In a small bowl, combine dark-brown sugar,

fresh lime juice,

and soy sauce.

Whisk to combine.

In a large nonstick skillet, heat oil over medium-high heat.

Things really start happening at a pretty fast clip here so make sure all your chopping has been done ahead of time.
Add scallion whites…

and garlic; cook, stirring constantly, until fragrant, 30 seconds.

Add eggs, if using. We are a very pro-egg crew around here so when I read that eggs were optional I actually said out loud, “What?! Why?!”

Cook, scraping skillet with a heatproof flexible spatula, until eggs are almost set, about 30 seconds. Transfer egg mixture to a plate. (If not using eggs, leave scallion-white mixture in skillet.)

Add noodles and soy sauce mixture to skillet; cook, tossing constantly, until noodles are soft and coated with sauce, about 1 minute.

Add egg mixture and toss to coat, breaking eggs up gently.

Divide noodles among four shallow bowls; garnish with cilantro and peanuts. I opted to leave the peanuts off because we are currently trying to pin down what nuts Beaut.two is/is not allergic to. Call me crazy, but I felt more comfortable learning more about his potential allergies in a doctor’s office instead of in my kitchen.

Enjoy! It was so very, very good. I ate mine. And then I wanted to eat everyone else’s but…

…the recipe ended up being kid approved! Seriously. They totally dug it. And it totally bummed me out. I was hoping to eat their “No Thank You-s” and their “I Don’t Like It-s” but no such luck for this lady. I guess I’ll just have to make more. Tomorrow.

Here is the recipe I used. Thank you Martha! I think next time I may try to add shredded carrots and bean sprouts. Bean sprouts are so yummy and the carrots will add an additional pop of color. Plus, they will both add some good-for-you nutrients.
I can hardly believe it but this meat-free dish was a success! Chicken the world over are celebrating.
What is your favorite type of food? Do you make it at home or do you enjoy it only when you dine out? Do you make Pad Thai? Will you share your recipe with me? Better yet, can I come over?
Welcome to Cowboy Party: Part Deux…or as less fancy folk call it, Part Two. In honor of all the Spring Break partying happening in the Southern United States, and most notably not in my house, I thought it was appropriate to feature the only type of partying I find myself partaking in these days: my children’s birthday parties. Yesterday’s post featured some of the photos and details of my son’s recent cowboy birthday party. Yesterday it begins…today it ends! If you missed any of the action, see yesterday’s boot-stompin’ fun post here.
At our house on birthday day, the birthday boy or girl starts the day off right…with presents! Here is Beaut.two with a big ‘ol grin that rivals the size of his loot! (Note: the photo has been altered to remove names, etc.)

I like to wrap my gifts with papers and trimmings that coordinate with the party theme. Big sis was enlisted to help open the presents. Here she is practicing her “Ohh!” and “Ahh!” face. So supportive.

We knew the Caped Crusader would have to make some sort of birthday appearance. Actually, he made several. He may have lost out to cowboys in the party theme department but he definitely rose again in the gift giving arena.

On to the party! Here we have the party dinnerware station. Once again Beaut.two’s Photoshop-altered invitation takes center stage.
Napkins: Black and red bandanas purchased online in bulk
Disposable dinnerware: Cups, plates and silverware from Hobby Lobby, silverware housed in a galvanized container we already owned

The brown and red felt Happy Birthday banner I stitched by hand. I have a small felt obsession. O.K., it isn’t exactly small. I’m going to get help. Later. For step-by-step instructions visit this previous post.

The party menu screamed Southern comfort: homemade macaroni and cheese, mini cornbread muffins, green bean casserole, homemade caramel corn (Commonly referred to as ‘crack corn’ in our family, it is that delicious. Thanks Mom!), S’more pops, cherry limeade and chocolate sheet cake. Lord have mercy, we need to re-enact this menu pronto!

The star of the party was The Pioneer Woman’s The Best Chocolate Sheet Cake.Ever. I had never made a sheet cake before and I did not have a party back-up plan, so I was relieved when it worked out. It more than worked it. It truly was a thing of culinary beauty. With the delicious aroma of the cake filling the house, it was a minor miracle that I didn’t accidentally fall face first into the cake and then eat my way out.

Begrudgingly putting aside my cake-eating fantasy until my birthday, I then had the beauties decorate this cowboy cake with plastic figurines and M&Ms.

I found these little figurines at Michaels. Aren’t they just perfect? (Wild West and Horse Toobs, about $8.00 each)

Cowboys, horses, chuck wagons, oh my!

The cake bakers look pleased with their creation. They turned on me shortly after this photo was taken once they realized we weren’t going to eat it right now. I’m not going to lie. It got ugly. Real ugly.

And an added cake bonus? I used the extra Toob figurines to create small vignettes around our home to enhance the party vibe.

S’more pops. Delectable S’more pops. And so simple. Insert sticks into marshmallows. Crush graham cracker cookies. Melt chocolate chips. Roll the marshmallows in the melted chocolate and then in the graham cracker crumbles. Done! Excuse me while I head to the kitchen to crush and melt stuff.

And the extra M&Ms made it to the party too! Isn’t that horseshoe perfect? They are really drawer pulls but they worked perfectly as food table decor. The tool trug in the background of the photo held the homemade cones of caramel corn.

And we drank The Pioneer Woman’s Cherry Limeade. Um…maraschino cherries in anything has my vote.

As the party guests (the young ‘uns) arrived, they received a black cowboy hat.

And here are the party favors; Old-Fashioned Taffy (in various flavors) and Toy Story’s Jessie and Woody coloring activities.

Party guests enjoying the grub. Notice that they aren’t wearing their hats to eat. I couldn’t be more proud of my polite buckaroos!

And the moment we’ve all been waiting for…the birthday cake! Imagine Beaut.two and me in a whispered conversation:
Beaut.two: “Where’s the cake? After a long day looking adorable and randomly shouting “Howdy Partner!” I am starving and want me some cake.”
Me: “I wish they would move this ‘Happy Birthday’ song along too. I mean this cake weighs like 25 pounds. It wouldn’t have had to be so heavy if I had my way and eaten some most of it earlier.”
After the conclusion of the song he decides now is the time to institute a little shyness and he slowly glances around as though it just dawned on him that these party guests are here, in his dining room and that they’re watching him. Tick, tock! Tick, tock! My arms are screaming!
Me: “I love you, honey but we can’t eat until you blow out your candles and make a wish. Please, please, please wish away. And while you’re at it, please wish for new forearms for your Mama! Mine are shot.”
Beaut.two: “Forearms? I don’t like forearms! I don’t want that to be my wish.”
Me: Arms officially on fire now. “I was just kidding. For the love of all that’s holy, blow out your candles!”
Beaut.two: Rush of air blessedly exits his mouth and makes contact with all the candles on his first attempt. Crowd erupts with applause. “Can I lick the horses’ feet?”
Me: “Not before I put this cake down and ice my arms.”

If you are looking for a fun, affordable and adorable party theme, a cowboy party will make all your dreams come true. Well, all of your party dreams. Promise.

What is your favorite party theme? Have you ever pulled off a cowboy party? What type of party are you planning next? Can I come?
In celebration of Spring Break, I thought I would feature one of my beauty’s recent birthday parties. When I think Spring Break, I think party. At least I did when I was a co-ed. Now when I think Spring Break I think spring cleaning and naps. Ah, the beauty of aging.
Beaut.two’s birthday party theme this year was cowboy. When I initially presented him with the idea of having a cowboy party he wasted no time with getting on board. Well, after he first asked if he could have another Batman party. But once I explained that cowboys are really Batmans on horseback, he was all in!
With birthday theme firmly decided, the next line of business was to create the all-important invitation. I knew I wanted to go the ‘Wanted Poster’ route, so I immediately began snapping photos of Beaut.two in his cowboy get-up for his ‘mug shot’! As his mother I pray this is the only mug shot my son ever poses for. Isn’t the vest and shirt just adorable? What you can’t see is the matching chaps. Ador.able! My friend Christine’s mom did the amazing sewing job…I cannot take one stitch (pun totally intended) of credit. I did buy the hat.

Once I snapped the perfect picture of my little outlaw, I went about the business of designing the invitation. Note: I photoshopped out a few important data elements to protect the innocent! It looks a little strange and the missing words don’t do the invite justice, but safety first!

The text reads:
WANTED:
XXXXXXX THE KID
Please help us round up this outlaw for the crime of growing up too fast!
Word has it he’ll be at the Xxxxxxxxx Ranch Sunday, December 11 from 4 to 6 pm.
Help us capture him and you’ll be greatly rewarded with tasty grub and boot stompin’ fun!
Let us know if you can be part of our posse by calling Stacey at xxx.xxxx.
I created the whole invite in Microsoft Word. Now I know there are more design-friendly programs out there and another one of my life goals is to learn them (just like that whole sewing dream) but for now I go with what I know. I have two small children, a dog and a DVR filled to the brim with life-changing viewing. When would a girl like me possibly find the time?
I just printed the invites out on nice card stock and burned the edges with a lighter. Yes, every single invite, every single edge. Yes, I started the paper on fire and then frantically blew it out again before the whole invitation went up in flames. Yes, it was during the winter so I sat on my porch with the door open just enough so I wouldn’t freeze but open just enough for the ashes to drift out. Yes, I still have some minor nerve damage on my right thumb. Yes, I love my son.
Next, on to the party decor. Here is a breakdown of what I used in the dining room.
Tablecloth: Red and tan checkered fabric from Jo-Ann Fabric
Table runner: Chocolate burlap from Jo-Ann Fabric
Table: Small straw bales from Wal-mart, spurs from Hobby Lobby, invitations in frames we already had
Chair: Sign from Hobby Lobby

The birthday boy’s chair is featured in this photo. The sign on the chair is from Hobby Lobby. They have a great western decor section. If you hit it when everything is 50% off (which usually happens every few weeks), it is literally cheaper than paper stuff from a party store. And way cuter.

All the balloons were tied with twine from Home Depot. Note the Christmas tree in the background. My son’s birthday parties are always an interesting blend of birthday and Christmas. Last year took the cake with bats on the wall and my nativity scene on display.

The straw bales totally (my son’s favorite word right now) helped set the scene but I was still fishing straw out of my living room rug in early February.

On the fireplace are horses on parade…and garland. Christmas-time birthdays make me giggle. I bought plain Creatology horse cut-outs at Michaels and painted them with craft paint to match the party theme colors.

What cowboy party would be complete without this guy? My dear mother-in-law let us borrow this life-like horse. I grew up with horses and I can assure you I was relieved that I didn’t have to clean up after this party guest.

Well, that’s a wrap on today’s party break-down. Join me tomorrow for Cowboy Party: Part Deux. See what we ate, what we gave as party favors and other fun party details. Happy Trails until then!


